You update the firmware on your watch and think nothing more of it. A few days later, the device will not turn on. For some COROS owners, the last few weeks have gone exactly that way. The manufacturer has acknowledged the problem and is replacing the affected watches.
What actually went wrong
The story was first reported by DC Rainmaker, one of the most trusted reviewers in endurance sports tech. According to his reporting, reports have clearly risen of COROS watches that stop working after the firmware update from mid-May 2026.
The most deceptive part is that the failure usually does not happen right away. The watch keeps working normally, then stops turning on days or weeks later. Warning signs sometimes appear first: odd behaviour, a sharp drop in battery life, and in some cases a sticking rotating crown. Because of that delay, it is hard to connect the failure to the update.
In practice, this is bricking. The device stops responding to charging or to restart attempts. Once a watch fails this way, there is no rolling back to a previous firmware version and no reviving it on your own. For a triathlete mid-season, building training around heart rate and power data, that is losing your data rhythm at the worst possible time.
COROS acknowledges the problem and replaces the hardware
This is where it gets better, because COROS has not swept the issue under the rug. The company is replacing the affected devices. Darian Allberry, Head of Product Marketing and Support, confirmed it on 17 June 2026:
For anyone who reaches out to us and whose device has failed following the recent firmware update, we are replacing those units.
Darian Allberry, COROS, quoted by DC Rainmaker
That is a translation of the original statement, but the meaning is clear. If your COROS failed after the May update, you are entitled to a replacement. You do not need to prove you did anything wrong. The manufacturer shipped a faulty update. The scale is clear from a figure the company itself provided: within a 72 hour window, over 100 reports came in about watches that had stopped working.
Which models are affected
To be straight about it, COROS has not published a closed list of models. What the company has said points to one thing: the problem is hitting watches that are two to four years old the hardest. The most frequently reported model is the COROS PACE 3. The company notes that this is partly a statistical effect. The PACE 3 is its best seller, so it naturally generates more reports. Treat that as a pointer to where the risk is highest, not as a list of condemned models.
What to do right now
If your watch failed after the May update: contact COROS support. Mention the firmware-update failure, since the company’s own statement means a replacement is owed to you.
If your watch still works and you updated it in May: do not force anything. Resetting it or reflashing firmware blind makes no sense while the device is working.
Regardless of the above: sync your data to the app regularly, so a failure does not cost you your training history.
The whole episode is a reminder of an old truth: a firmware update is not always a clean win. Sometimes it pays to wait a few days after release and see whether other users are reporting problems.
A full time trial bike costs a fortune, and you have one road bike and a budget already spent on a wetsuit and a watch. The good news: clip-on aero bars get you into an aero position for under €50. They bolt onto a standard road handlebar and deliver what saves the most free watts on a bike, less frontal drag. Here is how to choose and set them up properly.
Why triathletes use clip-ons
On draft-legal distances, most amateur sprint ITU races, clip-on aero bars are banned. World Triathlon withdrew them from drafting races from the 2023 season for pack safety. Always check your own race’s rulebook. On long, non-drafting distances, IRONMAN, 70.3, most Challenge races, an aero position is the cheapest way to save energy. Tucking the torso and forearms cuts air resistance, which at 30 to 40 km/h eats most of your power. Clip-ons on a road bike are also a good testing ground: you try the position before spending thousands on a dedicated time trial bike.
Three things to check when choosing
Adjustability. This matters most. An aero position is not natural, so you need to fine-tune pad height, and the width and angle of the extensions. The more adjustment range, the easier it is to find a setup you can hold for hours, not minutes.
Pad height and spacers. Once clip-ons go on a road bike, the knees can come too close to the chest at the top of the pedal stroke, and it gets cramped. Spacers under the pads open that space back up and save your breathing.
Handlebar compatibility. A clip-on needs a flat section of bar roughly 2 to 3 cm wide on each side of the stem. Check whether your aero bar even has somewhere to clamp on, not every one does.
Aluminium or carbon: where to start
Aluminium is plenty to start with. At Decathlon, the aluminium Van Rysel triathlon clip-ons cost €44.99, a sensible first buy to test whether an aero position works for you. Carbon is a bigger outlay: carbon-fibre clip-ons start at a few hundred dollars or euro and dedicated, integrated aero systems can run into the thousands, worth it once you know what you want and race against the clock. Among proven adjustable clip-ons, the names that keep coming up are Profile Design, Vision (TriMax) and Zipp (Vuka Clip), differing mainly in adjustment range and price.
Set them up before you ride
Start the extension angle level or slightly upward, up to about 10 degrees, so the forearms rest and the shoulders relax. Do the first outings on a turbo trainer or an empty, straight road: an aero position shifts the bike’s centre of gravity and handling, especially under braking and in corners. Get comfortable steering before riding into traffic.
You spend thousands on a bike, a time trial helmet and a wind tunnel fit, then pull on ordinary cotton socks and give away watts for free. Aero socks are one of the cheapest aerodynamic gains in triathlon: tens of USD’s instead of thousands. But how much of that is marketing, and how much is physics?
How it actually works
It sounds absurd: how can a piece of fabric on your ankle change anything? And yet it does. Your calf and ankle are among the body parts that cut through the air with every pedal stroke. Aero socks have a rough, textured surface or pronounced seams that deliberately trigger a turbulent boundary layer around the leg.
That sounds counterintuitive, but that’s the point: turbulent flow shrinks the low-pressure zone behind your leg, the aerodynamic wake that slows you down. A smaller vortex behind the calf means less drag. It’s the same principle behind the dimples on a golf ball.
How many watts: numbers, not promises
Here you need to draw a hard line between lab tests and what you’ll actually see on the road.
Manufacturers like to show their best numbers. Rule 28‘s own tests report a saving of around 8.5 W at 45 km/h, and claim more than 12 W over standard cycling socks at higher speeds. That’s impressive, but note the speed.
Realistically, if you’re riding around 40 km/h or slower, expect 2 to 5 W of saving. Only above 48 to 50 km/h does the gain climb into double digits, because aerodynamic drag scales with the cube of speed. For most age-groupers riding at 32 to 38 km/h, the real gain sits at the low end of that range, but for the price, it’s still one of the most cost-effective upgrades on the whole bike.
A few free watts over a full 180 km bike leg? You take it without thinking twice.
What about the rules?
In road cycling, the UCI regulates sock height: they can’t rise higher than halfway between the centre of the ankle bone and the head of the fibula (Article 1.3.003 BIS). That’s why road-legal aero socks are as tall as the rules allow.
In triathlon you have more room. World Triathlon rules don’t restrict sock height as strictly, so some athletes reach for calf sleeves up to the knee, which are even more aero. Before you put them on for a race, check the rules for that specific event: they can differ between federations and series.
What to look for when choosing
Height: taller usually means more aero, within the limits your event’s rules allow.
Texture and seams: these are what actually do the work. A smooth, elegant sock with no texture looks nice but is aerodynamically average.
Fit: it needs to sit like a second skin. Loose, bunching fabric ruins the whole effect.
Fabric for the heat: over a full-distance race in the sun, breathability and sweat-wicking matter as much as watts.
There’s no shortage of decent options on the market. Van Rysel, Decathlon’s own brand, sells aero socks developed with pro teams and tested in a wind tunnel, a solid starting point if you want to try the idea without spending a fortune. Rule 28’s socks are the alternative, performing well in independent tests, though at a higher price.
Verdict
Aero socks won’t turn you into Laidlow. But in a world where single watts cost thousands, a few watts for the price of a pair of socks is math that’s hard to ignore. Put them on, forget about them, and go faster on the same legs.
The most stressful minute of an entire triathlon doesn’t happen at the 180th kilometre of the bike leg, or in the closing stretch of the marathon. It happens at the start, when you’re standing, or really floating, in the water with a hundred other people about to swim straight through you. A deep water start, one with no ground under your feet, is a skill nobody teaches in a pool. And it decides whether you swim the first 200 metres in rhythm or in panic.
First, the decision: where to line up
Before you swim a stroke, you need to make a tactical call, and an honest one about your own level. You have three options:
Front, aggressively: for genuinely fast swimmers. If you can’t hold a strong pace in the pool, don’t push in here. You’ll get swum over and lose your composure at the start.
Mid-pack, for the draft: a good compromise if you can hold onto a faster swimmer’s feet.
Side or back, calmly: the smartest choice if open water stresses you out. You avoid the washing machine of the main group, at a cost of only a few seconds.
The key rule: line up according to the truth about yourself, not your ambition. Too far forward and you’ll get trampled. Too far back and you’ll be stuck behind slower swimmers, passing them for half the distance.
How to wait upright without wasting energy
Waiting for the gun in deep water is its own skill. Don’t thrash your legs like you’re treading water in a rescue drill: you’ll tire yourself out before the start even happens.
Stay on the surface with calm figure-eight sculling movements of your hands underwater, with your body tilted slightly forward. This is the most important detail: the closer to horizontal you are right before the start, the easier it is to get moving. The switch to swimming from a horizontal position is much faster than launching from vertical.
One more trick: keep your hands spread wide as you scull in front of you. It creates space around you and discourages other swimmers from crowding in beside you. A bit of elbows, in the good sense of the word.
The first metres: survival mode, not race mode
When the gun goes, don’t go straight to 100%, but don’t hesitate either. The first metres are controlled aggression: a short, faster surge to find clear water and avoid getting pushed into the middle of the pack.
In this phase, change two things about how you swim:
Sight more often: lift your eyes every few strokes to spot gaps in the crowd and correct your position.
Breathe on both sides: bilateral breathing lets you track who’s swimming next to you and where it’s getting less crowded.
This isn’t the moment for picture-perfect technique. It’s the time to get through the chaos in one piece without losing your head when someone taps your heel or swims over your arm. Expect the contact, and it won’t catch you off guard or trigger panic.
Around 150 to 200 metres: switch into race mode
The good news: the chaos doesn’t last long. After about 150 metres the group starts to spread out as everyone settles into their natural pace. This is the moment you’re waiting for, the switch from survival mode into race rhythm.
This is where the most valuable open water skill comes in: drafting. Sit right off another swimmer’s feet, or slightly off their hip, on the diagonal. In that water shadow, drag can drop by anywhere from around ten to several tens of percent, and your energy cost at the same speed goes down for real. Find someone a little faster than you and hold their feet.
One catch that’s easy to forget: drafting only works if the swimmer in front is swimming straight. If they drift off course, you drift with them. So keep sighting even while drafting, checking that your locomotive is actually on the right line.
How to train for it before the season
You practise a deep water start in open water, not in a pool, but there are a few things you can prepare in advance:
Sculling and vertical positioning: practise in deep water until holding position without thrashing your legs feels effortless.
Starts from a standstill: get into a lake, position yourself horizontally, and push from zero to a strong pace a few times. It’s a completely different effort from pushing off a pool wall.
Swimming in a group: if you train with others, practise starts together. Contact, taps, swimming on someone’s feet, the less unfamiliar it is, the calmer your head will be on race day.
A deep water start isn’t about strength. It’s about composure and a handful of technical habits. Master them, and the first 200 metres stop being the worst part of your triathlon, and you’ll come out of the water with a heart rate that won’t wreck the rest of your race.
By the time you start the marathon in a full-distance IRONMAN, you’ve already been racing for hours. The leaders have around 5 to 6 hours behind them, slower athletes even 9 to 10. You’re tired, your energy is low, and 42 km are still ahead of you. Trying to just run the whole thing on feel usually ends in walking through the second half anyway, the forced, unplanned kind. The run-walk strategy flips that logic: you walk before you have to, and end up running faster overall.
Why planned walking works
It sounds paradoxical, but the mechanics behind it are straightforward. Triathletes who work short walking breaks into the run from the start tend to finish the marathon with a better overall time. The reason is simple: they don’t fall apart around the 30 km mark and don’t end up in a long, uncontrolled walk to the finish. A short walking break isn’t rest, it’s active recovery that protects the muscles’ ability to keep running over the following kilometres.
Researchers describe a similar effect in ultrarunners. A study published in PLoS One looked at runners in the extreme Tor des Géants race, around 330 km (205 miles) with about 24,000 m of elevation gain, and compared them with participants in much shorter ultra races. The finding: athletes in the longest race had lower markers of muscle damage and inflammation, despite covering a far greater distance. The authors put this down to a protective, anticipatory pacing strategy, a slow and controlled pace from the very start. A body that knows a long road is coming holds itself back.
Run-walk is the same strategy, built rigidly into the plan. Instead of waiting for the body to force a walk, you impose one deliberately, while you’re still fully in control.
How to build your own pattern
The pattern depends on your level and time goal. A proven approach is a walking break at every aid station, which on an IRONMAN course are usually spaced about every 1.5 to 2 km. These are natural anchor points: you slow down, take a gel and water, swallow calmly, and move on.
Two rules keep this under control:
Breaks are short and consistent. Ten to a few dozen seconds of walking, not a stroll. The point is to reset heart rate and get calories down, not to fully rest.
Practise before race day. Trying run-walk for the first time on race day is a risk. Work it into long runs and brick sessions so the body learns and accepts the rhythm.
Pace: three indicators, not one
Run pace in an IRONMAN is decided earlier, on the bike and in your fuelling. Ride too hard and there’s nothing left for the marathon. A smart bike leg and getting carbohydrate intake right give you a shot at a good run.
On the marathon itself, you can’t rely on a single number. Wind, climbs and heart rate drift from overheating throw off any one indicator on its own. Combine three: RPE, heart rate and pace. Hold the first half at the bottom end of your range. If you feel fresh at halfway, you can pick it up slightly. Most of the time you won’t even need to.
The key rule: the risk of starting too fast is far bigger than the risk of starting too slow. A pace that’s too slow can be made up in the second half. Blow up at the start and there’s nothing left to make up.
Base it on reality
The last point is to base your target pace on real results from the last 8 weeks, not on ambition or last season’s form. A run-walk plan built on inflated assumptions falls apart just as fast as any other feel-based pacing strategy.
You’re training as usual, sleeping reasonably well, and your legs are still heavy, your heart rate takes longer to climb in training, and your form has stalled. Before blaming the plan, check something that doesn’t hurt and gives no clear symptoms until it’s already bad: your iron level, specifically ferritin.
Ferritin: the store that runs out first
Iron fuels oxygen transport. Without it, haemoglobin can’t carry oxygen from the lungs to the muscles, and mitochondria can’t turn it into energy. The problem is that the body empties its store first, and ferritin is the measure of that store.
That’s where the trap sits. The standard lab range treats ferritin of 12 ng/ml as normal. That threshold was set for the general population and misses the deficiency that actually limits performance. For women in endurance sport, 35 to 40 ng/ml is usually treated as the minimum for good form, and a range of 50 to 70 ng/ml is sometimes recommended for good recovery, energy and injury protection. So you can have a result that’s technically normal and still be running on fumes.
The most dangerous version is so-called iron deficiency without anaemia. Haemoglobin still looks fine, so a GP says everything’s normal, while ferritin is already on the floor and quietly suppressing performance. A systematic review covering 669 female athletes found that iron deficiency lowered endurance capacity by 3 to 4% compared with athletes at normal levels. Over the finish line of a 70.3, that handful of percentage points is worth ten-plus minutes.
Why triathletes lose iron faster
This isn’t about poor diet. The sport itself increases losses, through several mechanisms:
Footstrike haemolysis. Every running stride causes micro-damage to red blood cells in the foot. The more you run on hard surfaces, the bigger the losses.
Sweat. You lose iron through sweat, and triathletes sweat a lot and often.
Small gastrointestinal bleeds during long, intense efforts.
Menstruation. For women, it’s one of the main reasons deficiency is far more common.
Hepcidin. A hormone that rises after intense exercise and blocks iron absorption in the gut exactly when you need it most.
Iron deficiency affects roughly 15 to 35% of female athletes and 3 to 11% of male athletes. Among competitive runners and triathletes, an estimated 55 to 60% of women and 31 to 37% of men go through at least one deficiency episode during their career. In one study of recreational female runners, nearly three-quarters had ferritin below 15 ng/ml despite showing no signs of anaemia.
Don’t guess, test
The most important rule: don’t supplement iron blind. Excess iron is harmful, and the body has no efficient way to get rid of the surplus. Instead of guessing, get a blood test that includes ferritin, ideally alongside a full blood count and transferrin saturation. That helps separate a genuine deficiency from a temporary dip after a heavy training block, because ferritin also behaves as an inflammation marker and can read high right after a hard effort.
Leave interpretation and any supplementation decision to a doctor or sports dietitian. This article is background knowledge, not medical advice. Dose and form of any supplement should be decided individually.
How to supplement iron sensibly
If a deficiency is confirmed, research in recent years has changed the approach to dosing:
Less is more. Lower doses, in the range of 40 to 80 mg of iron, maximise the percentage actually absorbed. Splitting the dose into two a day doesn’t help, it just raises hepcidin.
Every other day instead of daily. After a dose of iron, hepcidin stays elevated for about 24 hours, blocking further absorption. Dosing every other day improves iron uptake and causes fewer stomach side effects. Ferritin rises at a similar rate over 8 weeks on both daily and alternate-day schedules, but the alternate-day one is gentler on the gut.
Vitamin C helps. Taking iron on an empty stomach with vitamin C increases absorption by around 65%.
Keep it away from coffee, tea and calcium. Coffee can cut iron absorption by as much as 39%, tea by up to 64%, and calcium by up to 50%. Leave a gap of at least 2 hours.
The practical takeaway: a single moderate dose every other day, on an empty stomach, with vitamin C, away from morning coffee, works far better than swallowing a large dose daily and washing it down with a latte.
Summary
Iron is one of the few markers where a single blood test can explain weeks of unexplained fatigue. If your form has stalled for no clear reason and you run a lot or menstruate, check ferritin before prescribing yourself another hard block. The best training plan is worthless if your blood has nothing to carry oxygen with.
Drafting is banned on the bike in triathlon, but in the water it’s completely legal. It’s the only part of the race where you can tuck in behind a rival, swim their pace, and save the energy you’ll be short of on the run. Amateurs routinely waste this, swimming alone alongside a group instead of latching onto its back.
Why drafting works in the water
When you swim, you push a wall of water ahead of you. The swimmer in front breaks that wall, and you move into the lower-resistance zone left behind them. Less resistance means a lower energy cost at the same speed, or a higher speed at the same effort.
A well-known study by Chatard and Wilson found that swimming in the draft cuts oxygen uptake by about 10%, with heart rate, lactate and perceived effort dropping alongside it. Resistance drops more, by around 20%, than energy cost does. Swimming in someone else’s tunnel is less efficient than swimming in open water yourself would be if resistance were the only factor, but still far cheaper than swimming solo. In practice the difference shows up most on long distance, where every percentage point saved means fresher legs coming out of the water.
Feet or hip: two schools of drafting
There are two main positions you can take.
On the feet. You swim right behind the leader’s toes. This gives the biggest resistance reduction, because you’re sitting directly in their tunnel. The downsides are no visibility ahead, the risk of a kick to the face, and the need to match pace exactly. Ease off for a moment and you drop out of the zone.
On the hip. You sit slightly to the side, roughly level with the leader’s hips. The resistance reduction is a bit smaller than on the feet, but you gain two important things: you can see where you’re going, and you need to sight less often. Fewer head lifts mean less disruption to body position and less wasted energy.
For most amateurs, the hip position is the more practical choice. It gives better visibility, less risk of a kick, and more control over the situation. The feet position is worth trying only when you know the leader’s pace well and trust them not to drop you.
How to catch and hold a draft in practice
A few rules keep you out of trouble and save seconds:
Pick the right feet. Stick with someone swimming slightly faster than your solo pace, but not so fast you blow up after 200 metres.
Position yourself before the start. In the start zone, line up next to someone at your pace rather than wherever there happens to be space.
Sight less often, but smarter. On the hip you’re relying on the leader to navigate for you. Check direction every few breaths, not every other stroke.
Don’t crowd the leader’s back. Constantly tapping their feet is the fastest way to make them speed up or lose you on purpose. Leave a few tens of centimetres of space.
Practise it in the pool and in open water. Drafting is a skill, not an instinct. Try swimming on a training partner’s feet in practice before attempting it in a race-day crowd.
Start with one thing
If you’ve been swimming solo so far, don’t jump straight into the feet position in the middle of a crowd. At your next race, do one thing: find someone at your pace and settle on their hip. That’s it. You’ll feel the difference by the first buoy, and your legs will thank you on the run.
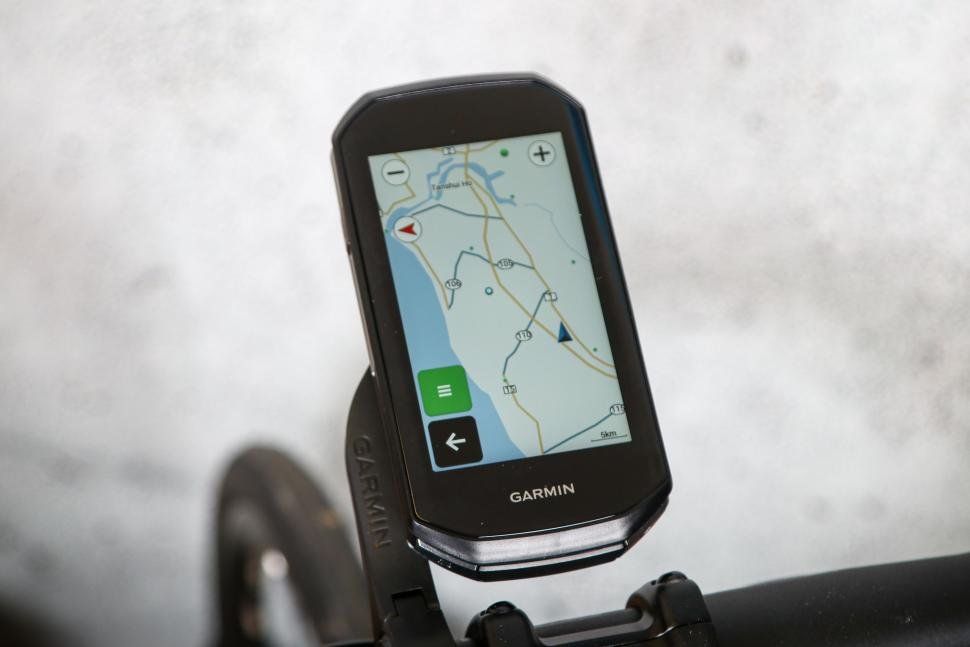
Garmin is preparing a successor to the Edge 1050, and for the first time the word “AI” is being used seriously in the context of a bike computer. The device has already cleared certification in several regulatory databases, so a launch is not a vague rumour but a matter of weeks. A lot of speculation has built up around the rumoured “Edge 1060” and its features, so it is worth separating the confirmed facts from the wish list.
What is actually confirmed
The one hard fact is a new Garmin device with the identifier A04831, which has appeared in regulatory databases: Malaysia’s SIRIM and the TDRA registry in the United Arab Emirates. The entries date from April 2026, and the Malaysian approval is valid until 2031, which points to a full product rather than a minor accessory. A regulatory filing is a standard step just before launch, since a manufacturer needs approval before hardware reaches shelves.
That is where the hard facts end. Garmin has not officially confirmed the name “Edge 1060”, or any specification. Some outlets note that the A04831 designation could just as easily point to an Edge 1050 Solar variant rather than a completely new flagship. A SIRIM filing also cannot be independently verified without an industry account, and the most reliable signal, an FCC filing in the United States, has not appeared yet. Everything below this point is trade-press speculation, not a manufacturer statement.
On timing, Garmin’s two-year cycle points to a window in June or July 2026. The Edge 1040 launched in June 2022, and the Edge 1050 launched on 25 June 2024, so the rhythm fits. That is deduction from a calendar, though, not an announced date.
What “AI-native” would even mean
Most of the noise centres on the claim that the new model will be the first “AI-native” bike computer, designed around artificial intelligence from the ground up rather than having features bolted on. In practice that would mean shifting some analysis from the cloud onto the device itself.
The most commonly speculated features are:
Live adaptive power pacing: the computer would adjust target power mid-ride using wind data and current Body Battery level, instead of sticking to a fixed Power Guide plan.
PacePro for cycling: an extension of the running feature, suggesting effort distribution based on terrain, current fatigue and historical power zones.
None of these features have been confirmed by Garmin. They are reasonable industry guesses, not an official roadmap.
Screen and battery
One correction worth making: the Edge 1050 does not have an AMOLED panel. It uses a bright, high-resolution LCD screen, 3.5 inches, 480 by 800 pixels, at around 1,000 nits. Its main weakness is battery life, up to 20 hours in normal mode, which looks poor next to the Edge 1040’s more than 35 hours. Better energy efficiency for long rides is the obvious direction for a successor, rather than a screen overhaul. No concrete battery or screen specifications exist yet for the new model.
What it might cost
Garmin typically holds flagship Edge pricing at a similar level between generations. The Edge 1050 launched at $699.99. It is reasonable to assume a successor lands in a similar range, though a new screen or AI features could push it slightly higher. There is no official launch price yet.
Should a triathlete wait
If you are riding an older Edge and considering an upgrade, it is worth holding off for a few weeks. A launch looks close. Even if the new model turns out too expensive, its debut usually pulls down prices on earlier versions. If the AI features do deliver sensible, wind-aware power pacing, that would be real value for long-distance racers. The final verdict will have to wait until the device is actually on a set of bars.
A round bottle wedged into a classic frame cage can cost you several watts, and over 70.3 or full IRONMAN distance that adds up to real minutes lost. The problem is you still have to drink. So the question is not whether to carry fluid, but where and in what.
A well-chosen hydration setup can be aerodynamically neutral, and in some cases acts like a fairing that makes you faster than riding with a bare frame. Here is how to approach it properly.
Why bottle position matters
On a time trial bike, your body position generates most of the aerodynamic drag, around 80%. Second in line is the zone around the frame, components and your hands. An ordinary round bottle sitting across the airflow acts like a small parachute.
Rather than take manufacturer marketing at face value, it is worth looking at the numbers. The figures below come from independent wind-tunnel testing, including the San Diego Wind Tunnel commissioned by tech outlet AeroGeeks, and from technical documentation published by frame makers Cervélo and Specialized.
Results are calculated for a standard race speed of 40 km/h:
Bike setup and bottle position
Loss / gain in watts
Estimated time over 180 km
No bottles at all
0 W (baseline)
n/a
BTA system (horizontal, between the forearms)
Gain: ~1.5 W
About 35 to 45 seconds faster
Behind the saddle (two bottles, vertical)
Loss: ~0.2 W (neutral)
Negligible, under 5 seconds
On the frame, down tube, round bottle
Loss: ~5.6 W
About 2 minutes 15 seconds slower
On the frame, seat tube, round bottle
Loss: ~7.2 W
About 3 minutes slower
Dedicated profiled frame bottle
Loss: ~1.5 W
About 35 seconds slower
The golden rule: stay in the aero position
The main lesson from these tests is not only about the drag of the bottle itself. What matters most is that you have to be able to drink without breaking the aero position. Every time you sit up to grab a bottle and put it back on the frame, you lose real time and break your pedalling rhythm. If your setup forces you to keep sitting up on the saddle, you are giving back exactly the minutes you paid for when you bought a time trial bike or clip-on bars.
Three zones for mounting bottles
Wind-tunnel engineers have tested three sensible locations for years. Each solves a different problem.
Between the arms: BTA
The clear number one, and the default choice for any triathlete. The system mounts directly on the aerobar extensions, and you drink through a straw without lifting your head out of the aero position.
Independent testing confirms a genuine paradox: a bike with a bottle mounted this way is aerodynamically faster than a completely bare bike. The bottle fills the empty space between the arms and acts like a fairing, smoothing the airflow that would otherwise hit the rider’s chest.
Proven systems include the Profile Design FC series (FC25, FC35) and the A2, integrated setups with a straw, a mount for a bike computer and a dedicated pocket for gels. At the premium end, the XLAB Torpedo system uses a carbon or composite mount with excellent stability and a retractable straw that does not flap in front of your face in the wind.
Behind the saddle: your rear reservoir
The classic answer for a second and third bottle on long distances, 70.3 and full. In the wind tunnel this zone is usually neutral, because the bottles sit in the aerodynamic shadow of your thighs and glutes, generating only minimal turbulence when properly tucked away.
The XLAB Carbon Wing and Delta series are the market benchmark for this position. Rear cages can also act like a catapult under centrifugal force on rough roads: mount them as close to vertical as possible and use only models with a firm grip. A lost bottle costs you your fuelling plan and risks a littering penalty on the course.
On the frame: when a profiled bottle makes sense
An ordinary round bottle on the frame is an aerodynamic problem, especially on the seat tube, where the air is already turbulent from the rider’s legs. If your time trial bike has no integrated storage, a dedicated profiled bottle is the only fix.
The Elite Crono CX is the proven option: a flattened, dedicated bottle with a matching cage that blends into the frame’s lines and minimises turbulence, recovering most of the lost watts.
What else to look for in a bottle
Choosing the position is half the job. The bottle itself has to hold up on practical and health grounds too:
Fast-fill system: essential for clip-on setups on long distance. You need to be able to pour water from a bottle handed over at an aid station without stopping or unscrewing a cap, just tipping the liquid through a mesh or valve on the move.
Clean materials, BPA and phthalate free: cheap plastic in full sun releases toxins and can leave an isotonic drink tasting off after two hours. Look for BPA- and phthalate-free labelling, ideally polypropylene.
Anti-odour technology: good brands use internal coatings, often with silver ions or a silicone layer, so a bottle forgotten after a Sunday ride does not grow black mould inside.
Soft nozzle and easy grip: at a high heart rate you do not want to fight stiff plastic. The bottle should be soft enough that one squeeze gives a strong flow, with a rubber nozzle to protect your teeth over rough ground.
How to set up your bike
Racing sprint or Olympic distance? One front system between the extensions is enough. Over a 40 km bike leg, you do not need to carry a warehouse of fluid.
Racing 70.3 or full IRONMAN? Start with a front bottle as your main source, and add a rear system behind the saddle as a reservoir. At an aid station, grab a fresh bottle, top up the front reservoir, and drop the empty in the litter zone. The frame stays clean and slippery through the air.
Three products that work in the aero position
Three specific products that handle mounting, holding and drinking in the aero position well.
Product
Price
Position
Who it is for
Profile Design Axis Grip Kage
$35.25
Front / cockpit
Triathletes building a clean front end. Holds the bottle firmly and has an integrated mount for a Garmin computer between the aerobar extensions.
Van Rysel Carbon 900 bottle cage
€24.99
Behind saddle / frame
Light, 25 g, stiff carbon cage. Answers the problem of bottles ejecting behind the saddle on rough roads.
Van Rysel FastFlow M 650 ml bottle
€5.99
Any, front or rear
Fitted with a valve that stops drips onto the frame and drivetrain, with a wide flow for quick drinking at a high heart rate.
The bottom line
Optimising a bike’s hydration setup is not about buying the most expensive gadgets, it is about removing guesswork. The wind-tunnel numbers show clearly that one badly placed round bottle can undo the effort behind an aero frame or helmet. Building a system for 70.3 or full IRONMAN, start with a base between the forearms, and keep any extra litres tucked in the aerodynamic shadow behind the saddle.
No laces. No seams. An upper that a robot sprays onto the last in a matter of minutes. The On Cloudboom Strike 2 LightSpray is the most futuristic racing shoe to hit the market in 2026, and for triathletes it has one advantage the brand doesn’t mention in its press materials: a T2 without fighting laces.
An upper painted by a robot
LightSpray is a seamless, glueless upper applied in a single spray, literally “painted” onto the last by a robotic arm. The result is a second-skin fit without traditional lacing. The shoe weighs 158g per shoe.
What’s underneath
The midsole is built from a new Helion HF foam, 15% lighter than the previous generation. Between two layers of foam at different densities sits a curved carbon-fibre Speedboard plate, lighter and stiffer than its predecessor, and the whole thing is wrapped in CloudTec Sphere geometry: channels cut into the foam so it can expand more freely and return energy.
It’s worth knowing where that 158g sits on the shelf, since the launch copy doesn’t say. It’s lighter than what Nike currently offers, but it isn’t the record holder. The Adidas Adizero Adios Pro Evo 3 weighs 97g at a price of $500, and the Asics Metaspeed Ray weighs 129g. The Cloudboom Strike 2 LightSpray sits near the top of the field, not at its peak, and buying it means buying the upper more than the weight.
Parameter
Value
Weight
158g (one shoe)
Drop
5mm
Sizes
36-49
Price
$310 in the US (320 EUR, 300 GBP)
Launch
30 July 2026
The price includes a pair of Elite Run Sock High Hyper socks, which On throws into the box for free.
What it’s like to run in
The obvious worry with a lace-free shoe is whether it will actually fit your foot. There’s already an answer: Marathon Handbook ran over 80km in this model in record heat, first in Zurich, then in Paris, in sessions at marathon pace, exactly where this shoe is meant to work.
The conclusions are surprisingly calm for a layperson. The upper breathes and doesn’t soak up sweat even in extreme conditions. The shoe runs true to size and true to width, and the bootie shapes itself individually to the foot. The ATPU material in the second generation is noticeably more flexible than in the first, so the stiffness problem people complained about earlier is gone. The reviewer compares putting it on and taking it off to sliding into a Blundstone.
How long will it last
This is the number one question at a price over $310, and nobody answers it with a number. None of the available sources give a mileage figure, so neither will we.
It is clear, though, which direction this goes. On itself says Helion HF is optimised for peak performance at the cost of durability, shorter-lived than the foam in a training shoe. The upper material, as the reviewer puts it, wears out quickly, and one runner turned a first-generation pair into walking shoes after a season. Treat this as race-day gear with a shelf life, not a purchase for two seasons.
Who this makes sense for
This is a shoe for races up to marathon distance, not for training. For a triathlete, the realistic scenario is the run leg of a long-distance race (70.3, IRONMAN) or a standalone running race outside the triathlon season. Not everyone will pay over $310 for shoes that might survive a few hundred kilometres of race use.
The lack of laces is still a concrete argument for amateurs who lose seconds in T2 fighting wet-fingered knots. Anyone targeting this model for next season should watch for restocks, since On sells it through its own store and select partners, without wide distribution.