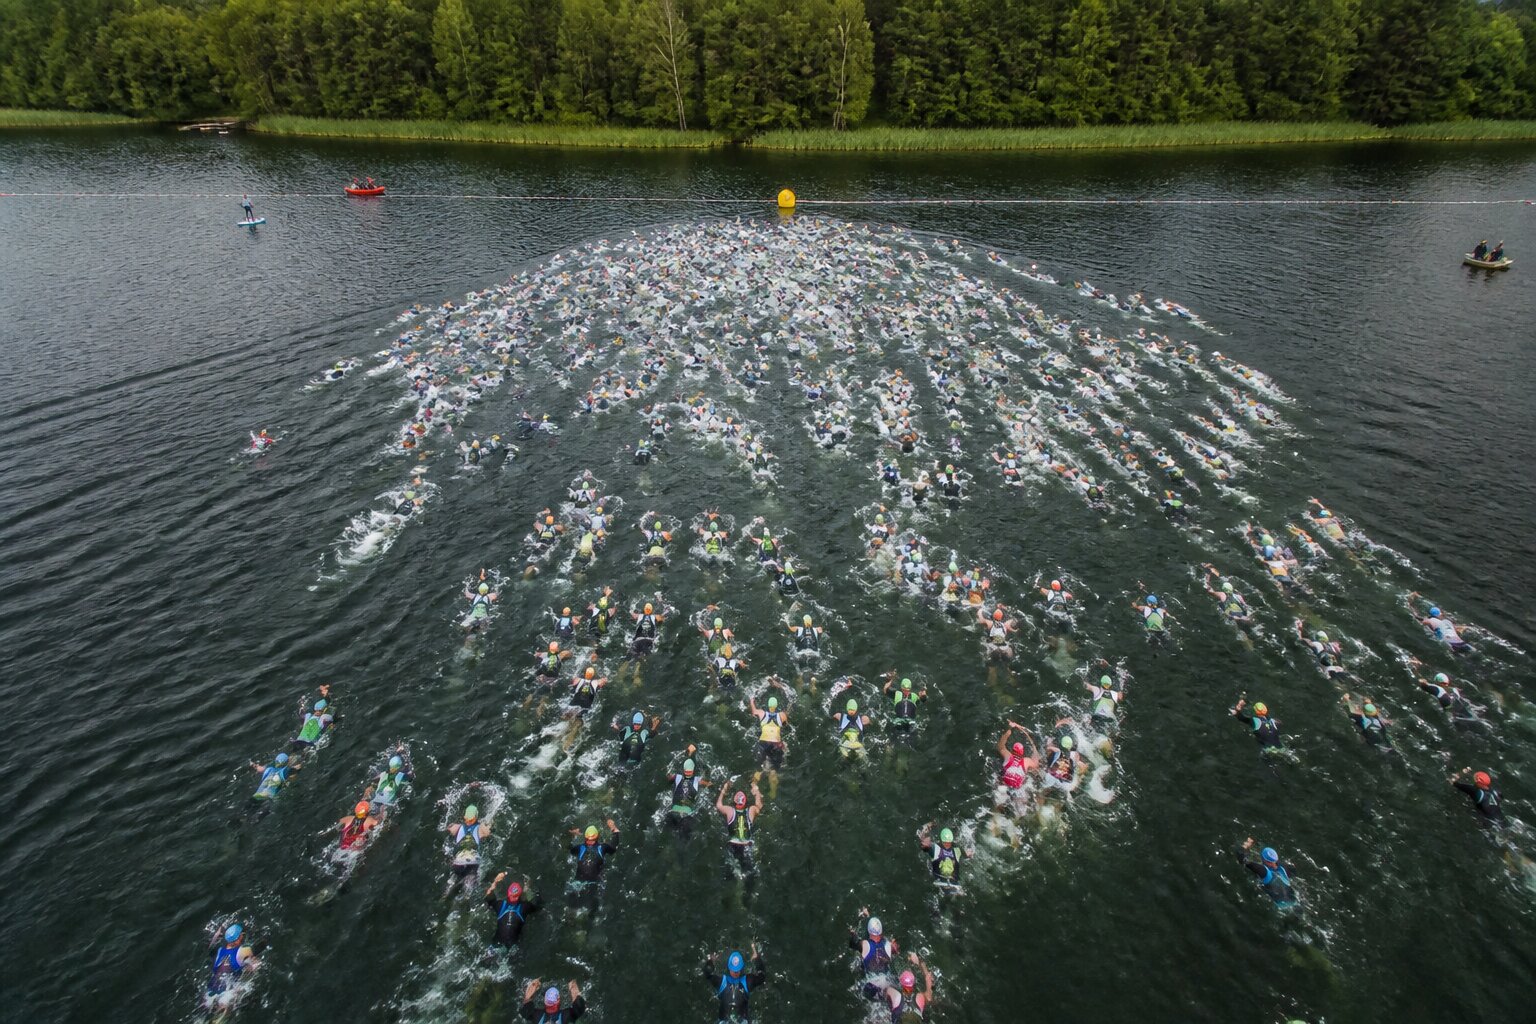
The most stressful minute of an entire triathlon doesn’t happen at the 180th kilometre of the bike leg, or in the closing stretch of the marathon. It happens at the start, when you’re standing, or really floating, in the water with a hundred other people about to swim straight through you. A deep water start, one with no ground under your feet, is a skill nobody teaches in a pool. And it decides whether you swim the first 200 metres in rhythm or in panic.
First, the decision: where to line up
Before you swim a stroke, you need to make a tactical call, and an honest one about your own level. You have three options:
Front, aggressively: for genuinely fast swimmers. If you can’t hold a strong pace in the pool, don’t push in here. You’ll get swum over and lose your composure at the start.
Mid-pack, for the draft: a good compromise if you can hold onto a faster swimmer’s feet.
Side or back, calmly: the smartest choice if open water stresses you out. You avoid the washing machine of the main group, at a cost of only a few seconds.
The key rule: line up according to the truth about yourself, not your ambition. Too far forward and you’ll get trampled. Too far back and you’ll be stuck behind slower swimmers, passing them for half the distance.
How to wait upright without wasting energy
Waiting for the gun in deep water is its own skill. Don’t thrash your legs like you’re treading water in a rescue drill: you’ll tire yourself out before the start even happens.
Stay on the surface with calm figure-eight sculling movements of your hands underwater, with your body tilted slightly forward. This is the most important detail: the closer to horizontal you are right before the start, the easier it is to get moving. The switch to swimming from a horizontal position is much faster than launching from vertical.
One more trick: keep your hands spread wide as you scull in front of you. It creates space around you and discourages other swimmers from crowding in beside you. A bit of elbows, in the good sense of the word.
The first metres: survival mode, not race mode
When the gun goes, don’t go straight to 100%, but don’t hesitate either. The first metres are controlled aggression: a short, faster surge to find clear water and avoid getting pushed into the middle of the pack.
In this phase, change two things about how you swim:
Sight more often: lift your eyes every few strokes to spot gaps in the crowd and correct your position.
Breathe on both sides: bilateral breathing lets you track who’s swimming next to you and where it’s getting less crowded.
This isn’t the moment for picture-perfect technique. It’s the time to get through the chaos in one piece without losing your head when someone taps your heel or swims over your arm. Expect the contact, and it won’t catch you off guard or trigger panic.
Around 150 to 200 metres: switch into race mode
The good news: the chaos doesn’t last long. After about 150 metres the group starts to spread out as everyone settles into their natural pace. This is the moment you’re waiting for, the switch from survival mode into race rhythm.
This is where the most valuable open water skill comes in: drafting. Sit right off another swimmer’s feet, or slightly off their hip, on the diagonal. In that water shadow, drag can drop by anywhere from around ten to several tens of percent, and your energy cost at the same speed goes down for real. Find someone a little faster than you and hold their feet.
One catch that’s easy to forget: drafting only works if the swimmer in front is swimming straight. If they drift off course, you drift with them. So keep sighting even while drafting, checking that your locomotive is actually on the right line.
How to train for it before the season
You practise a deep water start in open water, not in a pool, but there are a few things you can prepare in advance:
Sculling and vertical positioning: practise in deep water until holding position without thrashing your legs feels effortless.
Starts from a standstill: get into a lake, position yourself horizontally, and push from zero to a strong pace a few times. It’s a completely different effort from pushing off a pool wall.
Swimming in a group: if you train with others, practise starts together. Contact, taps, swimming on someone’s feet, the less unfamiliar it is, the calmer your head will be on race day.
A deep water start isn’t about strength. It’s about composure and a handful of technical habits. Master them, and the first 200 metres stop being the worst part of your triathlon, and you’ll come out of the water with a heart rate that won’t wreck the rest of your race.
By the time you start the marathon in a full-distance IRONMAN, you’ve already been racing for hours. The leaders have around 5 to 6 hours behind them, slower athletes even 9 to 10. You’re tired, your energy is low, and 42 km are still ahead of you. Trying to just run the whole thing on feel usually ends in walking through the second half anyway, the forced, unplanned kind. The run-walk strategy flips that logic: you walk before you have to, and end up running faster overall.
Why planned walking works
It sounds paradoxical, but the mechanics behind it are straightforward. Triathletes who work short walking breaks into the run from the start tend to finish the marathon with a better overall time. The reason is simple: they don’t fall apart around the 30 km mark and don’t end up in a long, uncontrolled walk to the finish. A short walking break isn’t rest, it’s active recovery that protects the muscles’ ability to keep running over the following kilometres.
Researchers describe a similar effect in ultrarunners. A study published in PLoS One looked at runners in the extreme Tor des Géants race, around 330 km (205 miles) with about 24,000 m of elevation gain, and compared them with participants in much shorter ultra races. The finding: athletes in the longest race had lower markers of muscle damage and inflammation, despite covering a far greater distance. The authors put this down to a protective, anticipatory pacing strategy, a slow and controlled pace from the very start. A body that knows a long road is coming holds itself back.
Run-walk is the same strategy, built rigidly into the plan. Instead of waiting for the body to force a walk, you impose one deliberately, while you’re still fully in control.
How to build your own pattern
The pattern depends on your level and time goal. A proven approach is a walking break at every aid station, which on an IRONMAN course are usually spaced about every 1.5 to 2 km. These are natural anchor points: you slow down, take a gel and water, swallow calmly, and move on.
Two rules keep this under control:
Breaks are short and consistent. Ten to a few dozen seconds of walking, not a stroll. The point is to reset heart rate and get calories down, not to fully rest.
Practise before race day. Trying run-walk for the first time on race day is a risk. Work it into long runs and brick sessions so the body learns and accepts the rhythm.
Pace: three indicators, not one
Run pace in an IRONMAN is decided earlier, on the bike and in your fuelling. Ride too hard and there’s nothing left for the marathon. A smart bike leg and getting carbohydrate intake right give you a shot at a good run.
On the marathon itself, you can’t rely on a single number. Wind, climbs and heart rate drift from overheating throw off any one indicator on its own. Combine three: RPE, heart rate and pace. Hold the first half at the bottom end of your range. If you feel fresh at halfway, you can pick it up slightly. Most of the time you won’t even need to.
The key rule: the risk of starting too fast is far bigger than the risk of starting too slow. A pace that’s too slow can be made up in the second half. Blow up at the start and there’s nothing left to make up.
Base it on reality
The last point is to base your target pace on real results from the last 8 weeks, not on ambition or last season’s form. A run-walk plan built on inflated assumptions falls apart just as fast as any other feel-based pacing strategy.
Drafting is banned on the bike in triathlon, but in the water it’s completely legal. It’s the only part of the race where you can tuck in behind a rival, swim their pace, and save the energy you’ll be short of on the run. Amateurs routinely waste this, swimming alone alongside a group instead of latching onto its back.
Why drafting works in the water
When you swim, you push a wall of water ahead of you. The swimmer in front breaks that wall, and you move into the lower-resistance zone left behind them. Less resistance means a lower energy cost at the same speed, or a higher speed at the same effort.
A well-known study by Chatard and Wilson found that swimming in the draft cuts oxygen uptake by about 10%, with heart rate, lactate and perceived effort dropping alongside it. Resistance drops more, by around 20%, than energy cost does. Swimming in someone else’s tunnel is less efficient than swimming in open water yourself would be if resistance were the only factor, but still far cheaper than swimming solo. In practice the difference shows up most on long distance, where every percentage point saved means fresher legs coming out of the water.
Feet or hip: two schools of drafting
There are two main positions you can take.
On the feet. You swim right behind the leader’s toes. This gives the biggest resistance reduction, because you’re sitting directly in their tunnel. The downsides are no visibility ahead, the risk of a kick to the face, and the need to match pace exactly. Ease off for a moment and you drop out of the zone.
On the hip. You sit slightly to the side, roughly level with the leader’s hips. The resistance reduction is a bit smaller than on the feet, but you gain two important things: you can see where you’re going, and you need to sight less often. Fewer head lifts mean less disruption to body position and less wasted energy.
For most amateurs, the hip position is the more practical choice. It gives better visibility, less risk of a kick, and more control over the situation. The feet position is worth trying only when you know the leader’s pace well and trust them not to drop you.
How to catch and hold a draft in practice
A few rules keep you out of trouble and save seconds:
Pick the right feet. Stick with someone swimming slightly faster than your solo pace, but not so fast you blow up after 200 metres.
Position yourself before the start. In the start zone, line up next to someone at your pace rather than wherever there happens to be space.
Sight less often, but smarter. On the hip you’re relying on the leader to navigate for you. Check direction every few breaths, not every other stroke.
Don’t crowd the leader’s back. Constantly tapping their feet is the fastest way to make them speed up or lose you on purpose. Leave a few tens of centimetres of space.
Practise it in the pool and in open water. Drafting is a skill, not an instinct. Try swimming on a training partner’s feet in practice before attempting it in a race-day crowd.
Start with one thing
If you’ve been swimming solo so far, don’t jump straight into the feet position in the middle of a crowd. At your next race, do one thing: find someone at your pace and settle on their hip. That’s it. You’ll feel the difference by the first buoy, and your legs will thank you on the run.
For years, level 100 was a ceiling in Zwift. You reached it and kept riding nowhere, at least in points terms. In the spring/summer 2026 update, the platform removed that cap on the bike and raised the running ceiling from 30 to 50. Alongside it comes a feature that suggests your next workout for you, and a challenge linking indoor trainer riding with real roads.
The end of the level 100 ceiling
As of 29 April 2026, cycling progression in Zwift has no upper limit. Past level 100 there are no more new kits or unlocks, but every further level still costs 50,000 drops, the in-game currency spent on gear in the virtual shop.
Zwift also introduced accelerated experience counting for riders who had been stuck at the century mark for a long time despite continuing to ride. The surplus points convert at a rate of 4:1, so the climb catches up faster than new kilometres accumulate. Runners got the same mechanism in a weaker form, 2:1, along with the level cap rising from 30 to 50. For now there are no new kits for the higher running levels, just the number climbing.
For a triathlete who spends a dozen or so hours a month on Zwift over winter, this is not cosmetic. Once someone hit the top, progression stopped meaning anything. Now the counter keeps turning, so long winter indoor intervals produce a tangible side effect again, beyond the TSS number itself.
Next Up: Zwift suggests your workout
The second major change is recommendations inside the Zwift Companion app. The Next Up card suggests what to do in your next session: a specific workout, a Robopacer Ride, or a route, based on your recent ride and run history and your weekly goal, if you set one.
If you connect a Garmin, Wahoo or Hammerhead account, the recommendations also take in workouts done outside the app, on the road, not just on the trainer. Zwift says this helps the system avoid overtraining and lets it suggest rest. That makes sense for a triathlete: Zwift stops looking only at what happens inside it and tries to judge the load across the whole week.
The Indoor Outdoor Challenge: four tiers, not one
The Indoor Outdoor Challenge runs from 1 July to 30 September 2026. Riders mix trainer sessions in Zwift with outdoor activities, and the kilometres add up to a single pool. The condition for outdoor kilometres: a Garmin, Wahoo or Hammerhead account connected through Companion.
The part that is easy to miss in the announcements is this. There are four reward tiers, not one:
Tier
Reward
250 km
100,000 drops
500 km
an exclusive cap and 20% off Maurten
750 km
5,000 XP
1,000 km
an in-game kit and an entry into a draw for a trip to L’Étape du Tour de France 2027
Even if a rider does not reach a thousand kilometres in the quarter, it is still worth doing the maths. The Maurten discount unlocks at 500 km, roughly 40 km a week. The grand prize is a trip to L’Étape 2027, with flight, accommodation and a $100 Maurten voucher, drawn among everyone who reaches 1,000 km.
No sign-up is needed. Anyone with an active subscription is in the challenge automatically.
What this actually changes in training
None of these features replaces a training plan built for a specific race, but for an amateur juggling work, family and training, it helps in two concrete places. First, “stuck at level 100” stops working as a demotivator for winter sessions. Second, linking watch data with the indoor riding app finally gives one coherent picture of the week instead of two separate logs.
Next Up is brand new, and so far there is mostly beta feedback rather than hard data on how well it works. It is not yet clear how it handles unusual plans, for example full-distance training with long volume blocks instead of the standard 70.3 structure. It is a feature that learns from a rider’s history, so its accuracy should grow with regular use.
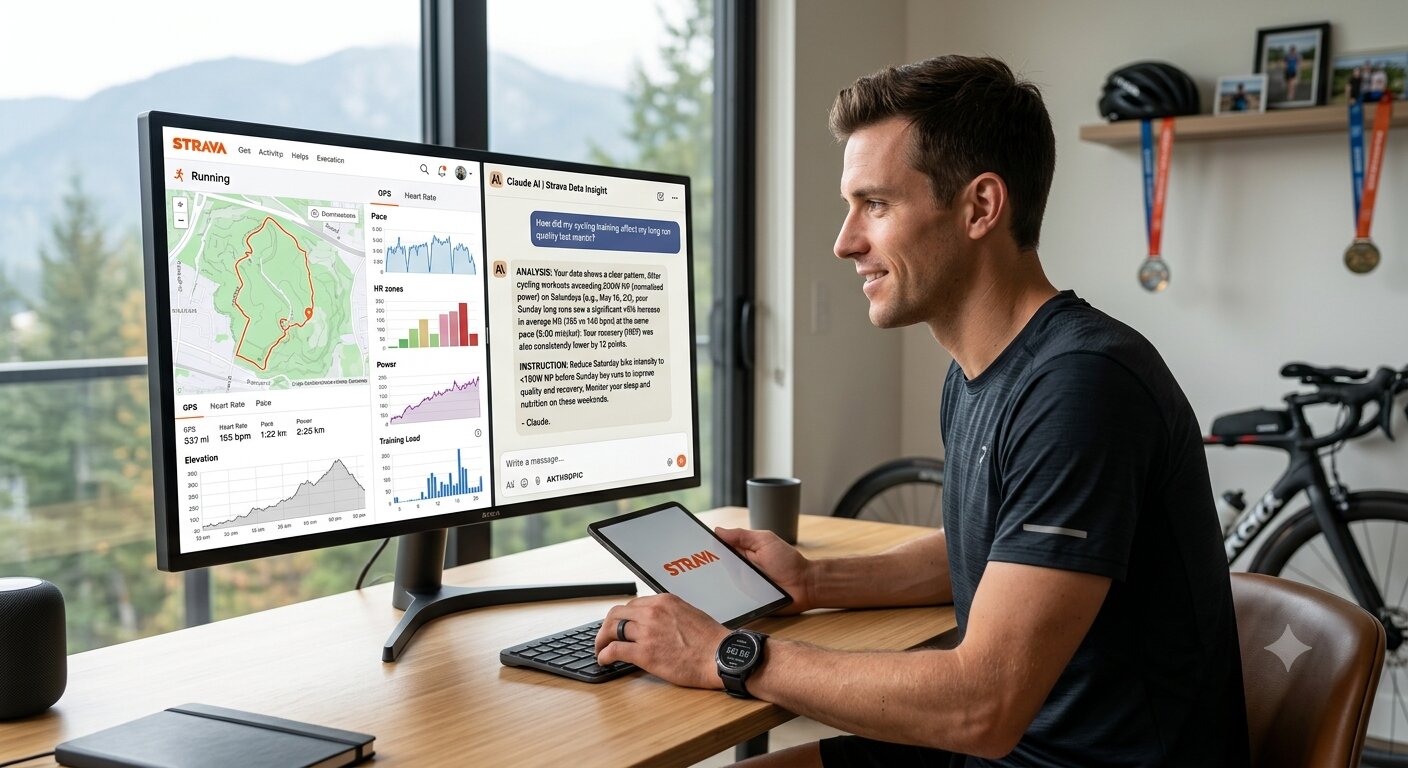
Not long ago, analysing training meant CSV exports, spreadsheets, manually comparing zones and long evenings spent over charts. Today more and more platforms try to make sense of it with artificial intelligence. The latest example is the Strava MCP Connector, an official link between Strava and Anthropic’s Claude assistant.
It sounds technical, but the idea is simple: instead of digging through your activity history yourself, you can ask an AI about your own training in plain language. Not generic advice from the internet, but answers drawn from your actual activities.
Strava MCP Connector: what actually happened
Strava launched its official MCP Connector on 1 June 2026. The tool is available to Strava subscribers and links a Strava account to Claude. Access is read-only, runs through OAuth authorisation, and can be revoked at any time in settings.
In practice this means Claude can analyse activity history, fitness trends, training load, GPS data, heart rate, pace and bike power. Strava stresses this is not a static data export but access to a user’s current account data.
Some example questions that start to make sense:
Are my easy sessions actually easy?
How has my pace changed on similar routes over the last few months?
Does strength training or cycling affect my running?
What did my heart rate look like on intervals during my last training block?
This is not yet an automatic coach that rebuilds an entire plan on its own. It is more of a very fast analyst that can read the data and pull out an answer without anyone copying charts by hand.
Why this matters for triathletes
Triathlon is an ideal sport for tools like this, because the data is everywhere. Swim, bike, run, intervals, heart rate, power, pace, sleep, HRV, fatigue, target race, taper. The problem for an amateur is no longer having too little data. It is having too much of it.
So the biggest shift is not that an athlete gets yet another app. It is that analysis stops being reserved for people who already know how to read load charts, power zones and heart rate drift.
If a system can answer, in plain language, why a Zone 2 run regularly finishes too hard, or why Sunday’s long run feels weak after Saturday’s ride, an amateur gets something valuable: faster feedback.
AI in triathlon: a quick platform comparison
The comparison below is not a ranking, since these tools solve slightly different problems. It is more of a quick map: what to pick if you want to analyse data, and what to pick if you want a plan that reacts to how training actually goes.
Platform
Main use
Strongest point
Limitations
Indicative price
Strava MCP Connector
Analysing training history through Claude
Natural-language questions about your own data: heart rate, pace, GPS, power, load
Read-only access; at launch, integration is mainly with Claude
Part of a Strava subscription: $11.99 a month or $79.99 a year
Triathlify
Adaptive triathlon training plan
Planning for a race or for weight loss, daily adaptation, Garmin/Strava/Apple Health integrations, Polish-language version
A younger platform than the biggest global players; some integrations are still on the roadmap
9.99 USD/month or 99.99 USD/year
TriDot
Advanced planning and result prediction
Extensive training engine, RaceX, plenty of data and race scenarios
Higher price; can be too much for beginners
from 14.99 USD/month; Essentials 39 USD/month; Complete 99 USD/month
Athletica.ai
Adaptive endurance plans
Simple subscription model, dynamic plan adjustment, sports-science methodology
Less triathlon-specific ecosystem than TriDot; more focus on general endurance sport
19.90 USD/month or 189 USD/year
Strava: a conversation with your own training history
How it works: the Strava MCP Connector lets you talk to Claude about your own training data. It is read-only, so the AI does not edit activities or upload new workouts to the account.
For now, Strava is launching with Anthropic’s Claude, but says it may support other AI clients in future. That matters, because MCP as a standard could eventually become more than one app’s single integration.
Who it suits: people with a long history on Strava who want to quickly find trends, dependencies or mistakes in their training, without exporting data by hand.
Price: the feature is part of a Strava subscription. According to Strava’s current pricing page, an individual subscription costs $11.99 a month or $79.99 a year. Prices can vary by payment channel, promotion and bundle.
Triathlify: adaptive triathlon training
How it works:Triathlify is a platform built for triathlon. Its premise is to adapt the plan based on session data, not just display it afterwards. The platform states it syncs with Garmin and Strava, works on a periodised plan from sprint to Ironman distance, and adapts daily based on completed load, calendar and recovery signals.
On its methodology page, Triathlify describes analysis of sleep, HRV, resting heart rate, wellbeing, adherence to the plan, CTL/ATL/TSB and phases of preparation. That matters, because in triathlon simply knowing “you did the session” is not enough. What counts is whether you did the right stimulus at the right moment.
Who it suits: athletes who want an adaptive triathlon plan, watch integration and the option to use the platform in Polish.
Price: according to Triathlify’s current pricing, the Athlete plan costs 9.99 USD a month or 99.99 USD a year. A 7-day trial is also available. So you can test all features for free.
TriDot: heavyweight and built on a predictive engine
How it works: TriDot is one of the best-known AI platforms in triathlon. The system is built on analysis of an athlete’s data, training history, race profile and environmental conditions. Among other tools, the platform uses RaceX Performance for forecasts and race optimisation.
This is a more built-out tool, and a pricier one. For some athletes it will be a great fit, especially if they like a heavily structured process. For others it may feel too heavy, or too rigid against everyday life.
Who it suits: triathletes who want a very advanced training platform and are willing to pay for the full ecosystem.
Price: TriDot’s current pricing starts with the Lifestyle plan at 14.99 USD a month. Essentials costs 39 USD a month, Complete 99 USD a month, and the Premium version with a coach starts from 249 USD a month.
Athletica.ai: microcycle adaptation and simple pricing
How it works: Athletica.ai focuses on adaptive plans for endurance sports. The platform analyses completed sessions, load and recovery-related signals, then adjusts the next sessions accordingly. Its strong point is a simple model: fewer pricing tiers, more focus on the planning itself.
Who it suits: athletes who want a dynamic endurance plan without a heavily layered, multi-tier system.
Price: 19.90 USD a month, 99 USD for 6 months, or 189 USD a year. New users get a 14-day trial.
What is worth asking the AI after connecting your data
Tools like this make the most sense once the questions get specific. Instead of asking “how should I train?”, it works better to ask something that can actually be checked against the data.
Are my recovery sessions actually recovery?
In which weeks did load rise too fast?
Does run quality drop the day after a long ride?
How has heart rate at the same pace changed over the last 12 weeks?
Which sessions correlate best with improved fitness?
Was the taper before the last race long enough?
Where is the catch
AI in training does not solve everything. A system can read heart rate, pace and power well, but it will not see poor swim technique, a badly fitted saddle, an overuse injury building up, or the fact that an athlete has been sleeping five hours a night for three weeks.
Data is only powerful when it is complete and well interpreted. The best scenario is not “AI instead of a coach”, but AI as a filter that helps spot a problem faster.
AI will not replace a coach. It can replace chaos
The important question is not “will AI replace a coach?”. That is too simple. A good coach still sees more than a chart: life context, stress, motivation, injury history, technique, the athlete’s head before a race.
But AI can replace something else: chaos. It can catch faster that easy runs are running too hard. It can notice that run quality regularly drops after a hard ride. It can show that a plan looks good on paper while the body has stopped absorbing it.
For an amateur training between work, family and everyday life, that can make a huge difference. Not because artificial intelligence knows everything, but because it does not get tired of looking at the data.
What is next
The Strava MCP Connector points at the direction the whole market is heading. Training data stops being just an archive of activities. It starts becoming material for conversation, analysis and decisions.
The platforms that win will not be the ones shouting “AI” the loudest, but the ones that turn data into a simple decision: train harder today, ease off today, shift emphasis today, you are ready today.
Anyone who wants to check how Strava describes its official connection with Claude can look at the documentation: Strava MCP Connector.
The future of triathlon will not be about getting even more charts. It will be about finally being able to read those charts fast enough to know what to do tomorrow.
You have done the work. Hundreds of kilometres in your legs, long Sunday long runs, session after session. Now, two weeks out from race day, you have to do something that most amateurs find harder than the toughest interval: back off.
Taper, the period of sharpening form before a race, is the moment where a whole season gets ruined most easily. There are usually two scenarios: out of boredom you add an extra session, or in a panic you spend two weeks on the sofa. Both mistakes cost exactly the same thing, your best possible shape on race day.
The good news is that the science is quite specific about what to do, and it is not guesswork, it comes from meta-analyses of hundreds of competitive endurance athletes.
What the science says: two weeks, and half the volume
Bosquet and colleagues’ well-known meta-analysis reviewed taper research in endurance athletes and reached a surprisingly clear conclusion. The best results come from a taper of around 14 days, in which training volume drops by 41 to 60%, roughly half.
The average improvement in race performance is around 2%. Over a 70.3, that can be whole minutes off a personal best. There is one condition that decides everything, though.
Cut volume, not intensity
This is the part most amateurs get wrong. Taper is not “an easy week where you do everything slowly”. It is closer to the opposite.
In Bosquet’s analysis, the best results came from plans that kept intensity at its existing level. The volume cut is best achieved by shortening sessions, not cutting how many of them you do. Frequency stays roughly the same, you keep training about as often, each session is just shorter.
In practice: you shorten sessions but keep short efforts at race pace or above inside them. Instead of a 90-minute run with intervals, you do 40 minutes with a few strides at race pace. The engine stays warm, and the legs get time to recover.
How to spread the cut over time
A progressive taper works best, volume comes down gradually rather than in one drastic drop. Here is a simple two-week template:
Period
Volume (vs peak)
What you actually do
Last hard week
100%
Normal, big block, last strong efforts.
Week -2
around 70%
Shorter sessions, intensity unchanged.
Week -1
around 50%
Even shorter sessions, short race-pace sharpeners.
Last 2 to 3 days
minimal
Short shakeout with a few pickups, maximum sleep.
Key rule: even in the last few days, do not disappear entirely from the pool, the bike or the track. A short stimulus a day or two before the race, so-called openers, a few accelerations at race pace, keeps the nervous system ready. Two full days of lying flat will leave you feeling heavy on the start line.
Three disciplines, three speeds of recovery
In triathlon, tapering gets complicated because swimming, cycling and running load the body in very different ways.
Running generates the most muscle micro-damage and needs the longest recovery. Cut volume here most aggressively.
Swimming loads the musculoskeletal system the least, but needs constant feel for the water. Keep the frequency up, short and frequent swims beat one big session followed by a week away from the pool.
Cycling sits in the middle. It is easy to rack up kilometres on the bike without a big recovery cost, but you still cut session length consistently through the taper.
Taper tantrums: what happens in your head
Backing off training triggers a specific mental state in athletes, known among runners and triathletes as taper madness or taper tantrums.
Phantom pains (“taper pains”): suddenly your knee twinges, your Achilles aches, or your shoulder pulls. This is a real, documented phenomenon. Studies on marathon runners during taper found that 67% report new muscle and joint aches that never showed up during the heaviest training weeks.
Why it happens: researchers have shown that when training stress drops sharply, athletes become hyper-aware of normal muscular sensations that were previously masked by constant fatigue. On top of that, the immune system finally has resources to deal with minor inflammation, which produces brief twinges. If nothing happened in training, it is not an injury. It will pass by race day.
Mood swings and irritability: research points to anxiety levels rising by as much as 40% in endurance athletes when training volume drops by more than 30%. A sudden cut in training hours sharply reduces your daily dose of endorphins. You are essentially going through withdrawal. Redirect that energy into sleep and mental rehearsal of the race.
Fuel for the start: the carbohydrate loading protocol
Lower energy expenditure during taper, with your usual diet unchanged, already rebuilds glycogen naturally. Real, targeted loading is worth starting 36 to 48 hours before the gun.
Aim for 8 to 10 g of carbohydrate per kilogram of body weight a day (for an 80 kg athlete, that is 640 to 800 g of carbohydrate a day).
Carb loading is not an excuse to eat pizza or burgers. Avoid fats, which slow digestion. Choose easily digested sources: rice, pasta, baked potatoes, fruit juice, honey, white bread.
Two days before the race, cut fibre hard, vegetables, fruit, wholegrain products. You want to start with a full tank and light, empty intestines.
If you weigh 1 to 1.5 kg more than usual the day before the race, that is good news. Every gram of stored glycogen binds about 3 g of water in the muscles. That water will save you from dehydration out on the run.
Race week, day by day
Monday to Tuesday: your last chance to collect the bike from the shop or do a final drivetrain check. Sessions are very short and symbolic.
Wednesday: start easing off high-fibre foods while keeping hydration steady, water plus an electrolyte drink.
Thursday: ramp up carbohydrates. Do a short run or ride with openers, for example 3 to 4 efforts of 30 seconds at race pace, to keep the muscles primed.
Friday: a rest day, or a very short (10 to 15 minute) swim in your wetsuit on the course, if the organiser allows it. Collect your race packet, check out T1 and T2.
Saturday: a brief session (15 minutes on the bike, 5 minutes running, 2 to 3 short bursts to wake the nervous system). Rack the bike and drop your bags in transition. Eat an early, tried-and-tested dinner and be asleep before 22:00.
Let technology do the counting
Manually programming a taper, working out a progressive drop in minutes while keeping intensity in check, is stressful for a lot of amateurs. Modern systems handle that automatically.
Dedicated training apps and platforms, such as triathlify.com, build the taper phase into their plans by default. Their algorithms calculate the point at which accumulated fatigue should start to drop, and form, the Training Stress Balance, should peak, right on race morning. The system automatically shortens sessions and schedules the right workouts, so you never have to work out whether you should be cutting 40% or 50% of your mileage, you just do the session the calendar gives you.
Common amateur mistakes during taper
Panic that you “haven’t done enough”. The last two weeks will not build your fitness, it is already in your legs. Forcing extra sessions in at the last minute will only tire you out. Fitness cannot be crammed in a week.
Treating taper like a coma. Cutting all stimulus completely is the surest way to feel sluggish on the start line. Less means shorter, not slower.
Overhauling diet or gear. Taper is a terrible time to test new gels, wetsuits, shoes, or “cleanse” diets. Nothing new in the two weeks before a race, that is a hard rule.
Skimping on sleep. The body supercompensates and rebuilds during rest, not during training. Sleep during taper is as important a training unit as any other.
The plan in three sentences
Start reducing load two weeks before the race. Cut volume by around half, but keep intensity and session frequency, letting a training platform’s algorithm handle the precise dosing. Spend the last few days on short shakeouts with sharp efforts, maximum sleep, carb loading, and zero experiments.
You spend thousands on a bike, aero wheels and an integrated bottle between the aero bars, and the one part that connects you directly to the drivetrain gets bought as an afterthought. Cleats are the single point through which all the power you generate reaches the crank. Badly chosen or badly set up, they can wreck your knees on a 90 km loop through Kashubia. Set up well, they simply disappear. You do not feel them, you just ride.
Here is how the main systems differ, how to diagnose foot and knee pain, what it costs to buy into a given standard, and how to set your cleats so your foot sits in the shoe like it grew there.
Road systems versus MTB: why three bolts make a difference
Many beginner triathletes start out in mountain bike shoes and pedals (the MTB system, such as the popular two-bolt Shimano SPD). They make walking around transition easier, but on a long road ride they have serious drawbacks.
Road systems (Look, Shimano SPD-SL) use a three-bolt mount and a much larger composite cleat. That larger contact area guarantees better power transfer and eliminates hot spots, the points of heavy pressure under the sole that, in MTB shoes, cause uncomfortable burning after a few dozen kilometres.
The one word to learn before you buy: float
Before you pick a brand or a colour, you need to understand float, the working play in the cleat inside the pedal. It is the freedom your heel has to rotate sideways while clipped in, before the foot releases.
Zero float: the foot is locked rigidly in one fixed position.
High float: the heel can move freely from side to side through the pedal stroke.
This is not a detail for gear geeks. The human knee does not move in a perfectly straight line while pedalling, it has its own natural, individual path. If a cleat locks the foot against that biomechanics, all the extra load lands on the knee joint. That is why, for most amateurs, especially over long distances, moderate float is far safer than a rigid zero.
Three systems, three philosophies
Look Keo, the universal standard
A system built around a triangular plastic cleat that dominates road cycling and triathlon. Look marks float by cleat colour:
Black: 0° float (fully rigid).
Grey: 4.5° float (the usual compromise).
Red: 9° float (a lot of freedom).
For most amateur triathletes, grey or red cleats are the natural choice. They give the knee plenty of room without the foot feeling like it is flapping sideways.
Shimano SPD-SL, the most common on the road
Mechanically close to Look Keo, but not compatible with it: a Look cleat will not clip into a Shimano pedal and vice versa. Its colour code runs:
Red: 0° float (rigid, for sprinters and professionals).
Blue: 2° float (a very tight, precise range).
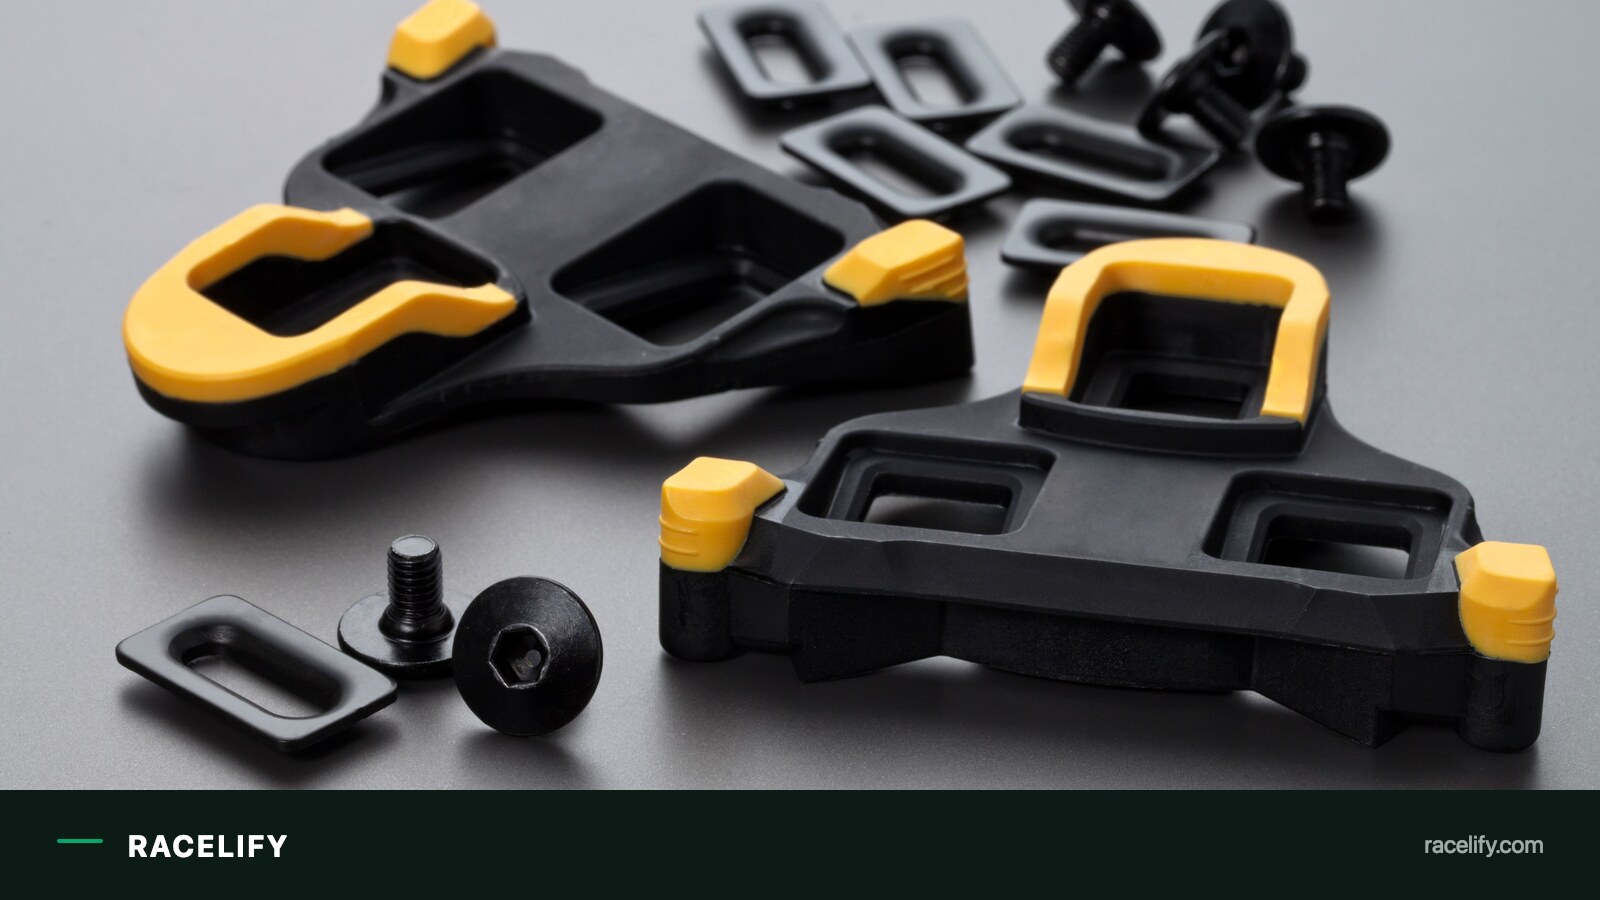
Yellow: 6° float (3° each way).
Most riders use yellow cleats. It is the safest, most forgiving starting point, one that tolerates small errors in setup.
Speedplay, the precision option
Distinctive, double-sided round pedals, often nicknamed lollipops. Their standout feature is smoothly adjustable float, from 0° all the way to 15°. That range is set mechanically with small screws in the cleat itself, independently for each foot.
For riders dealing with patellar tracking issues, old injuries, or an anatomical leg length difference, Speedplay is often the only route to pain-free riding. The downsides are a high entry price and the need for regular cleaning and lubrication of the mechanism hidden inside the cleat.
System
Float range
Character
Look Keo
0° / 4.5° / 9°
Universal standard for road and triathlon.
Shimano SPD-SL
0° / 2° / 6°
Safest starting point for most riders (yellow cleats).
Speedplay
0° to 15°, continuously adjustable
For knee issues and leg asymmetries.
How to set up cleats so your knees survive the season
Buying the right kind of cleat is half the job. The other half is bolting it to the sole correctly. Three planes need precise control:
Fore-aft position: the classic rule places the pedal axle directly under the ball of the big toe (the first metatarsophalangeal joint). In triathlon and time trials, though, many bike fitters deliberately move the cleat back a few millimetres. That shift takes real load off the calf muscles and Achilles tendon over a long bike leg, saving your legs for the run. Remember that moving the cleat back also changes your effective saddle height, so do not experiment with it right before a race.
Angle (rotation): the cleat needs to sit so the clipped-in foot lands in its natural anatomical position. For most people that means a slight inward or outward tilt of the heel. Do not guess. Sit on a trainer, pedal, and watch how the leg wants to sit naturally. Float will forgive a small offset, but it will not correct a foot that is forced into a drastically wrong position.
Side-to-side position (foot Q-factor): how far apart your feet sit has a big effect on the knee’s path. A shoe set too close to or too far from the crank arm pulls the knee inward or lets it drift outward under load, generating heavy strain in the joint.
Golden rule: no revolutions right before a race. New cleats, a drastic position change and a long distance at full effort are the simplest recipe for a sudden injury you cannot undo mid-course. Test any correction for weeks, in low-intensity sessions.
A cheat sheet for the sore: diagnose your pain
If you feel discomfort after clipping in, your body is sending a clear signal that one of the planes is set wrong. Here are the most common patterns worth checking:
Numb toes or a burning foot: the cleat sits too far forward, toward the toes, pressing on blood vessels and nerves. Try moving it back toward the heel by 2 to 3 mm.
Pain at the front of the knee (under the kneecap): this can mean the cleat is set too far back, forcing the knee to work through too deep a bend. Too low a saddle causes the same symptom.
Pain behind the knee: a sign the cleat sits too far forward, so the leg over-straightens in the bottom of the pedal stroke and strains the tendons.
Pain on the outside of the knee (IT band): often comes from incorrect cleat rotation, forcing the heel too far inward or outward from its natural path.
What it costs to buy into each system
Running costs vary a lot by brand. The figures below are US list prices, for replacement cleats alone and for full starter sets.
Cleats alone (replaced once a season or more often)
Look Keo (black, grey, red): about $23 for a genuine set. Grip versions with non-slip pads cost a few dollars more.
Shimano SPD-SL (red, blue, yellow): about $34 a set. Avoid suspiciously cheap copies online, they crack and can release unexpectedly during hard efforts.
Speedplay (Standard or Easy Tension cleats): about $60 a set. The price reflects the fact that the whole release mechanism sits in the cleat, not the pedal.
A full starter set (pedals plus cleats, boxed)
Look Keo: from $95 for the entry-level Keo Classic, through $155 for the popular mid-range Keo 2 Max Carbon, up to $195 for the flagship race model, the Keo Blade Carbon.
Shimano SPD-SL: $80 for the entry-level PD-RS500, $89.95 for the tough and most popular amateur standard, the Shimano 105 PD-R7000, $200 for Ultegra and $280 for the top-end Dura-Ace.
Speedplay (Wahoo): from $149.99 for the entry-level Speedplay Comp, up to $229.99 for the flagship stainless steel Speedplay Zero.
The marker trick: swap a worn cleat in two minutes
Fitting new cleats does not have to mean another trip to the bike fitter. To keep your existing, dialled-in position, use this simple trick:
Before unscrewing the worn cleat, clean the sole thoroughly of dust and mud.
Take a fine-tipped waterproof marker and trace the outline of the old cleat directly onto the sole.
Remove the old screws, place the new cleat exactly inside the drawn lines, and gently start the threads.
Tighten the screws evenly, ideally with a torque wrench set to 4 to 5 Nm. Over-tightening can permanently damage a carbon sole, while under-tightening lets the cleat shift during a ride and strips the threads.
Tip: before driving in the new screws, put a small drop of anti-seize grease on the threads. It stops the metal seizing up under sweat and road spray.
When to replace cleats
The plastic cleats in Look and Shimano systems are a wear item. Walking in them across transition, petrol stations or tarmac car parks grinds the soft plastic down fast.
Badly worn cleats sharply and unpredictably increase the working float, and in extreme cases the foot can release on its own under a hard pedal stroke or on rough road. Using rubber protective covers, so-called coffee shop caps, at about $15 a pair, when walking, and avoiding dragging your shoes on tarmac, extends their life considerably. The rule is simple: if you feel play in the pedal or the foot pops out when you tug on it, it is time for a new set.
The plan in three sentences
Choose cleats with safe working float, such as yellow Shimano at 6° or grey Look at 4.5°, to give the knee natural freedom of movement. Fit the fore-aft position to your own anatomy, considering a slight backward shift of the cleat to take load off the calves before the run. Do every cleat replacement and setup correction well in advance, using the marker method, and cut the risk of sudden pain out on the course.