Tag: Training

  • Polarised or Pyramidal: What 2026 Science Says on Zones

    Polarised or Pyramidal: What 2026 Science Says on Zones

    The question comes back every time the season changes: how to split time across training zones to get the most out of 10 hours a week. The polarised model has the appeal of simplicity, easy or very hard, nothing in between. The pyramidal model sounds more reasonable, more at the bottom, less in the middle, a sharp peak at the top. In 2026, a fresh research summary from Arturo Casado, PhD, puts the matter to rest: neither model wins everywhere. That is the most important conclusion of the season.

    What actually separates the polarised model from the pyramidal one

    Both models describe what percentage of training time is spent in three intensity zones:

    • Zone 1 (Z1): below the first lactate threshold (VT1/LT1). Conversational pace, easy effort.
    • Zone 2 (Z2): between the first and second thresholds (LT1 and LT2). A pace that cannot be held for long, but is not all-out either.
    • Zone 3 (Z3): above the second threshold. Lactate tolerance work, VO2max repeats.

    Polarised (POL): lots of Z1, almost nothing in Z2, a decent amount of Z3. Pyramidal (PYR): lots of Z1, moderate Z2, little Z3.

    Why these are not the “zones” shown on a Garmin, an important note

    Anyone training with a Garmin, Wahoo or TrainingPeaks likely sees five zones based on the model developed by Dr Andrew Coggan, the researcher behind the FTP concept and co-author of Training and Racing with a Power Meter from the early 2000s. That model splits intensity by percentages of FTP and maximum heart rate, treating Zone 4 as the lactate threshold.

    The three-zone model used in scientific research (Seiler, Casado, Filipas) is built on two physiological ventilatory thresholds, VT1 and VT2. It is a different cut of the same physiology:

    Five-zone model (Coggan / Garmin)Three-zone model (research)
    Z1 RecoveryZ1 (easy, below VT1)
    Z2 Aerobic base
    Z3 TempoZ2 (grey zone, between VT1 and VT2)
    Z4 Lactate threshold (FTP)
    Z5 VO2max and aboveZ3 (above VT2)

    When research says to avoid Z2 in the polarised model, it means zones 3 and 4 on a watch: half-marathon pace, threshold intervals, “sweet spot” work. It does not mean avoiding easy aerobic base, which sits inside Z1 of the research model and is exactly what belongs there. Seiler himself uses the three-zone model in research for simplicity, but works with athletes using five zones, because they give more precision when planning sessions.

    Figures from a study by Sellés-Pérez et al. (Journal of Sports Science and Medicine, 2019) on age-group athletes racing the half-iron distance, IRONMAN 70.3 (1.9 km swim, 90 km bike, 21.1 km run), commonly called a “half”, make this concrete:

    GroupZ1Z2Z3
    POL84.5%4.2%11.3%
    PYR77.9%18.8%3.3%

    The Z2 gap is stark: nearly a fifth of training time in the pyramidal group, barely a mention in the polarised one.

    What the research shows at the middle distance

    The same study found an interesting relationship: time spent in Zone 2 correlated with a better race result among age-groupers at the half-iron distance. In other words, in the 70.3 group, the pyramidal distribution beat the polarised one on race outcome.

    That is counterintuitive for anyone who listens to podcasts about the “Norwegian model” and the Iden and Blummenfelt brothers. But the logic is simple: a 70.3 puts an athlete at near-threshold intensity (Z2) for four to five hours. Training that includes plenty of Z2 prepares an athlete better for exactly that.

    Casado, on episode 695 of the That Triathlon Show podcast, discusses a study by Filipas et al. (Scandinavian Journal of Medicine & Science in Sports, 2022), in which a 16-week periodised plan, the first 8 weeks pyramidal and the next 8 weeks polarised, produced better running results than either model held for the full cycle. The improvement was mainly in 5k time and speed at lactate threshold; VO2max changes did not differ significantly between groups.

    What this means in practice, periodisation instead of doctrine

    The research synthesis available through 2026 points to a phased approach:

    General phase (base period, November to January). Pyramidal distribution. Plenty of Z1 (around 75 to 80%), a meaningful chunk of Z2 (15 to 20%), little Z3 (3 to 5%). This builds aerobic capacity, movement economy and threshold.

    Specific phase (February to April). Shift toward polarised. Keep Z1, reduce Z2 to roughly 5 to 8%, add deliberate Z3 blocks, Norwegian threshold sessions, VO2max repeats. This is when 30/30 intervals start to make sense.

    Race phase (May to September, depending on the calendar). Mixed, maintaining all systems while the specific demands of the race take over. For a half, return to more Z2 in the week before the start. For a full-distance event, hold polarisation with long Z1 sessions and short Z3 sparks.

    Recovery phase / off-season. Everything in Z1 with one sharp stimulus a week. Not the time for a plan.

    What about the 80/20 model

    The popular 80/20 model (80% easy, 20% hard) comes from Stephen Seiler’s research into intensity distribution among elites, and is a simplified version of the polarised model. It works well for runners training at very high volume, 15-plus hours a week. For an age-group athlete training 8 to 10 hours a week, the problem is different: the 80% “easy” training often is not easy at all. It ends up in a grey zone, too hard for recovery, too weak for progress.

    For an age-grouper, what matters more than choosing between the polarised and pyramidal model is this:

    • Keeping Z1 genuinely in Z1. The test: it should be possible to hold a conversation in full sentences.
    • Controlling Z3. A real VO2max repeat is one you would cut off your own arm to end.
    • Not dragging every session up to a perceived effort of 7 out of 10. That is the road to overtraining without progress.

    What to use when building toward a 70.3

    A concrete outline to work from:

    • November to January: pyramidal. Plenty of long Z1 (bike 2 to 3 hours, run 60 to 90 minutes), one Z2 session a week (for example 4×8′ at threshold), one short Z3 session (for example 6×3′ VO2max).
    • February to April: shift toward polarised. Two Z3 sessions a week (Norwegian double threshold, classic 4×4′ VO2max), Z2 limited to brick sessions and specific tests. Everything else in Z1.
    • May to September: race specificity. Two weeks before a 70.3, bring back Z2 (race-pace repeats: on the bike 2×30′ at 85% FTP, on the run 3×3 km at half-marathon pace).
    • October to November: everything in Z1 plus one sharp stimulus a week.

    There is no sacred percentage. There is a phase, a race, and an athlete’s own recovery. The 2026 scientific consensus: be periodised, not dogmatic.

    Verdict

    Polarised versus pyramidal is a false argument if the choice has to be made once and for all. The best adaptations come from a plan that shifts the intensity distribution across the season: pyramidal in the base period, polarised in the specific period, mixed at the race. Casado and the 2026 research say the same thing good coaches have said for years, just with numbers behind it now.
  • How Much Does an Age-Grouper Really Train?

    How Much Does an Age-Grouper Really Train?

    Anyone who has asked a coach how much they should train has heard some version of “it depends.” A weekly plan for a half distance should look different from one for an Ironman, that much is known. What has been missing is a concrete benchmark for how much the average age-grouper who actually finishes the race trains in a week. Until now. In May 2026, TrainingPeaks published a rundown on its blog of an independent scientific study in the peer-reviewed journal Frontiers in Sports and Active Living, giving the first real picture of that answer.

    What was studied, and how

    This was not a survey. It was objective session data exported from TrainingPeaks over a six-month period. Every participant had duration, distance, heart rate, Training Stress Score (TSS) and power zones logged. In total: 2,177 weeks of training from 95 age-groupers across 25 countries, 34,731 individual sessions.

    The sample is small in athlete count (95) but enormous in logged sessions. The data is objective, not raw Strava pulls where one athlete’s GPS catches a signal and another’s does not. The study was carried out by researchers at Deakin University in Australia and published in a peer-reviewed journal.

    Athletes were split into two groups:

    • Short-course: sprint, Olympic and middle distance, up to and including 70.3.
    • Long-course: full Ironman (140.6).

    Numbers worth pinning above your desk

    Weekly averages, taken across the full season:

    GroupMinutes/weekKilometres/weekTSS/week
    Long-course (Ironman)615 min (10h15)171 km574 TSS
    Short-course (up to 70.3)507 min (8h27)118 km452 TSS

    The claim that finishing an Ironman requires 15 hours a week of training still circulates in age-group circles, and these numbers are a reality check. The average is 10h15 for the full distance. Not 15, not 20. Ten, on average.

    For a half-Ironman, the short-course average is 8h27 a week. Also less than popular plans suggest.

    The second finding: training phase outranks age or sex

    The most interesting observation in the study: age and sex were weaker predictors of training load than the phase of the season. In other words, whether an athlete is 30 or 45, a woman or a man, the strongest influence on their weekly load is which phase of the season they are in.

    In the specific phase, the weeks closest to race day, TSS load runs about 21% higher than the general phase. In the taper/race/post-race phase it drops about 14% below the general phase. In the off-season it hits its low point: the study puts it around 340 min/week, roughly 38% below the general phase.

    That sounds obvious, but it has real consequences:

    Generic “12-week to Ironman” plans deserve suspicion. If a plan does not vary load between base, specific and taper phases, discard it.

    Comparing yourself with others on Strava only makes sense within the same phase. If a training partner logged 620 to 650 TSS in a week, check whether they are in the specific phase while you are just entering base.

    “Only 8 hours a week, so I won’t finish?” is the wrong question. Eight hours in the specific phase with well-distributed TSS can be more effective than 12 hours of chaotic hard work.

    What this means for the everyday age-grouper

    For an amateur working a 40+ hour week, this is good news:

    1. Your goals are more realistic than you think. Giving 8 to 10 hours a week puts an athlete in the international average for age-groupers finishing a half-Ironman. Fifteen hours a week is not required to finish a 70.3.

    2. TSS counts, not time. The 452 TSS/week short-course average works out to roughly 65 TSS a day. That could be an easy 90-minute ride (about 50 to 60 TSS) or a 60-minute threshold run (80 TSS). What matters is that the weekly total adds up.

    3. Periodisation beats volume. The same training time, spread through a 3:1 progression (three weeks building, one week recovering) with distinct phases, produces dramatically better results than training 8 flat hours a week all year with no variation.

    4. Compare against the average, not the elite. A pro trains 25 to 30 hours a week at 1,200+ TSS; that is not the right benchmark. The benchmark is 615 minutes and 574 TSS for an Ironman.

    What not to do with this data

    Two interpretive traps worth watching for:

    Trap 1: “If the average is 10 hours, 10 hours is enough for me.” That figure is averaged across the whole season and the whole sample. What counts as “enough” depends on the finishing time being chased. Finishing an Ironman in 14 hours is a different task from qualifying for Kona.

    Trap 2: “If TSS is 574, every week should be 574.” No. That is a seasonal average across different phases: base weeks run around 400, the specific phase 700 to 750, taper below 500. Week-to-week fluctuation is correct and expected.

    The verdict

    The first study of this scale shows that finishing an Ironman as an age-grouper does not require living like a monk. It requires consistency, periodisation and a defined TSS load, distributed sensibly through the season. The average is 615 minutes a week. Not 1,000.

  • SWOLF and Swimming Economy: Where You Lose Time

    SWOLF and Swimming Economy: Where You Lose Time

    The watch shows you swam 1500 m in the same time as a year ago, despite training more. The problem is rarely fitness. More often it is how much effort gets wasted every hundred metres. That is why SWOLF is worth knowing.

    What SWOLF is

    SWOLF is short for Swim Golf, and the scoring works exactly like golf: lower is better. Two numbers go into it:

    • time to cover one pool length, in seconds
    • stroke count over the same length

    Add them together. The result is your SWOLF.

    Example: you swim 25 m in 35 seconds with 20 strokes (single-arm cycles). SWOLF is 55. Next time you cover the same 25 m in 33 seconds with 18 strokes: SWOLF is 51. That is a four-point improvement, even if the difference was not obvious to the eye.

    Why it matters for a triathlete

    Runners measure running economy in watts or pace per watt. Cyclists have FTP and TSS. Swimmers mostly measured pace for years, but pace tells you how fast, not how efficient. SWOLF links speed with technique.

    In triathlon, fatigue builds through the swim to the finish. Inefficient technique costs energy that will not come back on the bike. Someone with weaker aerobic fitness but better technique often exits the water almost as fast, and with a noticeably smaller energy deficit.

    How to measure SWOLF

    The simplest way is a sports watch. Garmin, COROS, Suunto and Polar all calculate SWOLF automatically during pool swimming. Start pool swim mode, swim, and the watch counts strokes and time. Once the session ends, there is a SWOLF value per length and an average for the whole workout.

    Without a watch, it can be done by hand: have someone time the swim with a stopwatch and count strokes. One measured session a week is enough to track progress.

    What the numbers mean

    Rough benchmarks for a 25 m pool, freestyle:

    • below 35: elite level, rarely seen among amateurs
    • 35 to 45: very good efficiency, a technically trained amateur
    • 45 to 55: average for regularly training adults
    • above 55: significant technical room, the biggest potential for improvement

    In a 50 m pool the numbers run higher: a result in the 70s over 50 m is very good economy.

    Compare SWOLF against your own numbers, under the same conditions: same pool, similar fatigue. Comparing it against a training partner makes little sense if you have different heights and arm spans.

    The trap: a low SWOLF for the wrong reasons

    SWOLF drops when you swim slower with long strokes, and rises when you thrash through short, fast ones. Neither extreme is ideal. The goal is the right balance of pace and stroke count, not minimising either number at any cost.

    So do not track SWOLF alone. Track it alongside pace. If SWOLF drops by 4 points but pace slows by 5 seconds per 100 m, something has gone wrong.

    How to improve SWOLF: three routes

    1. Increase distance per stroke (DPS)

    DPS, distance per stroke, is how many metres you cover per arm cycle. Longer is better, since it means less work for the same distance. Useful drills: closed-fist drill, single-arm drill, catch-up drill. Each one teaches you to engage the catch before pulling, which produces propulsion for less effort.

    2. Cut frontal drag

    A great pull can still lose energy if the body is not sitting flat in the water. Legs dropping, the hand crossing the midline on entry, lifting the head to breathe: each of these creates drag that raises the number of strokes needed per metre. Footage shot from the side and from underwater often reveals faults that are hard to feel.

    3. Find your optimal stroke rate

    Too slow a stroke rate loses momentum between strokes. Too fast and the strokes get short and inefficient. For triathlon distances of 1.5 km and up, most amateurs settle around 55 to 65 cycles a minute, though it is individual. Rather than copying someone else’s rate, adjust gradually and watch how SWOLF responds at a fixed pace.

    How much you can gain

    Most adult amateur swimmers can improve SWOLF by 5 to 10 points after a few months of consistent technique work. For scale, 10 points in a 25 m pool over an Olympic-distance 1500 m swim means a few hundred fewer strokes, and correspondingly less energy spent, energy that stays available for the bike.

    Start with one measured session a week. Write down the result. Come back in a month and compare.

  • Race Simulation Training: Kill Start-Line Nerves

    Race Simulation Training: Kill Start-Line Nerves

    You’re on the start line. Goggles on for the hundredth time, but the strap never sits the way it does at the pool. The bike: you built it out of the travel box and did a couple of loops round the block, but you’ve never done that in a wet wetsuit, with the PA blaring and a few hundred other athletes around you. A bottle mounted between the aerobars, except how much did you actually drink from that setup in training?

    This is exactly the problem race-simulation training is meant to solve.

    What a Simulation Session Is, and Why It Matters

    A simulation session is a workout where you deliberately recreate the conditions and sequence of race day: the swim exit, T1, the bike, T2, the run. It’s not about covering the full race distance, that’s what your A-race is for. It’s about reprogramming your nervous system so that nothing on race day feels new.

    There are three benefits:

    • You test tactics and pacing before there are real consequences
    • You test gear and nutrition under real conditions, not just in your head
    • You build confidence: you’ve done this before, and you know you can handle it

    When to Schedule a Simulation Session

    The ideal is twice per training block: one session about 8 weeks before the race, a second about 4 weeks before. The first is reconnaissance, you find out what isn’t working and what needs fixing. The second confirms you’re ready.

    What not to do: don’t schedule a simulation the week before the race. You need 5 to 7 days to recover from a session like this, and taper week is not the time for new experiments.

    Structuring a Simulation Session (Olympic Distance)

    Swim: 500 to 750 m

    Instead of just swimming the distance, recreate the effort pattern of the race:

    • 100 m at start pace (the opening metres of a mass start can get chaotic)
    • 200 m at settling pace (moderate effort, finding your rhythm)
    • 100 m hard (simulating a sprint to a buoy or the finish)
    • Short rest, repeat

    One key drill: stripping off your wetsuit. Do it under time pressure, twice, with people watching if you can arrange it.

    Bike: about 30 to 40 km

    A format TrainingPeaks recommends for Olympic distance:

    • 4 x 2 km at race pace-plus (slightly above your target FTP%)
    • 8 km at base pace between intervals
    • No breaks between blocks, ride it continuously, the way you would on race day

    Non-negotiable: eat and drink exactly what you plan to use on race day. Not a simulation of your nutrition, the real thing: the same gel, at the same point on the course, that you’ll use on race day.

    Run: 5 to 10 km

    Run it straight off the bike. That’s the whole point of the exercise.

    • 5 x 1600 m at race pace, with 400 m jog recoveries
    • Run the first 800 m purely by feel, without looking at your watch. Your legs lie about pace after the bike.

    What to watch: how far off your target pace is that first kilometre. If you’re starting too fast, that’s something to fix before race day.

    What to Test During the Simulation

    Some things seem obvious and only fail on race day:

    Goggles. Do new ones slip on a run-in start? If you haven’t been in the water with them 10-plus times, you’re carrying a risk.

    Cleats. Jumping into your shoes with cleats already clipped to the pedals, or putting shoes on standing beside the bike. Do it at least five times before the simulation.

    Race number. How are you fixing it? Pins, elastic, a belt? Does it stay straight through 10 km of running?

    Running cap. Does it stay on during the run.

    The Mental Side: The Invisible Piece

    A simulation session is also a mental exercise. Start the clock, set yourself a race target, and go. Watch what happens in your head once the pace gets hard.

    Feel the pressure? Good, that’s where the learning happens. Every hard 200 metres of a simulation session is a rehearsal for the real race.

    Don’t avoid discomfort in these sessions. You need to learn that you can handle it, and that means being in a hard place at least once before race day.

    Two Sessions per Block

    Eight weeks out: reconnaissance, diagnosing weak points. Four weeks out: confirmation that you’re ready, the sharp point of the season.

    Each session costs 2.5 to 4 hours. In return: a calm start, gear you’ve already tested, and a head that knows it’s done this before.

  • Running in the Heat: How Not to Blow Up on Race Day

    Running in the Heat: How Not to Blow Up on Race Day

    June, 11 a.m., 32°C (90°F), the sun fighting the shaded start of T2. You come off the bike with a plan: hold 5:10 per km. After 800 metres your body says no. By 2 km you’re slowing down. A familiar story.

    The problem isn’t weakness, it’s a bad strategy. Running in the heat follows its own rules, and ignoring them costs minutes, and with bad pacing, costs your health.

    Why Heat Wrecks Your Pace

    Above 28°C (82°F) your body sends more blood to the skin to cool itself. Less blood reaches the muscles. Your heart rate climbs at the same pace you’d hold on a cooler day. This isn’t a motivation problem, it’s physiology.

    Research on heat and endurance performance suggests that every 5°C (9°F) above the optimal starting temperature (roughly 12 to 15°C, 54 to 59°F) can slow an average amateur’s pace by 10 to 20 seconds per kilometre. Over 10 km that’s as much as 1.5 to 3 minutes.

    Strategy: Forget Pace, Run on RPE

    The key mistake on a hot run is fixating on pace from a cool day. In the heat, set a target RPE (rate of perceived exertion) instead of a speed.

    • For an IRONMAN 70.3 in the heat: target RPE 6 to 7/10 for the first 7 km, and let your body pick up the pace only in the final three
    • For a sprint or Olympic-distance race in the heat: RPE 7 to 8/10 for the first 3 km, then see what’s left in your legs

    A Garmin or COROS watch will show your heart rate, which is a better measure of effort on a hot day than pace. A heart rate above lactate threshold in the first two kilometres is close to a guarantee of a blow-up in the closing stages.

    Cooling: Before, During and After

    Before the Run (Pre-Cooling)

    The most effective method: an ice slushie or a cold drink 10 to 15 minutes before T2. Research shows that dropping core temperature by as little as 0.5 to 0.7°C (about 1 to 1.3°F) before the run start translates into noticeably better performance over the opening kilometres.

    Other options: a wet towel on your neck and wrists while you wait for T2, a cold, wet headband.

    During the Run

    At every aid station take water and pour it over your head, neck and wrists, not just drink it. A wet shirt or a cap with a soaked brim noticeably lowers how hot your body feels for a few minutes.

    If organisers hand out sponges, take all of them. Soaked shorts or socks are not a problem, overheating is.

    Hydration and Electrolytes

    General rule: 150 to 250 ml every 15 to 20 minutes in high heat. Water alone isn’t enough, heavy sweating strips sodium and potassium too. Electrolyte tablets or an isotonic drink at aid stations aren’t optional, they’re necessary in races above 25°C (77°F).

    Warning sign: you stop sweating even though your body is hot. That’s a sign of dehydration or heat stroke, get off the course immediately.

    Pacing: The Negative Split in the Heat

    In normal conditions a negative split, the second half faster than the first, is a strategy for advanced athletes. In the heat it should be the default even for amateurs.

    A starting plan for 10 km above 28°C (82°F):

    • km 1 to 3: 15 to 20 seconds per km slower than your target pace
    • km 4 to 7: watch your heart rate, hold RPE steady
    • km 8 to 10: if you have anything left, pick up the pace

    Simple arithmetic: start too fast and you lose 2 to 4 minutes in the second half. Start sensibly and you gain 1 to 2 minutes at the end.

    Heat Adaptation, If You Have Time

    The body adapts to heat training within 10 to 14 days of regular exposure. You don’t need to train through the middle of the day right away, moving a few sessions to the 10 a.m. to 2 p.m. window for two weeks before a hot race is enough. The effect: better thermoregulation, a smaller heart-rate rise in heat, lower perceived effort.

    A 20-minute sauna session after training works too, the same heat-adaptation effect without running in full sun.

  • Mid-Season Volume: How Much Training Do You Really Need?

    Mid-Season Volume: How Much Training Do You Really Need?

    The season is in full swing, and triathlon groups are debating: one athlete trains 15 hours a week and posts it on Strava, another swears four hours is enough. Both are right, and neither is.

    The right training volume depends on your goal, your level and how much recovery you can actually get. But the science points to a few concrete thresholds worth knowing.

    The Minimum That Actually Moves the Needle

    Recommendations from Tri Coaching Finland and TrainingPeaks analysis point to a few tiers:

    4 to 6 hours a week: enough to feel fit and improve your base endurance. A realistic ceiling for someone with a job and a family. Split: one swim, two bike sessions (one longer), two runs. Progress is slow but consistent.

    6 to 9 hours a week: this is where serious sprint and Olympic-distance racing starts. Roughly 75% of volume in zone 2 (aerobic), 25% above threshold. At this level you can compete for decent times at local and regional races.

    10 to 15 hours a week: full-distance ambitions, a half-distance IRONMAN as the season goal. Requires planned recovery and sensible periodisation, or you end up injured in August.

    Zone 2 Is the Foundation, Not the Boring Option

    If you train 8 hours a week and spend 6 of them in zone 3 to 4 (suffering, but not quite hard, not quite easy), you’re doing it wrong. Research consistently confirms that most of your volume should sit in zone 2, conversational pace, where you can talk in full sentences.

    It’s mentally uncomfortable because zone 2 looks too easy. But that’s exactly where mitochondrial density, movement economy and fat-burning capacity get built, and those adaptations move the needle more than another interval session.

    A practical rule: for every hour of intense training, put in at least three hours of aerobic work.

    Why Consistency Beats Intensity

    This is one of the few points where training science agrees across the board: regular, smaller-volume sessions outperform occasional, oversized training blocks.

    Three 45-minute sessions spread evenly through the week beat one 3-hour session once every 10 days, with a much lower risk of injury, illness and burnout. Your muscles, tendons and hormonal system need regular training signals, not sudden overload.

    In practice: if you have less time this week, don’t try to make it up the next. Keep the pattern and shorten the sessions instead.

    When Volume Starts to Hurt

    The trap in the middle of race season is stacking high volume onto a body still tired from racing. After every race you need 1 to 2 days of easy training for every 10 km of running distance covered (a rough rule of thumb). After an IRONMAN 70.3, a minimum of a week of lighter training before you start building volume again.

    Signs you’re training too much: resting heart rate rising more than 5 to 7 beats per minute above normal, HRV clearly below your baseline, worse sleep quality, chronic leg fatigue that persists after three days. A watch with HRV monitoring (Garmin, COROS, Polar) helps you catch these signals earlier.

    What 7 to 8 Hours a Week Looks Like in Practice

    A sample week’s skeleton in the middle of an Olympic-distance season:

    • Monday: rest or 30 minutes of mobility work
    • Tuesday: 45-minute threshold run (1 x 20 minutes in zone 3 to 4)
    • Wednesday: 45 to 60-minute swim (technique plus 2 x 400 m at threshold)
    • Thursday: 60 to 75-minute bike (zone 2, steady rhythm)
    • Friday: rest or a short 30-minute zone 1 run
    • Saturday: long bike, 2 to 2.5 hours, zone 2
    • Sunday: brick session, 45-minute bike plus 20-minute run off the bike

    Total: about 7.5 hours. There’s no room here for heroic sessions, just a plan.

  • The Power Curve: Why CP and W’ Beat FTP

    The Power Curve: Why CP and W’ Beat FTP

    You do a 20-minute FTP test. It comes out at 250 W. All your zones flow into the app: Z2 up to 165 W, Z3 up to 205 W, Z4 up to 250 W. And you train that way for eight weeks. Meanwhile your anaerobic work, 30-second intervals, sprints on a descent, attacks on climbs, lives in a vacuum. FTP tells you nothing about it, because FTP is one number for one point on the curve.

    The power curve changes that. Critical Power (CP) plus W’ give you two points instead of one. Suddenly you see the whole physiology of your legs, not just that one 20-minute segment.

    What the power curve is

    The power curve (the power-duration curve) is a graph showing the maximum power you can hold for a given length of time. Watts on the vertical axis, seconds or minutes on the horizontal.

    • 5 seconds: a neuromuscular sprint. Trained age-grouper: 800-1100 W. Pro: 1500-1800 W.
    • 1 minute: max VO2max effort. Age-grouper: 350-450 W. Pro: 600-700 W.
    • 5 minutes: the classic VO2max test. Age-grouper: 280-340 W. Pro: 450-500 W.
    • 20 minutes: the classic FTP test. Age-grouper: 220-280 W.
    • 60 minutes: true threshold power (CP).

    The longer the duration, the lower the power. The curve decays exponentially. Two numbers describe it: CP and W’.

    Critical Power: your true aerobic limit

    Critical Power (CP) is the highest power you can hold in physiological steady state. Below CP, your lactate, VO2 and pH stay stable. Above CP, all three climb exponentially and you move into non-steady state: fatigue accumulates and sooner or later you blow up.

    CP is not the same as FTP, though the two sit close together. CP typically runs 4 to 5% higher than your true 60-minute maximum power. So if your real one-hour power is 240 W, CP comes out around 250-252 W. FTP usually lands somewhere in between, around 245 W.

    The difference sounds marginal. But it is a meaningfully more precise metric, because CP is not “60 minutes that felt hard”. It is a value calculated mathematically from two or three tests, grounded in physiology rather than how you felt.

    W’: your anaerobic tank

    W’ (read “W prime”) is the work you can do above CP before you are exhausted. Measured in kilojoules (kJ) or joules.

    It is a finite store of anaerobic energy. Picture a fuel tank: you do not burn it while idling below CP. But push the throttle above CP and the tank empties. When it is gone, you are at zero.

    Typical values:

    • Age-group triathlete: W’ = 10-15 kJ
    • Road cyclist with a strong anaerobic engine: W’ = 18-22 kJ
    • Track sprinter: W’ = 25-30 kJ

    With CP and W’, you can calculate exactly how many seconds you will hold a given power above CP. The formula is simple: time = W’ / (P – CP), where P is the power you are holding and CP is your critical power.

    Example: CP = 250 W, W’ = 15 kJ. You hold 350 W (an attack on a climb). How long can you sustain it? 15,000 J / (350 – 250) = 150 s = 2.5 minutes. After that, you blow up.

    How to test CP and W’

    Two protocols are most common:

    1. The 3 to 12-minute test (classic):

    • Day 1: 20-minute warm-up, then a 3-minute maximal all-out effort. Average power is P3min.
    • Day 2 (or after 48 hours of recovery): 20-minute warm-up, then a 12-minute maximal effort. Average power is P12min.
    • Calculation: CP = P12min – ((P3min – P12min) x 3) / 9 (an approximation). W’ = (P3min – CP) x 180 seconds.

    In practice, apps such as TrainingPeaks, Golden Cheetah and WKO5 calculate this for you once you upload the files.

    2. The 3-minute all-out test (Vanhatalo/Burnley, 2007):

    • 20-minute warm-up.
    • 3 minutes of maximal effort: maximum power from the first second, holding whatever you can to the end.
    • CP = average power over the last 30 seconds.
    • W’ = the work done above CP in the first 150 seconds.

    A brutal test. But faster: you get both metrics in 25 minutes.

    CP vs FTP: when to use which

    • Training for IRONMAN 70.3 or full-distance starts: FTP is enough, simpler and well proven over long training blocks.
    • Training for T100 or fast short-course racing: CP + W’, for precision in the anaerobic zones.
    • Age-group triathlon, building an aerobic base: FTP is enough.
    • Advanced triathlon, fighting for seconds in a 70.3 race: CP + W’, for better pacing analysis.
    • No power meter: neither, use heart rate and RPE.

    For most age-groupers, FTP is still the practical standard. But for anyone already using WKO5 or Golden Cheetah, analysing every interval, moving to CP and W’ is the natural next step.

    Training zones based on CP

    The classic Coggan model has seven zones based on FTP. CP opens up an extra, seventh zone for anaerobic training:

    • Z1 (recovery): below 55% CP
    • Z2 (aerobic base): 56-75% CP
    • Z3 (tempo): 76-90% CP
    • Z4 (threshold): 91-105% CP
    • Z5 (VO2max): 106-120% CP
    • Z6 (anaerobic capacity): 121-150% CP, where you train W’
    • Z7 (neuromuscular): above 150% CP, sprints of 10-30 s

    For a triathlete, Z2 and Z4 matter most. Most training, 64-74% of FTP or roughly 65-75% of CP, is aerobic base. Z4 is threshold intervals. Z6 and Z7 are seasonal, done in blocks, not daily.

    Practical takeaways

    1. If there is no power meter, the power curve does not matter. Go back to heart rate and pace.
    2. If FTP alone drives the app, that still works well for 80% of sessions. No need to change.
    3. If every session gets analysed in TrainingPeaks or WKO, test CP and W’. See how the zones shift and whether the intervals are actually hitting their targets.
    4. If racing in virtual events, W’ is critical. Knowing there is, say, 15 kJ available for attacks means planning when to spend it and when to save something for the finish.

    CP and W’ are not magic. They are mathematics, mathematics that shows real physiology, not the round marketing numbers from a 20-minute FTP test.

  • How to Find Your Optimal Swimming Pace

    How to Find Your Optimal Swimming Pace

    Swimming is a physical activity, and it’s also an exercise in managing pace: a mix of technique, endurance and strategy in the water. Many swimmers ask themselves one question: what pace is actually good for me? There’s no single answer, because it depends on training level, distance, stroke and conditions in the water. Understanding and setting your own pace is central to effective training, better results and enjoying every metre in the water. The sections below look at swim pace from a few different angles.

    Pool Swim Pace

    Why Pool Pace Matters

    Pool pace is the basic measure of a swimmer’s progress. Tracking the time needed to cover a set distance lets you gauge your current level and plan your next training targets. Stroke efficiency and technique have a direct effect on speed, so refining technique matters as much as building fitness. A few tools help track pace:

    • Stopwatches and timers: the classic method, good for anyone who wants to focus purely on timing without distracting extras.
    • Sports watches with swim tracking: modern devices that measure distance, pace and stroke count, and analyse efficiency from motion sensor data.

    Regular measurement makes it possible to track progress and adjust the training plan based on results.

    Typical Pace by Swimmer Level

    Pool pace varies significantly by training level:

    • Beginners: around 2:00 per 100 m on average. At this stage, the priority is building efficient technique and a base level of endurance.
    • Intermediate swimmers: pace sits around 1:30 min/100 m, alongside more training aimed at technique and conditioning.
    • Elite swimmers: times below 1:00 min/100 m reflect a very high level of technique and endurance.

    Research published in the Journal of Sports Sciences, among other journals, backs this up: regularly tracking pace supports effective development of swimming skill.

    Open Water Swim Pace: Conditions and Challenges

    What Determines Pace in Open Water

    Swimming in open water, lakes, rivers or the sea, is significantly harder than swimming in a pool. Currents, waves, water temperature and visibility can slow pace by as much as 5 to 20 seconds per 100 m compared with the pool. Tougher conditions raise fatigue and demand more, both physically and mentally.

    At IRONMAN races, for example, the swim takes place in open water, where even experienced triathletes have to expect a slower pace than they would hit in the pool.

    Elite Pace: The World’s Best

    The best 10 km open water swimmers hold a pace of around 1:12 per 100 m, the product of years of training, technique and race strategy. Their pace over sprint open water distances is faster still.

    How Stroke Affects Pace

    The Fastest Strokes: Freestyle and Backstroke

    • Freestyle is the fastest and most efficient stroke. It delivers the highest speeds and is the default for amateurs and professionals alike.
    • Backstroke is slower, but more comfortable and puts less strain on certain muscle groups, which helps during longer sessions and rehab work.

    Butterfly and Breaststroke: Demands and Traits

    • Butterfly demands strength and endurance, is technically difficult and hard to hold over long distances. Good technique matters here in particular, to avoid injury.
    • Breaststroke is the slowest stroke, but popular with amateurs for its comfort and relatively low demand on the respiratory system.

    For performance, and for triathlon specifically, freestyle is the stroke most commonly recommended.

    Swim Pace in Triathlon

    Pace Among Professionals

    Top triathletes swim around 1:15 min/100 m for men and 1:20 min/100 m for women. Those times come from strong technique, well-planned training and the ability to adapt to changing conditions.

    Gear and Conditions

    A wetsuit in open water races improves buoyancy and reduces drag, which can shave a few seconds off pace per 100 m. Calm, warm conditions favour faster times, while rough weather demands more flexibility and adaptability from the athlete.

    What Counts as a Good 1K Pace?

    Elite Numbers

    Elite swimmers cover 1 km in under 10 minutes, reflecting a very high level of fitness, technique and endurance.

    Amateur Benchmarks

    For recreational swimmers, or those preparing for a first race, hitting around 20 minutes is already a solid target to train toward. A time under 15 minutes points to strong fitness.

    Tracking and Planning Progress

    Regular time trials over 1 km, under controlled conditions, help assess training effectiveness and set realistic goals. Using data such as 100 m pace makes it possible to predict and plan results over longer distances.

    Planning Swim Training Around Pace

    Structure and Periodisation

    Consistency is the foundation. A training plan should include technical sessions (stroke work), endurance sessions (longer sets in the aerobic zone), intervals (high intensity, for example 4×100 m with 30 seconds’ rest) and recovery.

    A Sample Microcycle for an Intermediate Swimmer

    • Monday: 1500 m warm-up, 6×100 m at threshold pace (around 1:30 min/100 m), 200 m cool-down
    • Wednesday: 800 m technique work, 4×50 m sprint, 600 m easy swimming
    • Friday: intervals, 10×100 m at RPE (Rate of Perceived Exertion, a subjective sense of intensity) 7 to 8 out of 10, with 20 seconds’ rest
    • Sunday: 2000 m continuous, steady swimming at zone 2 pace (moderate endurance, around 65 to 75% of maximum heart rate)

    Reading the Data

    • Heart rate zones: help pin down effort level. Zone 2 is a comfortable pace where the body burns mostly fat.
    • FTP (Functional Threshold Pace): the threshold pace a swimmer can hold for roughly 30 to 60 minutes, central to anaerobic threshold work.
    • TSS (Training Stress Score): a measure of overall training load that accounts for both intensity and session length.

    Tracking these numbers regularly helps prevent overtraining and helps keep motivation up.

    Recovery, Nutrition and Mental Preparation

    Proper recovery, good sleep and balanced nutrition are essential to improving both pace and endurance. Sleep restores the nervous system and lets muscles rebuild. Carbohydrates are the primary fuel, and protein supports muscle repair. On the mental side, visualisation and mindfulness help manage race-day nerves and keep focus in the water.

    Swim Pace Is Something You Shape

    Swim pace isn’t fixed. It shifts with deliberate training, better technique and mental preparation. Whether you’re new to swimming or working to improve a triathlon split, the fundamentals are patience, consistency and setting realistic new goals. Start by measuring your current pace, then build a training plan on that baseline: each metre gets easier to cover from there.

  • How to Start Triathlon Training: A Beginner’s Guide

    How to Start Triathlon Training: A Beginner’s Guide

    A triathlon combines swimming, cycling and running into one race. It tests your strength, endurance and determination. Don’t let that put you off: triathlon is open to anyone, regardless of starting fitness level, with the right training. This guide covers the basics of the sport, gear choices and training strategy to help you get started.

    What Is a Triathlon?

    A triathlon is a multi-discipline race that combines swimming, cycling and running. Distances range from sprint races to standard-distance events up to the full Ironman distance. Sprint distance is one of the shorter options: 750 metres of swimming, 20 km of cycling and a 5 km run. At the other end of the spectrum is the long-course distance: 3.86 km of swimming, 180.25 km of cycling and a marathon run of 42.195 km. There are plenty of distances in between. Beginners are generally advised to start with a shorter distance and build up gradually.

    Gear You Need to Get Started

    The basic gear you need for triathlon training is a swimsuit, a bike and running shoes.

    Swimming is the first discipline in a triathlon, so a proper swimsuit matters. Choose one that’s comfortable and allows a full range of movement. Some races, particularly open water ones, may also require a wetsuit.

    The bike is the second piece of equipment. You can start with whatever bike you already own. If you plan to race, though, a dedicated triathlon bike, lighter and more aerodynamic, is worth the investment.

    Running shoes should be comfortable and properly fitted. Since you’ll be running after an intense swim and bike leg, good shoes make a real difference to comfort and performance.

    Beyond the essentials above, a bike helmet, sunglasses and a water bottle are worth having on race day. A sports watch is also useful for tracking progress and monitoring heart rate.

    Triathlon Training Basics

    The foundation of triathlon training is balancing work across swimming, cycling and running. Safety matters, and regular sessions let you build endurance and strength gradually. As Joe Friel writes in The Triathlete’s Training Bible, the key to triathlon success is deliberate training planning and a focus on technique in each discipline. He recommends increasing training intensity and volume gradually, to avoid injury and early burnout.

    Your training routine should include sessions in each of the three disciplines, plus strength work and stretching. Build in time for rest and recovery, and pay attention to nutrition. Triathlon calls for a holistic approach to training and health.

    Why a Training Plan Matters

    A structured training plan is central to triathlon success. It helps balance training across the three disciplines, ensures adequate recovery and makes it possible to track progress. Various training plans are available online, covering how to split sessions between swimming, cycling and running, and when and how long to rest. Fitting the plan to your own ability and goals matters more than following any plan to the letter.

    Nutrition and Hydration

    Diet and hydration matter as much as training itself. They fuel your sessions and support muscle recovery afterward. Triathletes need a balanced diet: protein for muscle repair, carbohydrates for energy, and fat for longer-lasting fuel. Hydration matters just as much, especially during long training sessions or races. Learning to fuel and hydrate properly is central to performing at your best.

    Recovery and Rest

    Rest and recovery are central to performing well in triathlon. Learning when and how to rest helps you avoid overtraining and injury. Recovery methods range from simple rest and sleep to physical therapies such as massage or ice treatment. Rest is often overlooked, but it matters as much as training itself.

    Motivation and Goals

    Staying motivated matters for long-term success in triathlon. Setting realistic goals and tracking progress helps with that. Whether the goal is finishing a first sprint-distance race or qualifying for an Ironman, every small step moves you closer to it.

    Triathlon demands determination, endurance and strength, but with the right training plan, anyone can take it on. Keep in mind the value of the right gear, balanced training, proper nutrition, recovery, and setting realistic goals.

  • Clip-On Aero Bars: Get Aero Without a TT Bike

    Clip-On Aero Bars: Get Aero Without a TT Bike

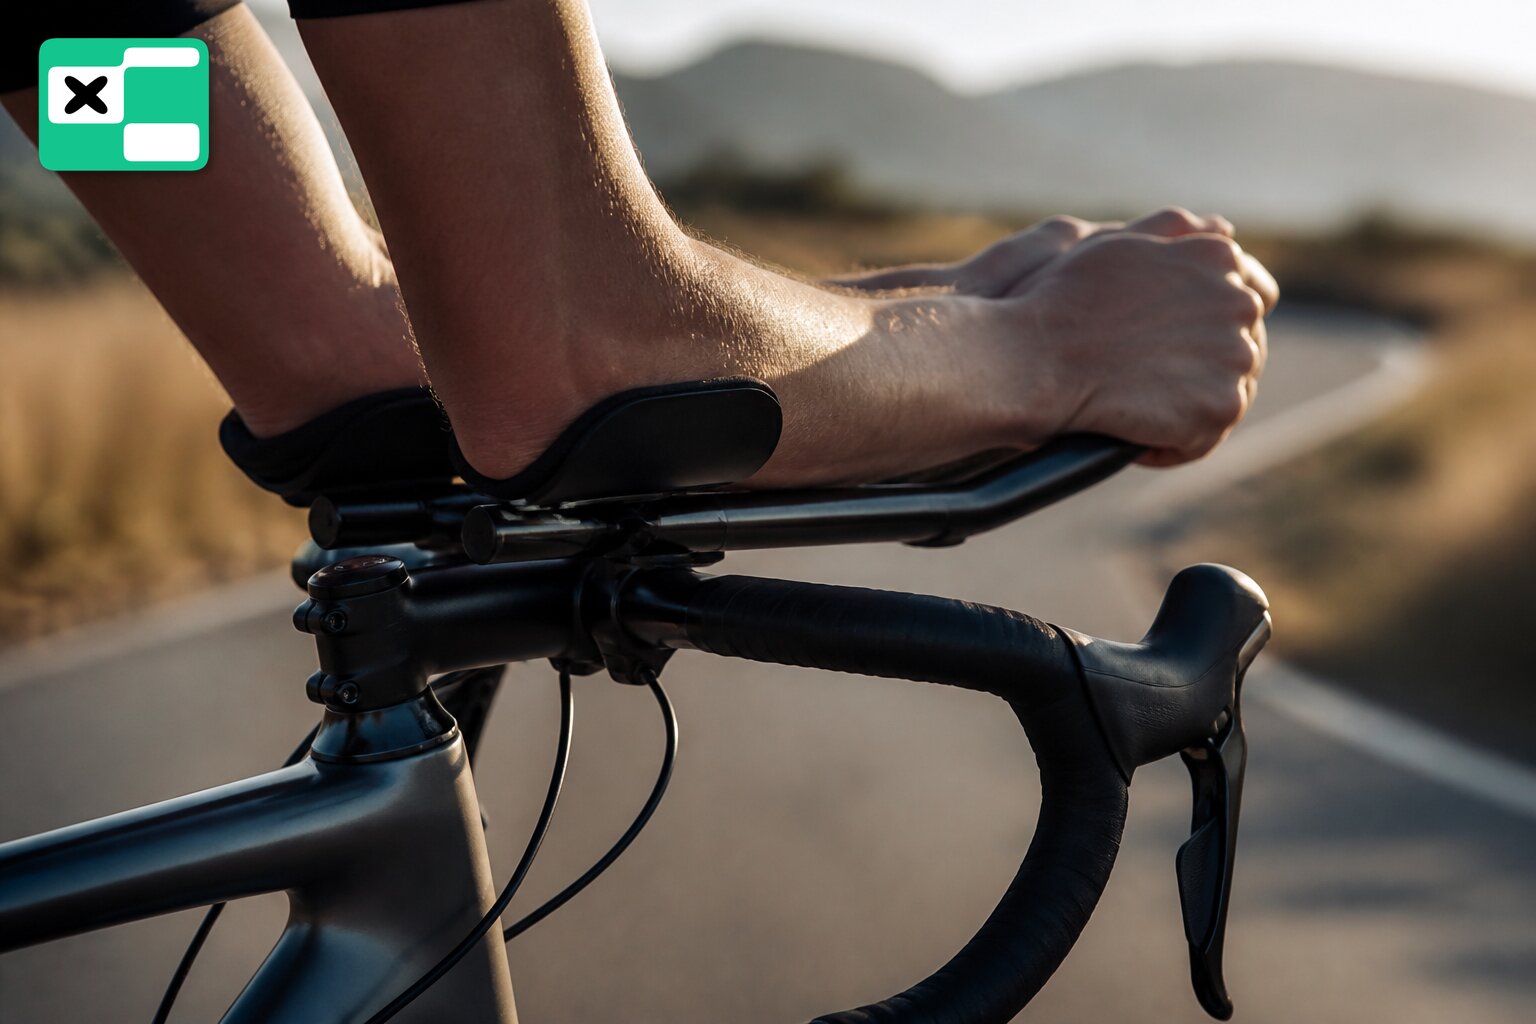
    A full time trial bike costs a fortune, and you have one road bike and a budget already spent on a wetsuit and a watch. The good news: clip-on aero bars get you into an aero position for under €50. They bolt onto a standard road handlebar and deliver what saves the most free watts on a bike, less frontal drag. Here is how to choose and set them up properly.

    Why triathletes use clip-ons

    On draft-legal distances, most amateur sprint ITU races, clip-on aero bars are banned. World Triathlon withdrew them from drafting races from the 2023 season for pack safety. Always check your own race’s rulebook. On long, non-drafting distances, IRONMAN, 70.3, most Challenge races, an aero position is the cheapest way to save energy. Tucking the torso and forearms cuts air resistance, which at 30 to 40 km/h eats most of your power. Clip-ons on a road bike are also a good testing ground: you try the position before spending thousands on a dedicated time trial bike.

    Three things to check when choosing

    Adjustability. This matters most. An aero position is not natural, so you need to fine-tune pad height, and the width and angle of the extensions. The more adjustment range, the easier it is to find a setup you can hold for hours, not minutes.

    Pad height and spacers. Once clip-ons go on a road bike, the knees can come too close to the chest at the top of the pedal stroke, and it gets cramped. Spacers under the pads open that space back up and save your breathing.

    Handlebar compatibility. A clip-on needs a flat section of bar roughly 2 to 3 cm wide on each side of the stem. Check whether your aero bar even has somewhere to clamp on, not every one does.

    Aluminium or carbon: where to start

    Aluminium is plenty to start with. At Decathlon, the aluminium Van Rysel triathlon clip-ons cost €44.99, a sensible first buy to test whether an aero position works for you. Carbon is a bigger outlay: carbon-fibre clip-ons start at a few hundred dollars or euro and dedicated, integrated aero systems can run into the thousands, worth it once you know what you want and race against the clock. Among proven adjustable clip-ons, the names that keep coming up are Profile Design, Vision (TriMax) and Zipp (Vuka Clip), differing mainly in adjustment range and price.

    Set them up before you ride

    Start the extension angle level or slightly upward, up to about 10 degrees, so the forearms rest and the shoulders relax. Do the first outings on a turbo trainer or an empty, straight road: an aero position shifts the bike’s centre of gravity and handling, especially under braking and in corners. Get comfortable steering before riding into traffic.