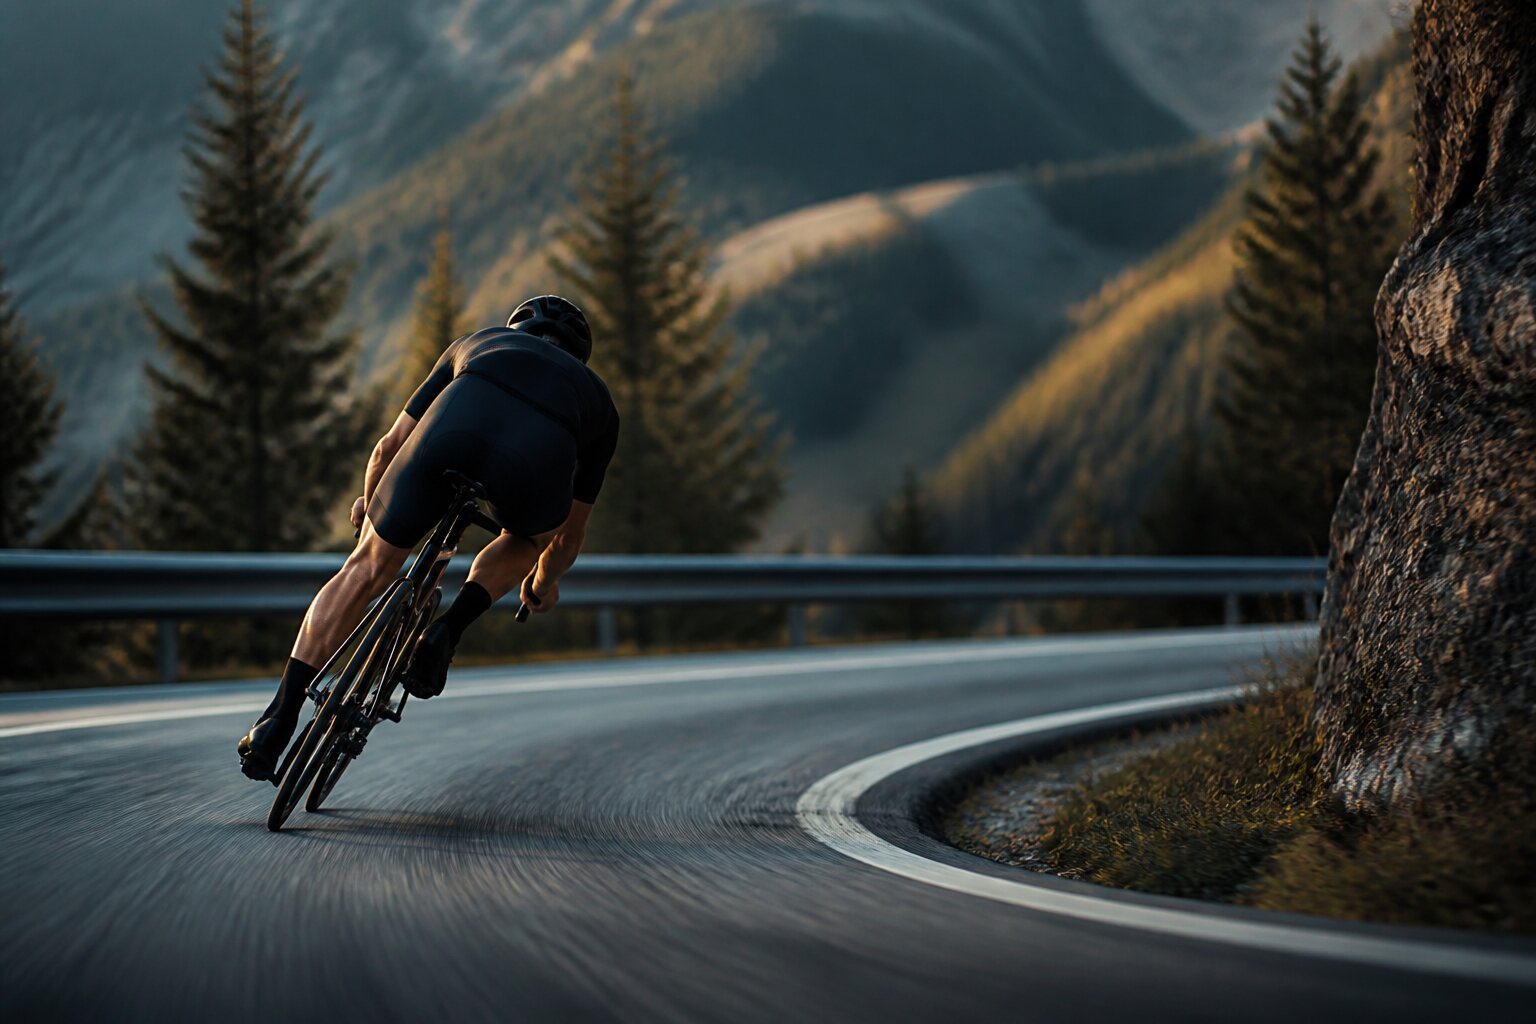
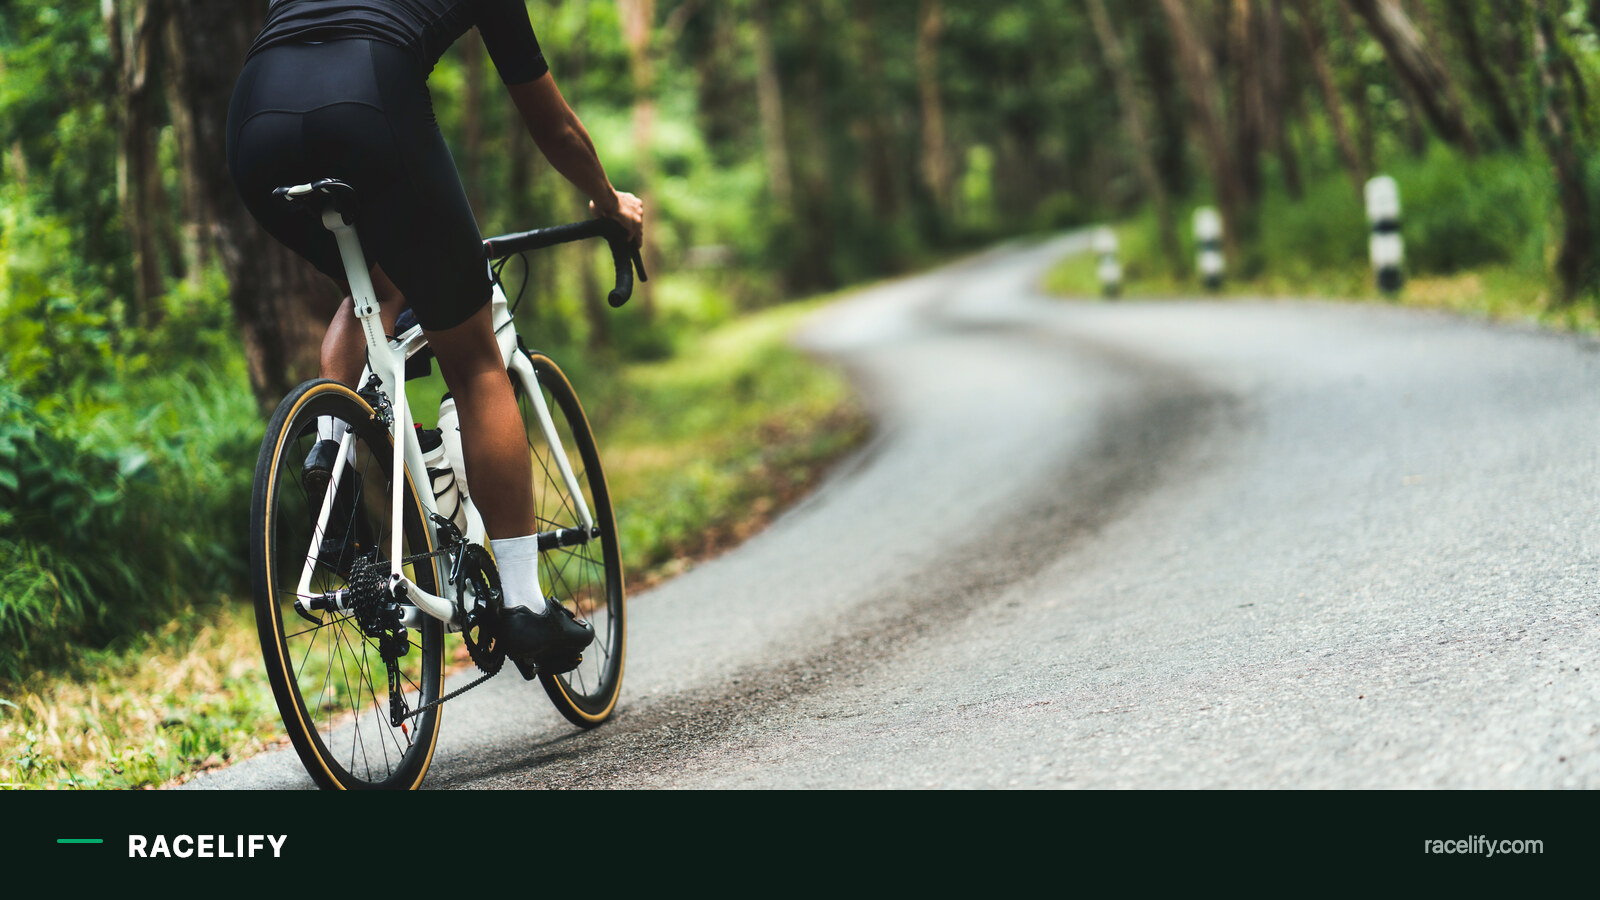
You have trained your FTP, you own an aero helmet and expensive wheels. Yet at every corner you brake down to walking pace. You lose distance that you then claw back with brutal effort. Triathletes often ride solo, so cornering technique rarely gets any real practice. On a twisty course it is technique, not raw power, that decides the result. The good news is that cornering and descending can be learned.
The corner starts on the straight
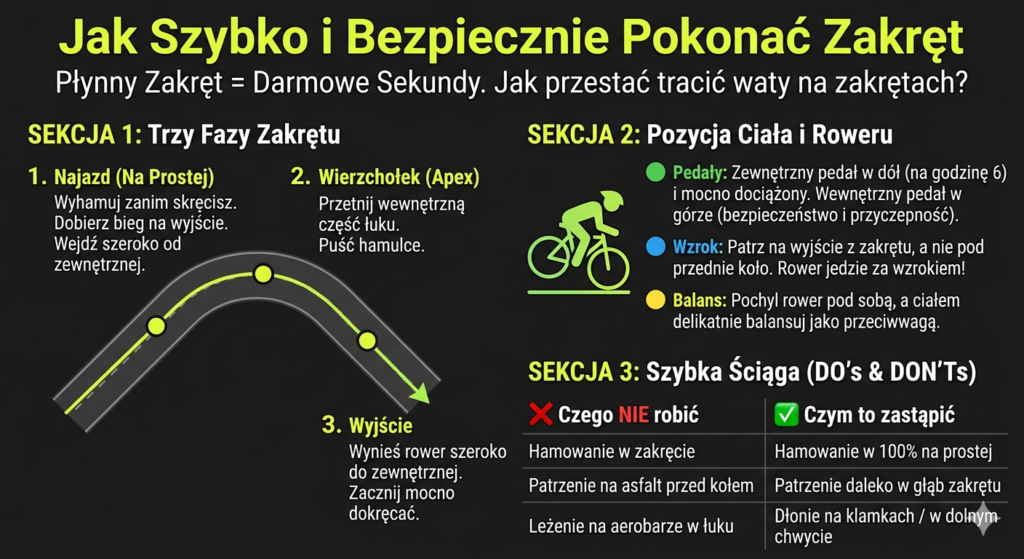
The most important part of a corner is the approach. That is where the key decisions get made. The rule is simple: do all your braking on the straight, before you lean the bike over.
Once the bike is leaned, the tyres need to hold grip through the arc. Braking mid lean is the fastest way to slide a wheel and crash.
The ideal line fits in three words: enter wide, clip the apex, exit wide. A wide arc lets you carry higher speed. Pick the right gear before you enter the corner too, so you can accelerate hard the moment you are through it.
Outside pedal down
This is the detail that changes everything. In a corner, set your inside pedal up. Shift your full body weight onto the outside pedal, down.
That lowers your centre of gravity and presses the tyre harder into the tarmac, so you get maximum grip.
You steer a bike mainly by leaning it, not by turning the bars. Lay the bike underneath you and use your body as a counterweight. Straighten the inside arm slightly. Most important: look where you want to exit, not at the front wheel. The bike always follows your eyes.
A descent is no place to panic
Confidence on descents and in corners comes from the same fundamentals. Riders who fear speed brake too hard and lose valuable momentum. Instead of grabbing the levers, apply these rules:
Smooth modulation: feather both brakes lightly at once. Avoid sudden inputs that lock the wheels.
Safe hand position: on a straight descent you can stay on the extensions. Once corners appear, move your hands to the drops or the hoods immediately. That gives you full control with the brakes under your fingers. The aero position does nothing for you if fear makes you brake to a standstill.
How to practise it
Most mistakes come from panic and poor position, not from weak tyre grip. Practise somewhere safe, away from traffic:
Figure eights in a car park: find an empty lot. Ride tight figure eights, going lower each time. You will find out exactly how much grip your tyres have.
Deliberate line: on a familiar, safe loop, practise entering wide and aiming for the apex. Repeat until it becomes automatic.
Gentle descents: start on shallow hills. Drill your brake modulation and a stable position before you take on real climbs.
Twisty courses are ahead this season, and the seconds technique buys you come free. They cost not one extra watt.
Europe’s strongest full-distance race has its date: 28 June. IRONMAN Frankfurt is not an ordinary race, it is the European Championship, with the largest pool of Kona qualifying spots on the continent. This year 71 professionals will jump into the Langener Waldsee, with six professional slots to the world championship on the line.
The Norwegians split up
The most interesting storyline is the Norwegian tactical split. Casper Stornes, the reigning IRONMAN world champion, and his friend and countryman Gustav Iden both chose Frankfurt over Challenge Roth. The third of the trio, Kristian Blummenfelt, races Roth on 5 July, where he will face Sam Laidlow and Patrick Lange. All three have been sharpening their form at a training camp in St. Moritz.
Stornes and Iden had a difficult start to the season, both dealing with injuries and racing less often than Blummenfelt, who has already won a full IRONMAN in Texas plus two 70.3 races, in Oceanside and Geelong. Even so, both know Frankfurt well. Stornes stood on the podium here last year, third, and has two third-place finishes this season, at 70.3 Oceanside and IRONMAN Texas. Iden finished fourth at last year’s European Championship in Frankfurt, and was second at the world championship in Nice. As a former IRONMAN and 70.3 world champion, he is aiming for the podium.
Ditlev returns after illness
The big unknown in the field is Magnus Ditlev of Denmark. The three-time Challenge Roth winner is only just opening his season, an infection picked up before IRONMAN Texas took longer to shake than he expected. “I still haven’t started the season because of the infection from before Texas, but I hope to be back on the start line soon,” he wrote on Instagram from an altitude camp in Sierra Nevada.
Ditlev is a two-time IRONMAN world championship medallist (2023, 2024) and winner of the 2025 African Championship. On any start line he is a genuine threat, the only question is how much the illness has taken out of him. At Frankfurt he also needs a Kona slot, so his motivation is doubled.
Who else is chasing a slot
The list of contenders for the six tickets to Kona is long. Gregory Barnaby of Italy, winner of the 2024 IRONMAN Pro Series, has already tasted success at Frankfurt, third here two years ago. Vincent Luis of France, after a standout full-distance debut in Texas, fourth in a strong field, jumps onto the list of favourites. Kieran Lindars of Great Britain already has a Kona slot locked in with eighth place in Texas, and was second at Frankfurt in 2024.
The home team will make its presence felt: the German squad includes Jonas Hoffmann, fifth last year, Finn Große-Freese, Wilhelm Hirsch, Jan Stratmann, Florian Angert and Paul Schuster. Also back after an unlucky season is Jamie Riddle of South Africa, who should set a fast pace from the swim and bike.
A shadow over the organisers
The women’s European Championship was held in early June in Hamburg and was won by Norway’s Solveig Løvseth. It will also be remembered for another reason: metal and glass were scattered on the bike course as a protest against the road closures. More than 100 age-group athletes had to withdraw with punctured tyres. IRONMAN announced it would work with police on measures to stop a repeat. The Frankfurt organisers will certainly be taking note.
What to watch for
Frankfurt is a classic where legs alone do not decide the race, the head matters too. The long, flat bike course punishes anyone who starts too fast, and the finish on the medieval Römerberg square can send the crowd into a frenzy. If Ditlev returns to his old form, expect a duel with the Norwegian pair for the European crown. If he does not, the door opens for Barnaby, Luis and the German contingent.
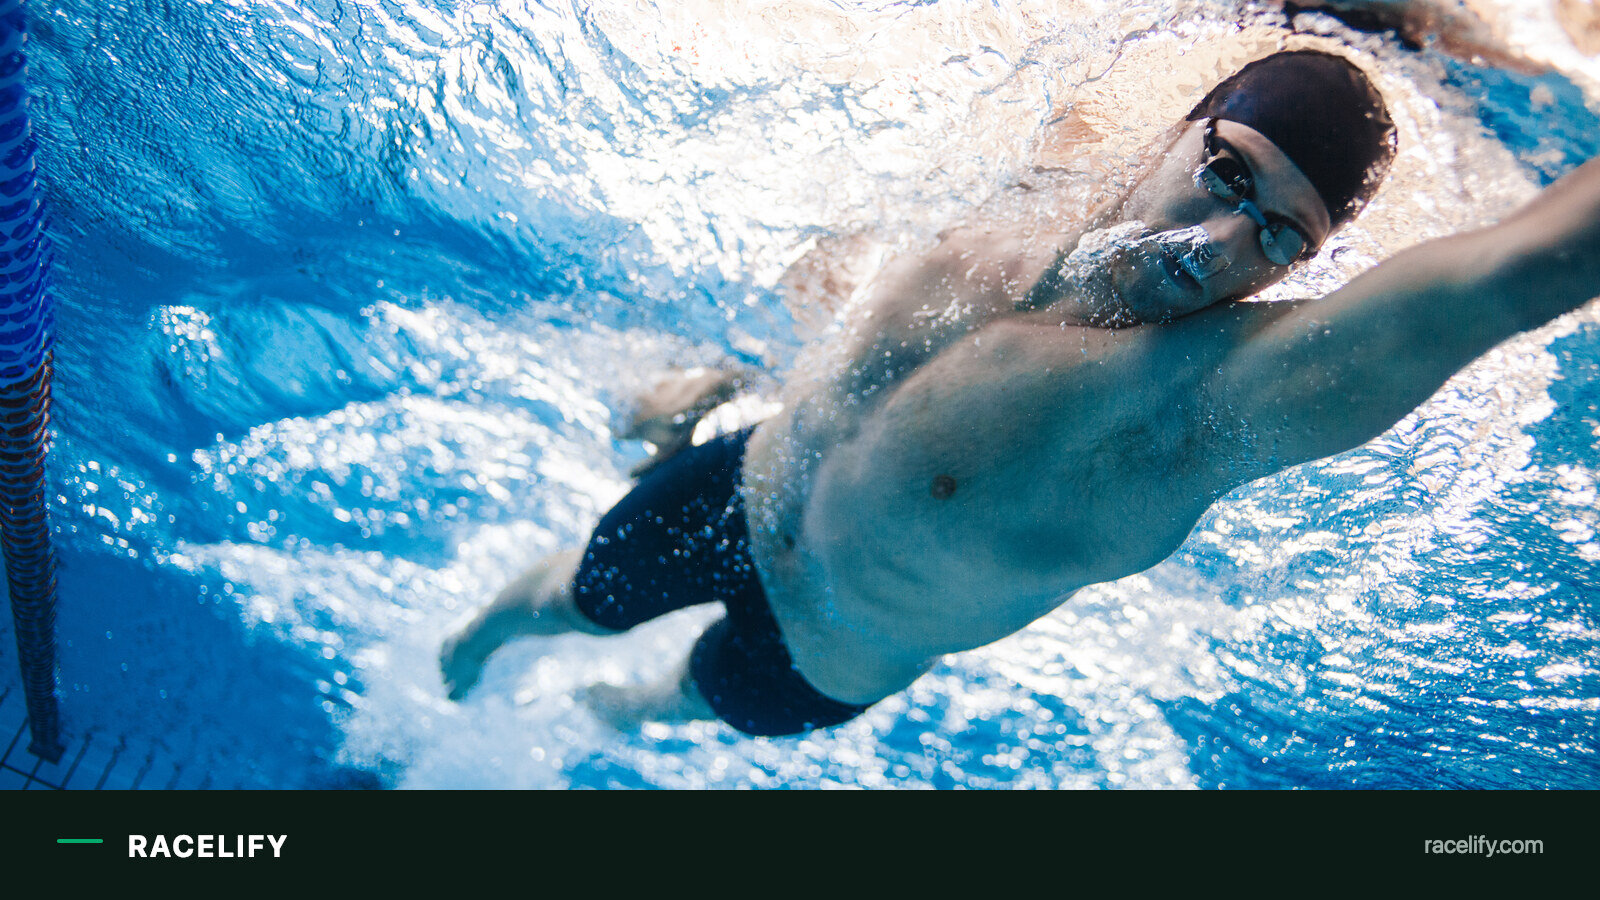
Most amateur triathletes swim front crawl flat: chest glued to the surface, the stroke driven by the arms alone. The result is a short, jerky pull, overloaded shoulders, and a pace that refuses to move no matter how many hours go into the pool. One thing is missing: torso rotation. It turns swimming from tiring arm-waving into a long, efficient glide.
What rotation actually does
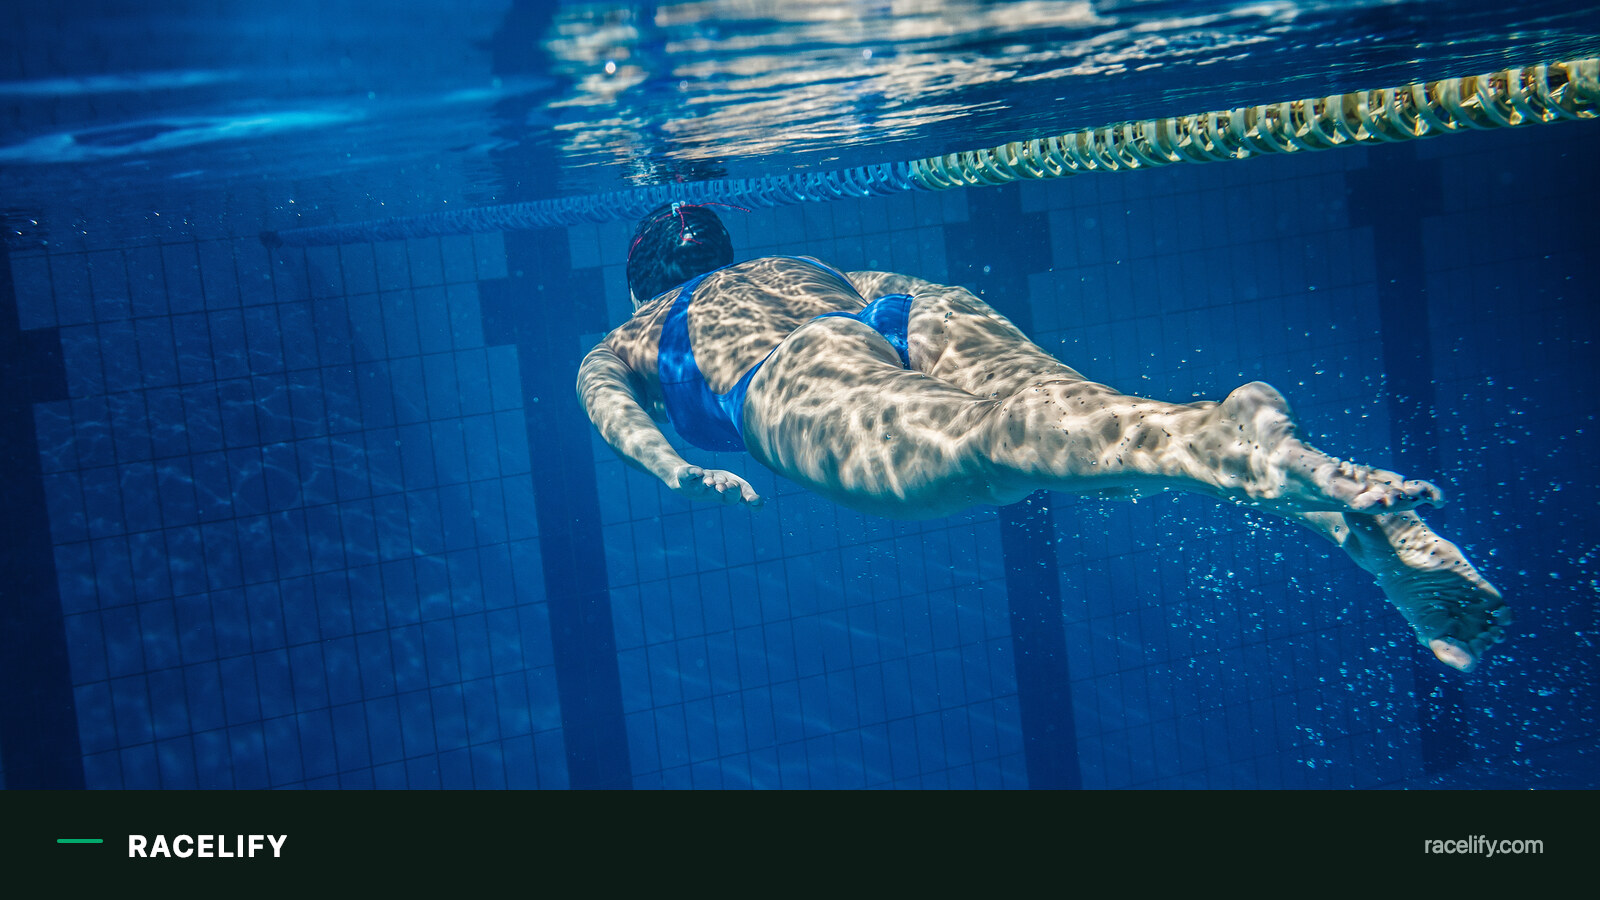
When you rotate the torso around the body’s long axis, you bring the lats and the core into the work, alongside the shoulders and arms. The underwater pull gets longer, because the arm reaches further on entry and the hip adds force to every stroke. It is like rowing with the whole body instead of the forearm alone.
Rotation gives three concrete benefits: a longer stroke (fewer cycles per length), a lower risk of shoulder overload, because the force comes from the big muscle groups, and easier breathing, since the mouth clears the water on its own during the turn instead of you having to crane the neck.
How much to rotate, and when it is too much
This is not about rolling side to side like a log. Aim to rotate both hips and shoulders together, enough that the body is clearly on its side but still moving in a stable line. Coaches quote different numbers here, most commonly around 30 to 45 degrees to each side (some technique schools go lower), and the exact range is individual. What matters is that both sides rotate evenly: rotate hard only toward your breathing side and you become asymmetric, drifting into a zigzag.
Too much rotation is also a mistake. Roll almost onto your back and you lose balance, the legs drop, and the whole body brakes. The target is enough to engage the torso, and no more than that, so the water line stays intact.
Three common mistakes
Rotating from the shoulders, not the hips. You twist the arms while the hips stay flat. Force never travels through the torso, and the spine takes the twist instead. Start the rotation from the hips; the shoulders follow.
Snaking. Uneven rotation combined with crossing the hand over the body’s centreline sends you swimming in a sine wave. It adds distance and burns energy on correcting course.
Rotation that stalls on the breath. Many swimmers freeze on their side waiting to inhale. The breath should be part of the continuous rotation, not a pause in it.
Four drills that fix it
6-3-6 (six-kick switch). Swim on your side with one arm extended forward, the other at the hip, face down. Six kicks on one side, three strokes, six kicks on the other. Teaches balance on the side and a controlled transition through the rotation.
Side kick, with or without a board. On your side, lower arm extended, kicking while holding a stable position. You feel how to balance the body in rotation without panicking.
Fingertip drag with a hip cue. The classic fingertip drag on the recovery, but you consciously start each stroke from a hip rotation. It links a high elbow with rotation.
Single-arm swimming. Swim with one arm, the other extended forward or resting at the hip. Without the other arm to help, torso rotation has to drive the stroke, and the flaw shows up immediately.
Use these as a warm-up or work them into a technique set two to three times a week. Technique does not improve from one session; it needs repetition until the new pattern becomes a habit.
Taking it to open water
In open water, rotation works even harder in your favour. A stable balance helps you hold a line through chop, and a smooth rotation makes it easier to combine breathing with sighting. A swimmer who rotates evenly on both sides can breathe to either side, which is invaluable when the sun or the swell is hitting you from one direction.
Try one thing at your next session: count your stroke cycles per length, correct the rotation from the hips, then count again. If the number drops at the same pace, that is proof it works.
Most amateurs treat the gym as something that steals training time that could go into more kilometres. The research says the opposite: heavy strength work improves running economy, meaning you cover the same pace on less energy. This is not about adding muscle mass. It is an investment that pays back minutes on race day.
What the gym actually gives you
The headline effect is movement economy. Stronger muscles and stiffer tendons store and return energy more efficiently with every stride, so the same effort costs you less oxygen. A review of the research shows strength training lowers the energy cost of running, cycling and swimming: you do the same work, more cheaply.
The second effect is fewer injuries. A stronger muscular frame and stable hips hold your technique together once fatigue sets in, and fatigue is exactly where overuse injuries start. The third is more power on the finish and on climbs, because strength is the base everything else is built on.
And the detail that matters most to many people: done heavy, at low reps, strength training does not build bulk. You build strength and neuromuscular efficiency, not extra kilograms to haul uphill.
Heavy, not light: this is not a fitness class
This is where the biggest mistake happens: triathletes do sets of 15 to 20 reps with a light load, thinking it is “safer”. The research says otherwise. Heavy loads are what improve running economy, more than plyometrics, and far more than light endurance sets.
In one study, triathletes strength trained twice a week for 14 weeks with loads above 90% of their one-rep max, and improved maximal strength, running economy and speed at VO2max. In practice that means sets of 3 to 6 reps with a heavy load and full recovery between sets. The goal is not to reach failure. It is a heavy movement with clean technique.
How often, and when in the season
The rule is simple and tracks the phase of the season:
Base period / winter: two to three sessions a week. This is when swim, bike and run volume is lower, so it is the time to build strength.
Race season: drop to one session a week, in maintenance mode. The goal is to hold onto what you built, not add fatigue before a start.
The key is scheduling the gym after a hard endurance session, or on a separate day, never right before a key run workout. Legs under a heavy squat and legs on intervals are two different jobs; do not make them compete for the same energy on the same day.
Four exercises that give the most
You do not need twenty machines. You need compound movements that load what you actually run and pedal with:
Barbell back squat: the foundation of leg strength, transfers directly to climbs and bike power.
Deadlift: the posterior chain (glutes, hamstrings, back), the engine behind your running stride.
Lunges and Bulgarian split squats: single-leg strength, since you run on one leg at a time anyway.
Hip thrust or glute bridge: glutes that spend all day switched off at a desk often need this the most.
Add plyometrics, box jumps for example, on top as a reactivity booster, but as a supplement to the heavy work, not a replacement for it.
Start with technique, not load
If you are new to the gym, spend the first two to three weeks learning the movement with a light load, ideally with a coach watching. Only once the squat and the deadlift look clean should you start adding kilograms. Strength built on bad technique is not strength. It is an injury waiting for its moment.
Hydration in triathlon is still a guessing game. Most of us have no idea exactly how much fluid and sodium we lose through sweat, so we go on generic advice and then fade in the heat, cramp, and lose watts in the final kilometres of the bike leg. FLOWBIO promises to turn that guesswork into data. It is a sensor that analyses your sweat during training and tells you what you are actually losing.
What it actually measures
FLOWBIO measures two things: fluid loss rate and sodium loss. The sensor captures sweat through a tiny channel, using the pressure your own sweat glands generate, and there is no needle involved. That is the key difference from the now-discontinued Supersapiens, which pierced the skin. The light module (about 10g) clips onto a chest strap, and the reading updates every few seconds.
The data lands in the FLOWBIO app, where the in-house AHi engine (Advanced Hydration Intelligence) combines it with intensity and ambient temperature and outputs a specific plan: how much to drink, when, and why. You go from “I hope I took in enough electrolytes” to knowing how much sodium you will lose over a 70.3 at 30°C (86°F).
Does it work: the hard numbers
The manufacturer has not hidden behind marketing and published an independent, peer-reviewed validation in the journal Frontiers in Physiology (2025). The study compared the sensor against lab reference methods: body weighing for fluid loss, and flame photometry plus an L’Aqua Twin analyser for sodium. The team was led by David Bandiera, with Yannis Pitsiladis among the co-authors, and the work was carried out at the University of Rome Foro Italico and at CREPS Montpellier.
On accuracy: in lab conditions FLOWBIO claims 90% accuracy. In the field, it drops to up to 83% for sodium (a difference of up to 180mg, about six times less than a pinch of salt) and 73% for fluids (a difference of up to 250ml). That is not laboratory perfection, but for an amateur planning a drinking strategy for a long race, it is a step up from generic tables.
Device compatibility and battery
This is the freshest news. A live data feed to Wahoo head units launches in late June 2026, putting sweat loss straight on your bike computer screen mid-ride. A live view on Garmin watches and head units is in internal testing and is due to reach beta later in the summer. Long term, FLOWBIO is built to work with Garmin, Wahoo, COROS and Zwift.
Battery life is a strong point: over 100 hours of use, charged over USB-C. The sensor is reusable, with no disposable inserts and no extra subscription; you pay once.
Spec
FLOWBIO
Measures
Fluid and sodium loss from sweat
Mount
Chest strap, about 10g
Needle
None, sweat collected through a channel
Battery
100+ hours, USB-C
Connectivity
Garmin, Wahoo, COROS, Zwift
Live data (Wahoo)
Late June 2026
Live data (Garmin)
Beta later in summer 2026
Price, and who it is for
International pricing runs about £295 to £379, or $399. That puts it firmly in “serious gadget” territory, not an impulse buy. But if you race 70.3 and full IRONMAN distance, fight the heat, or cramp regularly, a personalised sodium strategy can be worth more than another pair of aero socks.
It is not for someone running 40-minute sessions in cool weather with no gut issues. Hydration only becomes critical at long efforts and in the heat, and that is where FLOWBIO earns its place.
You know the feeling. You get off the bike, your legs are carrying you, adrenaline is running high, and the first kilometres of the run go out at a pace you would not hold even on fresh legs. Half an hour later the bill arrives: pace drops, every step hurts, and your result falls apart in the closing kilometres. That is a classic positive split, a second half slower than the first, and it is the most common way age groupers waste a well ridden bike leg.
The cure is called a negative split: a run where you cover the second half faster than the first. It sounds simple, but it is one of the hardest skills to master in triathlon.
The physiology: why a slower start pays off
A negative split is not a mental trick. It rests on solid physiology, confirmed in a review published in 2025 in Frontiers in Physiology. A conservative start delivers four advantages that stack up exactly where a race hurts the most:
Glycogen sparing. A slower first half burns proportionally more fat and preserves glycogen for the finish. That matters in triathlon, where you start the run with those stores already dented from the bike.
Less lactate. A calmer start limits early lactate build-up, so you do not enter the run carrying a debt you cannot repay.
Better thermoregulation. Lower intensity at the start means body temperature rises more slowly, which matters on the hot summer races that June and July bring.
Less cardiac drift. Building effort gradually limits cardiovascular drift, the creeping rise in heart rate at a constant pace.
The effect is delayed fatigue and better efficiency in the closing stages. Age groupers gain the most from it.
The T2 trap: the first kilometres of the run
In triathlon the problem starts in the transition zone. Off the bike your legs feel like concrete, but your head feels fresh, and that illusion sends you out at a pace 15 to 20 seconds per kilometre too fast. You pay those seconds back with interest later.
The rule is simple: run the first 1 to 2 kilometres deliberately slower than you want to. Let your heart rate settle, find your rhythm, then build. A negative split in triathlon does not mean a spectacular closing kilometre; it means not killing yourself at the start.
How to train it
A negative split is a habit built in training, not at races. Three tools that work:
Session
How to do it
Progression runs
A long run where you add pace every few kilometres, with the final section fastest
Fast finish
An easy run that closes with 2 to 3 km at race pace or faster
Controlled brick
Off the bike, run deliberately slow for the first 10 minutes, then build
Then there is the mental side: set a concrete pace target for each half and practise patience. The hardest part of a negative split is holding back at the start while everyone passes you. Many of them you will see again later, walking.
When a negative split is not the answer
To be honest, this is not a universal recipe. On a course with a significant climb in the second half, or in extreme heat, a pure negative split can be unrealistic. Aim instead for even effort rather than even pace on the clock. Elite athletes sometimes run different strategies because they are racing for position, not time. But for most age groupers racing their own watch, slower at the start and faster at the finish is the simplest route to a personal best.
Most triathletes breathe to the same side every time they swim freestyle. It is comfortable, familiar, safe, and that is exactly why it quietly slows you down. Bilateral breathing, breathing to both sides, is not a technique flex. It is a tool that evens out your stroke and saves you in open water when the chop happens to be hitting your “good” side.
Why one side is a trap
When you breathe only to the right, your body rotates harder to that side. Over time this locks in an asymmetry: one arm works differently from the other, the pull on the “weaker” side is shallower, and your body position in the water drifts slightly sideways. In the pool it gets away with it. In open water that drift adds metres you cannot see, and energy you waste.
Breathing to both sides forces even pulls and more symmetrical rotation. The result is a smoother, better balanced stroke and more evenly developed muscles. In other words, you learn to swim straight.
The real advantage is in open water
This is where bilateral breathing stops being pool theory. Race conditions are rarely ideal:
Chop and splash coming from one side: you can breathe to the sheltered, dry side instead of swallowing water.
Low sun blinding you from one direction: turn your head the other way.
Crowded starts: if someone is right at your shoulder, breathe to the opposite side to avoid a head clash or a mouthful of water.
Sighting: you see the buoys and rivals on both sides, so it is easier to hold your line.
A swimmer who can only breathe one way loses every one of those options in open water, exactly when they matter most.
How to learn it: from basics to rhythm
Do not jump straight into the hard pattern. Build it in layers.
Start with breathing every 2 strokes to your comfortable side, until it feels completely relaxed and you are never short of air.
Move to breathing every 3 strokes, the classic bilateral pattern, because it automatically switches sides on every breath. Your “weak” side will feel clumsy at first. That is normal.
Add longer patterns, every 5 and every 7 strokes, in short reps, to get comfortable holding your breath and to force a calm, controlled exhale underwater.
The key is exhaling underwater. Most breathing problems come from holding your breath and then trying to exhale and inhale in a split second above the surface. Exhale steadily the whole time your face is in the water, so that all that is left above the surface is a quick inhale. That is what keeps breathing smooth and out of the way of your technique.
Drills that speed it up
Willpower alone is not enough. Technique comes from drills that isolate individual elements:
Single-arm swimming: one arm works while the other stays extended in front or at your hip. It forces rotation and teaches breathing on both sides.
Side kick: lying on your side with one arm extended and the other at your body, gently turning your head to breathe. Builds the stability and position typical of open water.
The “zipper” drill: your hand slides along your body like a zip, forcing smooth rotation and head turn. Ideal for practising bilateral breathing.
Centre snorkel: removes the need to turn your head, so you can focus on body position and arm work before adding the breath.
Weave them into your warm-up and technique work: a few 25m reps, unhurried, with the focus on quality of movement rather than pace.
One nuance for race day
Bilateral breathing is a great training tool and a rescue skill for open water, but it is not a rule for race day. During the hard effort of a start, when your body is calling for oxygen, breathing every 3 strokes can leave you short. Many racers breathe every 2 strokes to a chosen side during the race itself, and switch to bilateral only when conditions force it: chop, sun, a swimmer at their shoulder.
Train both sides so that on race day you have a choice. The goal is not a rigid rhythm but freedom: you can breathe either way, so conditions cannot catch you out.
You do your FTP test on fresh legs. Good for you. What matters more is how much of that number survives three hours on the bike, once you swing off onto the run. For some riders it is nearly all of it. For others, half. Science calls that gap durability, and it is durability, not a fresh VO2max, that decides how you race the closing stages of a 70.3 or an IRONMAN.
What durability actually is
Durability is the capacity to resist the decline in physiological parameters during prolonged exercise, both in how large that decline is and in when it starts. In plain terms, how long you hold power, threshold and economy before everything starts to fall apart.
It is a hot topic in endurance physiology in 2026. Researchers, including Andrew Jones’s group, have broken the concept down into four related traits:
Durability, resistance to a drop in form during a single long effort
Fatigability, how quickly you get tired
Repeatability, the ability to repeat hard efforts after short recovery
Resilience (physiological resilience), the resistance of the cardiovascular, metabolic and neuromuscular systems to accumulating fatigue
For a triathlete the first and the last matter most. They explain why someone with a worse FTP can still run you down over the closing 10 km.
Why the standard tests deceive you
FTP, VO2max, lactate threshold: you test all of them fresh. Triathlon, though, is a sport of tired legs. Your real threshold after 2 to 3 hours of riding can be noticeably lower than the number from a test done on warm, rested legs.
You can find durability markers in data you already have:
Heart rate drift: if your heart rate keeps climbing at the same power, your resistance to fatigue is low
The drop in power over the second half of a long ride: compare average power in the first and last hour at the same heart rate
Split run pace: how much you lose per kilometre running off the bike compared with a run on fresh legs
Those are your real tests. Not the number from a March test day, but what is still in your legs in the fifth hour.
How to train fatigue resistance
The good news: durability is trainable. The bad news: there is no shortcut. 2026 research points to a few levers:
1. Volume built over years. A consistent, high training volume spread across years builds the foundation of resilience. This is not about one block, it is groundwork laid over the long term.
2. Zone 2, plenty of it. Low and moderate intensity training raises the oxidative capacity of the muscles and metabolic efficiency. Those are what delay the point where you start running on sugar and losing power.
3. Hard efforts on tired legs. This is the core of it. Weave race-pace or harder efforts into long sessions, but place them in the second half of the session, once the legs already hurt. For example, the final hour of a 4-hour ride with three 8-minute intervals at FTP. You are teaching your body to hold power once it is already tired, exactly as it will need to on race day.
4. Strength and plyometrics. Heavy strength training, and possibly plyometrics, improve neuromuscular resistance and movement economy. Studies show that strength training alone can improve running economy by about 5% and cycling economy by about 7%, and economy that holds up under fatigue is durability in practice.
A practical week
Placing the training stimulus more intelligently matters more than piling on volume:
A long ride with FTP intervals at the end (bike durability)
A brick: bike plus a short, hard run off tired legs
1 to 2 strength sessions a week (squat, deadlift, pull variations), regardless of the training phase
The rest of the week: easy Zone 2 that builds the aerobic engine
Recovery is part of the plan here, not a reward for it. Without it, hard efforts on tired legs turn into overtraining.
The takeaway
Stop bragging about a fresh FTP number. What counts is how much of it survives the next hour of training or racing. Fatigue resistance is the trait that separates the ones who fall apart on the run from the ones who deliver. It is genuinely trainable, once you stop testing yourself only on fresh legs.
The question comes back every time the season changes: how to split time across training zones to get the most out of 10 hours a week. The polarised model has the appeal of simplicity, easy or very hard, nothing in between. The pyramidal model sounds more reasonable, more at the bottom, less in the middle, a sharp peak at the top. In 2026, a fresh research summary from Arturo Casado, PhD, puts the matter to rest: neither model wins everywhere. That is the most important conclusion of the season.
What actually separates the polarised model from the pyramidal one
Both models describe what percentage of training time is spent in three intensity zones:
Zone 1 (Z1): below the first lactate threshold (VT1/LT1). Conversational pace, easy effort.
Zone 2 (Z2): between the first and second thresholds (LT1 and LT2). A pace that cannot be held for long, but is not all-out either.
Zone 3 (Z3): above the second threshold. Lactate tolerance work, VO2max repeats.
Polarised (POL): lots of Z1, almost nothing in Z2, a decent amount of Z3. Pyramidal (PYR): lots of Z1, moderate Z2, little Z3.
Why these are not the “zones” shown on a Garmin, an important note
Anyone training with a Garmin, Wahoo or TrainingPeaks likely sees five zones based on the model developed by Dr Andrew Coggan, the researcher behind the FTP concept and co-author of Training and Racing with a Power Meter from the early 2000s. That model splits intensity by percentages of FTP and maximum heart rate, treating Zone 4 as the lactate threshold.
The three-zone model used in scientific research (Seiler, Casado, Filipas) is built on two physiological ventilatory thresholds, VT1 and VT2. It is a different cut of the same physiology:
Five-zone model (Coggan / Garmin)
Three-zone model (research)
Z1 Recovery
Z1 (easy, below VT1)
Z2 Aerobic base
Z3 Tempo
Z2 (grey zone, between VT1 and VT2)
Z4 Lactate threshold (FTP)
Z5 VO2max and above
Z3 (above VT2)
When research says to avoid Z2 in the polarised model, it means zones 3 and 4 on a watch: half-marathon pace, threshold intervals, “sweet spot” work. It does not mean avoiding easy aerobic base, which sits inside Z1 of the research model and is exactly what belongs there. Seiler himself uses the three-zone model in research for simplicity, but works with athletes using five zones, because they give more precision when planning sessions.
Figures from a study by Sellés-Pérez et al. (Journal of Sports Science and Medicine, 2019) on age-group athletes racing the half-iron distance, IRONMAN 70.3 (1.9 km swim, 90 km bike, 21.1 km run), commonly called a “half”, make this concrete:
Group
Z1
Z2
Z3
POL
84.5%
4.2%
11.3%
PYR
77.9%
18.8%
3.3%
The Z2 gap is stark: nearly a fifth of training time in the pyramidal group, barely a mention in the polarised one.
What the research shows at the middle distance
The same study found an interesting relationship: time spent in Zone 2 correlated with a better race result among age-groupers at the half-iron distance. In other words, in the 70.3 group, the pyramidal distribution beat the polarised one on race outcome.
That is counterintuitive for anyone who listens to podcasts about the “Norwegian model” and the Iden and Blummenfelt brothers. But the logic is simple: a 70.3 puts an athlete at near-threshold intensity (Z2) for four to five hours. Training that includes plenty of Z2 prepares an athlete better for exactly that.
Casado, on episode 695 of the That Triathlon Show podcast, discusses a study by Filipas et al. (Scandinavian Journal of Medicine & Science in Sports, 2022), in which a 16-week periodised plan, the first 8 weeks pyramidal and the next 8 weeks polarised, produced better running results than either model held for the full cycle. The improvement was mainly in 5k time and speed at lactate threshold; VO2max changes did not differ significantly between groups.
What this means in practice, periodisation instead of doctrine
The research synthesis available through 2026 points to a phased approach:
General phase (base period, November to January). Pyramidal distribution. Plenty of Z1 (around 75 to 80%), a meaningful chunk of Z2 (15 to 20%), little Z3 (3 to 5%). This builds aerobic capacity, movement economy and threshold.
Specific phase (February to April). Shift toward polarised. Keep Z1, reduce Z2 to roughly 5 to 8%, add deliberate Z3 blocks, Norwegian threshold sessions, VO2max repeats. This is when 30/30 intervals start to make sense.
Race phase (May to September, depending on the calendar). Mixed, maintaining all systems while the specific demands of the race take over. For a half, return to more Z2 in the week before the start. For a full-distance event, hold polarisation with long Z1 sessions and short Z3 sparks.
Recovery phase / off-season. Everything in Z1 with one sharp stimulus a week. Not the time for a plan.
What about the 80/20 model
The popular 80/20 model (80% easy, 20% hard) comes from Stephen Seiler’s research into intensity distribution among elites, and is a simplified version of the polarised model. It works well for runners training at very high volume, 15-plus hours a week. For an age-group athlete training 8 to 10 hours a week, the problem is different: the 80% “easy” training often is not easy at all. It ends up in a grey zone, too hard for recovery, too weak for progress.
For an age-grouper, what matters more than choosing between the polarised and pyramidal model is this:
Keeping Z1 genuinely in Z1. The test: it should be possible to hold a conversation in full sentences.
Controlling Z3. A real VO2max repeat is one you would cut off your own arm to end.
Not dragging every session up to a perceived effort of 7 out of 10. That is the road to overtraining without progress.
What to use when building toward a 70.3
A concrete outline to work from:
November to January: pyramidal. Plenty of long Z1 (bike 2 to 3 hours, run 60 to 90 minutes), one Z2 session a week (for example 4×8′ at threshold), one short Z3 session (for example 6×3′ VO2max).
February to April: shift toward polarised. Two Z3 sessions a week (Norwegian double threshold, classic 4×4′ VO2max), Z2 limited to brick sessions and specific tests. Everything else in Z1.
May to September: race specificity. Two weeks before a 70.3, bring back Z2 (race-pace repeats: on the bike 2×30′ at 85% FTP, on the run 3×3 km at half-marathon pace).
October to November: everything in Z1 plus one sharp stimulus a week.
There is no sacred percentage. There is a phase, a race, and an athlete’s own recovery. The 2026 scientific consensus: be periodised, not dogmatic.
Verdict
Polarised versus pyramidal is a false argument if the choice has to be made once and for all. The best adaptations come from a plan that shifts the intensity distribution across the season: pyramidal in the base period, polarised in the specific period, mixed at the race. Casado and the 2026 research say the same thing good coaches have said for years, just with numbers behind it now.
Apple put a heart rate sensor into a pair of earbuds, and in May 2026 Strava finally learned to read it. For a triathlete that means something that sounded like science fiction a year ago: running with earbuds in and getting a reliable pulse with no chest strap, no watch, nothing else. There is really one question that matters, whether an ear, in training where seconds decide which zone a session lands in, can actually replace a proven ECG electrode.
What actually happened
The AirPods Pro 3 launched in September 2025 as Apple’s first earbuds with built-in heart rate measurement, a PPG (photoplethysmography) sensor using infrared light pulsing 256 times a second, built directly into the earpiece. The feature worked natively with the Apple Fitness app and with Apple Watch.
On 13 May 2026, Strava announced full support for the feature in its iPhone app. From that point, starting an activity recording in Strava with AirPods Pro 3 in your ears streams live heart rate to the Mobile Record view. No Apple Watch needed. No strap needed. Just an iPhone and the earbuds.
Requirements: iOS 18 or later, AirPods Pro 3 with current firmware. If a user also has an Apple Watch, Strava automatically picks the best available signal.
How it performs in testing
The most thorough testing came from DC Rainmaker, and several of his key findings are echoed by other outlets, including Macworld and Headphone Guide Pro. The results were surprisingly good, DC Rainmaker said outright that he was “blown away” by the accuracy:
Steady-state efforts (continuous running, trainer riding, long rides): the reading from AirPods Pro 3 is functionally indistinguishable from a chest strap. Adaptive filtering effectively removes footstrike artefacts, so the heart rate trace is smooth, without the “stepping” pattern typical of wrist-based watches.
Tempo efforts and thresholds: still very good. Once intensity settles, the values stabilise and track the real pulse.
Short VO2max intervals are where the one real gap shows up. No optical sensor, wherever it sits on the body, can match the instantaneous electrical response of an ECG strap like the Polar H10, because optical sensors measure blood volume in capillaries, which carries a few seconds of physiological lag. AirPods Pro 3 still do better than wrist watches here, because the ear sits closer to the carotid arteries. For most interval sessions, including hard 60-second repeats, accuracy is very good. For anyone analysing absolute peak heart rate in the first second of a sprint, an ECG strap is still more precise.
Overall, that is a meaningfully better profile than wrist watches in nearly every scenario.
What about swimming
This is where the enthusiasm needs cooling. AirPods Pro 3 carry an IP57 rating (Apple states resistance to immersion up to 1 m for 30 minutes in fresh water), but Apple explicitly says the earbuds are not intended for water sports or swimming. In practice, heart rate measurement underwater runs into physics that Bluetooth does not like, water dampens the signal, and the PPG reading itself is unstable on a submerged ear.
DC Rainmaker tested them in a pool despite Apple’s warnings, but the results are not a basis for treating them as a swim heart rate monitor. A triathlete who wants a pulse reading from swimming still reaches for:
Garmin HRM-Pro Plus / HRM-Swim, with onboard data storage in the strap itself
Polar OH1 or Verity Sense clipped to swim goggles
Form Smart Swim 2 with its optical temple sensor
AirPods are not a substitute for any of these.
What this means for a triathlete
Practical scenarios where AirPods Pro 3 with Strava genuinely help:
An after-work run without a watch. Head out with earbuds in, a podcast playing and an iPhone in a running belt. Pace, distance, GPS and heart rate all land in Strava, no strap, no wrist device. For an age-grouper who does not want another device to charge, that is pure convenience.
Strength training. This is where wrist watches are weakest, a chest strap has always given noticeably better readings than a wrist band. AirPods Pro 3 fill that gap, the sensor stays stable because arms move but ears do not. A genuine alternative.
Indoor trainer sessions. Steady-state Zone 2 or a 30-minute threshold session on the trainer, AirPods will happily stand in for a strap left at home or one a rider simply does not feel like putting on.
Race day. No. Earbuds are typically banned under race rules at triathlon events (ITU, IRONMAN, check the specific rulebook), and relying on a Bluetooth link between phone and ear in race conditions is asking for trouble regardless.
What about FTP, power and the chest strap
To be clear: AirPods Pro 3 are a heart rate sensor and nothing more. They do not replace:
ECG-grade R-R interval or HRV measurement, still the job of a Polar H10 or HRM-Pro Plus
Running power meters (Stryd, Garmin RD Pod, Polar Vantage with an RC sensor)
Running dynamics, torso lean angle, stride length
For an advanced triathlete who relies on advanced metrics, a chest strap remains the tool of choice. For everyone else, AirPods Pro 3 with Strava genuinely cut down the number of devices worn on the body.
Price
AirPods Pro 3 launched at $249 in the US. The comparison is what makes the price interesting: a Polar H10 ($104.95 from Polar) plus an AirPods Pro 2 (also $249 at its 2022 launch) adds up to more than the price of the AirPods Pro 3 alone, and buys two separate devices instead of one that also handles noise cancellation, transparency mode and live translation.
Strava supports the feature on its free plan. No Premium subscription is required.
Verdict
For an age-grouper training 8 to 12 hours a week, spending a lot of time on the trainer and happy to have a podcast running during an easy session, AirPods Pro 3 with Strava are a real alternative to a chest strap for 70 to 80% of training sessions. The rest, absolute HRV precision, swimming, and strict threshold testing with R-R analysis, is still a job for the strap.
This is not a revolution. It is a well-built tool that simply cuts down the number of things to put on in the morning.