Author: racelify_admin

  • CORE 2: Turning Body Heat Into a Training Tool

    CORE 2: Turning Body Heat Into a Training Tool

    In summer, your power doesn’t drop because “you’re having an off day.” It drops because core body temperature crosses the threshold where the body starts protecting itself. CORE 2 is a sensor that shows that temperature in real time, turning heat acclimation from guesswork into a controlled training input.

    What it actually measures, and how

    CORE doesn’t insert a thermometer inside you. You wear the sensor on a heart rate strap or stuck to your chest, and it calculates core temperature from heat flow through the skin (thermal energy transfer technology from Swiss company greenTEG) plus an algorithm trained on large measurement datasets. It’s an estimate, not an invasive measurement, but the manufacturer states an accuracy confirmed by studies (average difference in the range of -0.01°C to +0.23°C) and validation for running and cycling.

    The second generation is simply more comfortable: 48% smaller and 30% lighter than the original CORE. It moves around less, and you notice it less. Data reaches your watch or bike computer over Bluetooth and ANT+, and the sensor works with Garmin, Wahoo, COROS and Suunto, plus Apple Watch and Wear OS (and, on the computer side, Hammerhead too). In practice, that’s whatever is already on your wrist or handlebars.
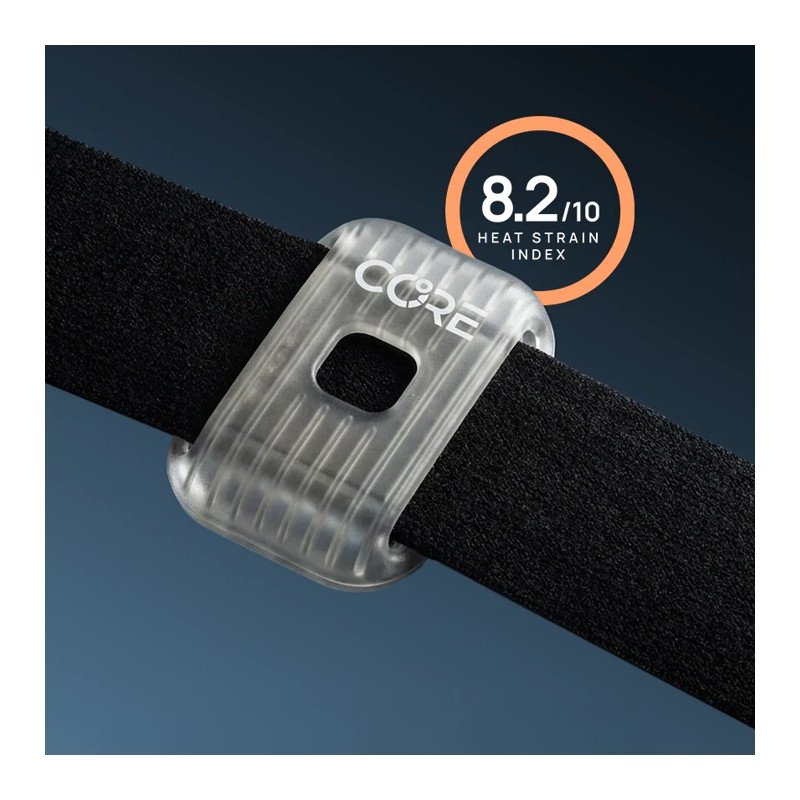
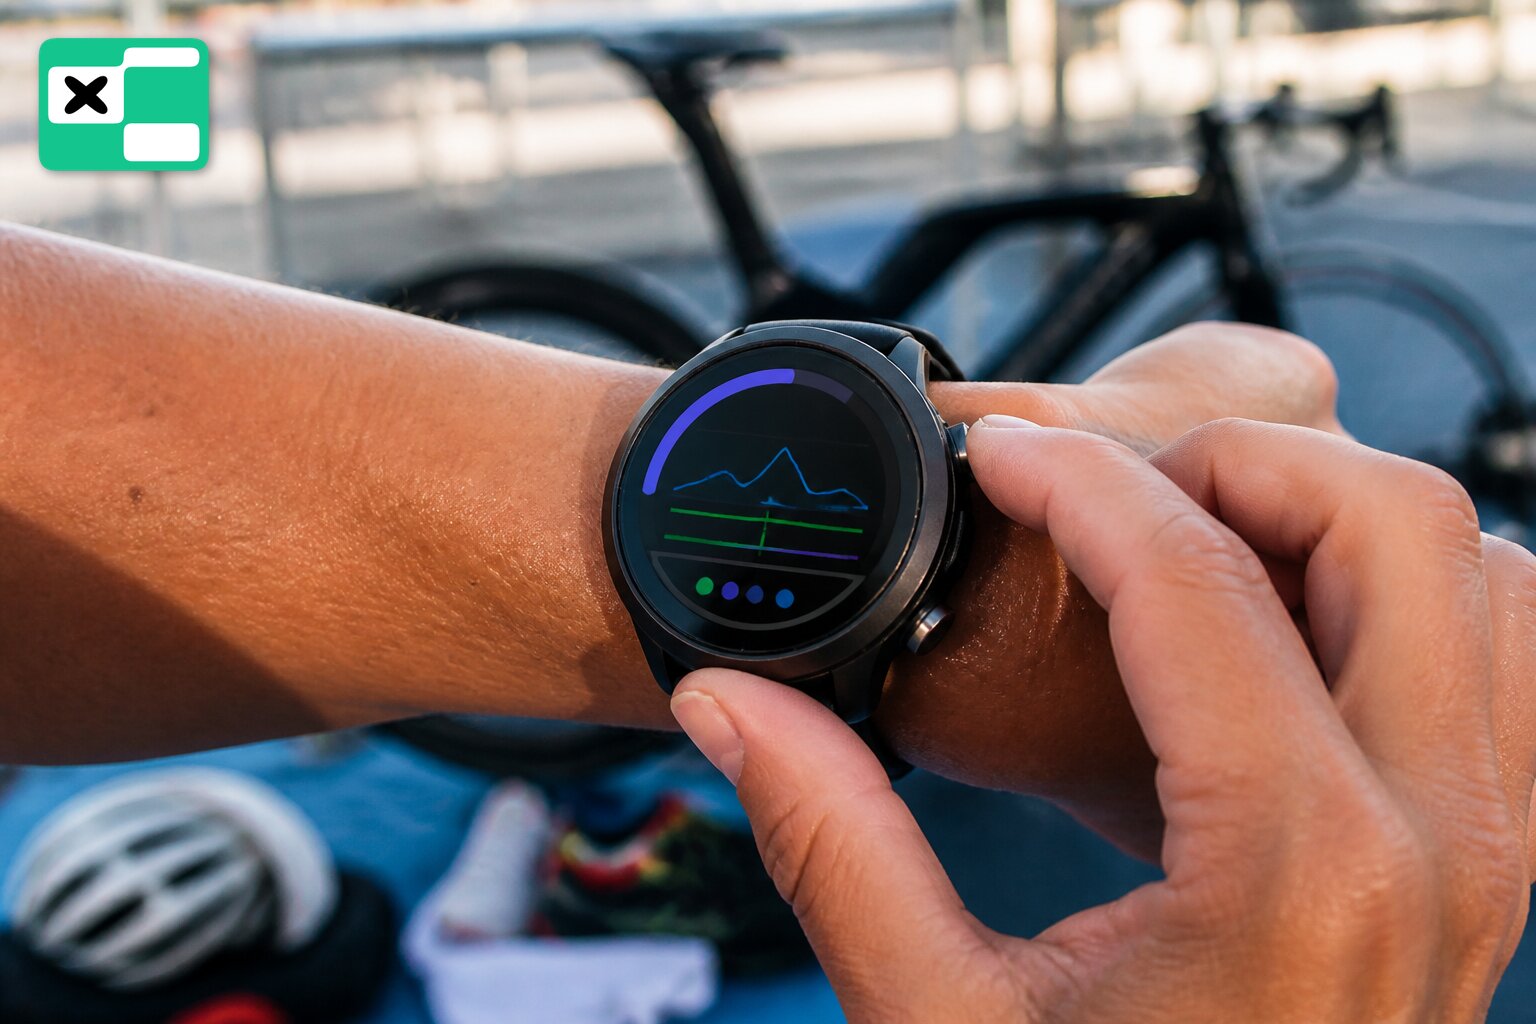
    CORE 2 body temperature sensor worn on a heart rate strap

    What core temperature is for, if you’re a triathlete

    Two concrete uses.

    First: safe pacing in the heat. As core temperature climbs toward around 39°C (102°F), performance drops sharply and the risk of overheating rises. CORE shows you when to back off before you cook yourself on a 70.3 course at midday in July. That’s the difference between a strong run and a march from aid station to aid station.

    Second, and more interesting: heat acclimation as training. Deliberately raising core temperature and holding it in an “acclimation zone” for several days to a couple of weeks produces adaptations similar to altitude training: increased plasma volume and haemoglobin mass. In a classic study by Lorenzo and colleagues (Journal of Applied Physiology, 2010), ten days of heat acclimation improved cyclists’ time trial performance by about 8%, in both heat and cool conditions. CORE turns that protocol into a numbers game: you can see whether you’re actually in the zone, instead of guessing from how much you’re sweating.

    Is it worth it, and for whom

    To be honest, this isn’t essential kit. If you’re struggling to fit in three sessions a week, don’t buy a temperature sensor, buy consistency instead. CORE 2 makes sense once you’re preparing for a start in a hot climate (Lanzarote, Nice, any IRONMAN in July) or when you treat heat acclimation as a real performance lever rather than a curiosity.

    The price cools the enthusiasm: 269.95 CHF (about 285 EUR) from the official store. Authorised resellers list it at much the same price. That’s the cost of a decent watch, for one narrow function.

    Verdict: a great tool for a very specific job. If your season centres on hot summer races and you want to approach acclimation deliberately, CORE 2 gives you numbers heart rate alone won’t show you. For most amateurs, though, it’s a “later, once everything else is dialled in” gadget.
  • Sighting in Open Water: How to Swim a Straight Line

    Sighting in Open Water: How to Swim a Straight Line

    In a pool, there is a line on the bottom and a wall every 25 metres. In open water, there’s nothing. That’s why two swimmers with an identical pace can exit the water at very different times: one held a straight line, the other zigzagged and added hundreds of extra metres. The skill that decides the difference is sighting, a controlled glance at the buoy. Here is how to do it well without losing pace.

    Crocodile eyes, not a raised head

    The most common mistake is lifting the whole head out of the water. A high head pushes the hips and legs down, which slows you and wastes energy. Instead, use the crocodile eyes technique: lift your head only enough to clear your eyes above the surface, take a quick look, and drop your face straight back down. Surface as little as you need to, not a centimetre more.

    Combine sighting with breathing

    Sighting the buoy and breathing are one movement, not two. Look forward at the buoy first, then rotate your head to the side to take a breath: sight, then breathe. This way you avoid adding a separate, costly head lift to every stroke cycle. Kick a little harder at the moment you sight, to hold speed and stop your hips from dropping.

    The three-look rule

    A reliable system: sight two to three times in a row, every other arm stroke. The first look locates the buoy, the second corrects the angle, the third confirms direction. Then swim blind, straight, for 20 to 30 seconds and repeat. You don’t need to look on every stroke, that only slows you down. Adjust frequency to conditions: sight more often in chop and with sun in your eyes, less often on calm water.

    Training: start in the pool

    Sighting isn’t something to practise for the first time on race day. Build it into pool sessions: every few strokes, lift your eyes and look at the wall as if it were a buoy. Practise bilateral breathing too, a symmetrical breathing pattern keeps the stroke balanced and limits the natural drift to one side that pulls many swimmers off course. In open water before a race, swim a few stretches sighting on a fixed point on shore, to check how much the current or wind is pushing you off line.

  • Aero Wheels: How Many Seconds They Really Give

    Aero Wheels: How Many Seconds They Really Give

    Swap factory aluminium wheels for deep carbon rims and suddenly the bike feels like a motorbike. The question is whether that is physics or a placebo bought at four figure prices. The answer sits in between: aero wheels do cut time, just not where or by as much as most riders assume. Here is the breakdown in watts and seconds.

    Where the free watts come from

    A wheel is the second-largest surface on a bike hitting the air, after the tyre. A deep aero rim keeps airflow attached instead of letting it tear away, which cuts drag. The effect: at the same power, the bike goes faster, or holds the same speed for less effort.

    Wind tunnel numbers are scattered, and that spread matters. Moving from a shallow aluminium box-section rim to a carbon aero wheel can save anywhere from a few watts to several dozen, depending on rim depth, tyre width, speed and rider position. Some conservative tests at 40 km/h show only a few watts of difference; others, at higher speeds and with deeper rims, reach 20 to 40 watts. A more concrete, repeatable reference point: a deep 60 mm wheel alone saves roughly 10 watts over factory aluminium at 40 km/h. That is not a rounding error. It is a difference no amount of training closes in a week.

    How many seconds that is on the road

    Watts are abstract, seconds are not. 10 watts of savings is well over half a minute over 40 km: at around 250 W that works out to roughly 40 seconds, and the slower the pace, the more time the same wattage saving buys. A full swap from aluminium box-section to carbon aero realistically means several dozen seconds over a 40 km time trial, depending on the models tested and conditions.

    The key point: aero wheels work best exactly where a triathlete spends most of their time, on flat ground, at steady, even power. That is precisely the profile of a triathlon bike leg. No surges, no pack to hide in: it is a solo effort, and air resistance is the main opponent. Aero wheels are built for exactly this scenario.

    Watt savings vs speed: what deeper wheels give you

    Illustrative estimate against a factory aluminium box-section wheel. Drag rises with the cube of speed, so the same wheel yields more watts as speed increases. Anchor point: 50 mm wheels are about 10 W at 40 km/h (wind tunnel test).

    0510 15202530 303540 4550 speed (km/h) savings (W) ~10 W @ 40 km/h 35 mm rim (VR 35) 50 mm rim (VR 50) full disc / 80 mm

    Where the sweet spot for depth actually sits

    This is the most important buying lesson: the biggest performance jump comes from moving off a shallow box-section rim onto an aero profile of 30 to 40 mm. Adding depth beyond that is marginal-gains territory, smaller and smaller returns for more and more money.

    In practice, that means a rider on factory aluminium gets the most out of the first decent pair of aero wheels. Going from 50 mm to 80 mm, or to a full disc, is fine-tuning the last few seconds, worthwhile for someone racing for the podium, less so for an amateur chasing a personal best.

    Worth knowing: for that first meaningful jump off aluminium, Van Rysel’s carbon wheels cover both ends, 35 mm for stability and climbs, 50 mm for flat aero work. Both have a 22 mm internal rim width for 28 mm tyres, exactly the range described above.
    WheelRim depthPriceBest for
    Van Rysel VR 35 Carbon35 mm€799.99Riders moving into aero for the first time, hilly and windy courses, anyone who values stability over the last few watts
    Van Rysel VR 50 Carbon50 mm€899.99Flat triathlon courses, a single pair for everything, still manageable in crosswind

    Disc wheels and crosswind: the cost of depth

    A full rear disc is the fastest option on a flat, windless course. But depth has a cost: the deeper the rim, the harder the bike is to control in a crosswind. A side gust catches a deep rim like a sail and pulls at the handlebars.

    For an amateur, the practical rule is simple: on a windy, technical coastal course, a deep front wheel can be more stressful than it is fast. Many professionals on such courses deliberately run a shallower front, around 50 to 60 mm, and a deeper or disc rear: the front handles steering, the rear handles speed. The rear is shielded by the frame and the rider’s body, so a disc causes fewer problems in the wind.

    Before spending the money

    Before reaching for wheels in the four figure range, check the cheaper watts first. A good, aero position on the bars saves more than any wheel: the body, not the equipment, is the biggest sail on a bike. A fresh, fast tyre at the right pressure is another set of free seconds. Only once position and tyres are sorted do aero wheels become the logical next step.

    If buying, look for a wide rim, 21 to 25 mm internal, matched to wider 28 mm tyres. The market is moving away from 25 mm tyres toward 28 mm, because a wider tyre on a wide rim tends to be both faster and more comfortable. Rims narrower than 21 mm internal are already outdated. The price spread on decent aero wheels is huge, from around €800 for a reasonable set to several times that for the top models, so it is worth setting a budget first and then looking for the deepest rim that fits it without compromising quality.

    Picks for the 2026 season

    1. Windy, hilly courses: Van Rysel VR 35 Carbon (35 mm). The biggest gain comes from that first jump, and the shallower front does not pull at the bars.
    2. Flat triathlon, one pair for everything: Van Rysel VR 50 Carbon (50 mm). Aero on the flat, still manageable in the wind.
    3. Before adding depth: sort the position on the bars and get a good tyre first. A disc or an 80 mm wheel is fine-tuning the last few seconds, and matters most for riders racing for the podium.
  • Indoor Trainer ERG Mode: When It Beats Riding Outdoors

    Indoor Trainer ERG Mode: When It Beats Riding Outdoors

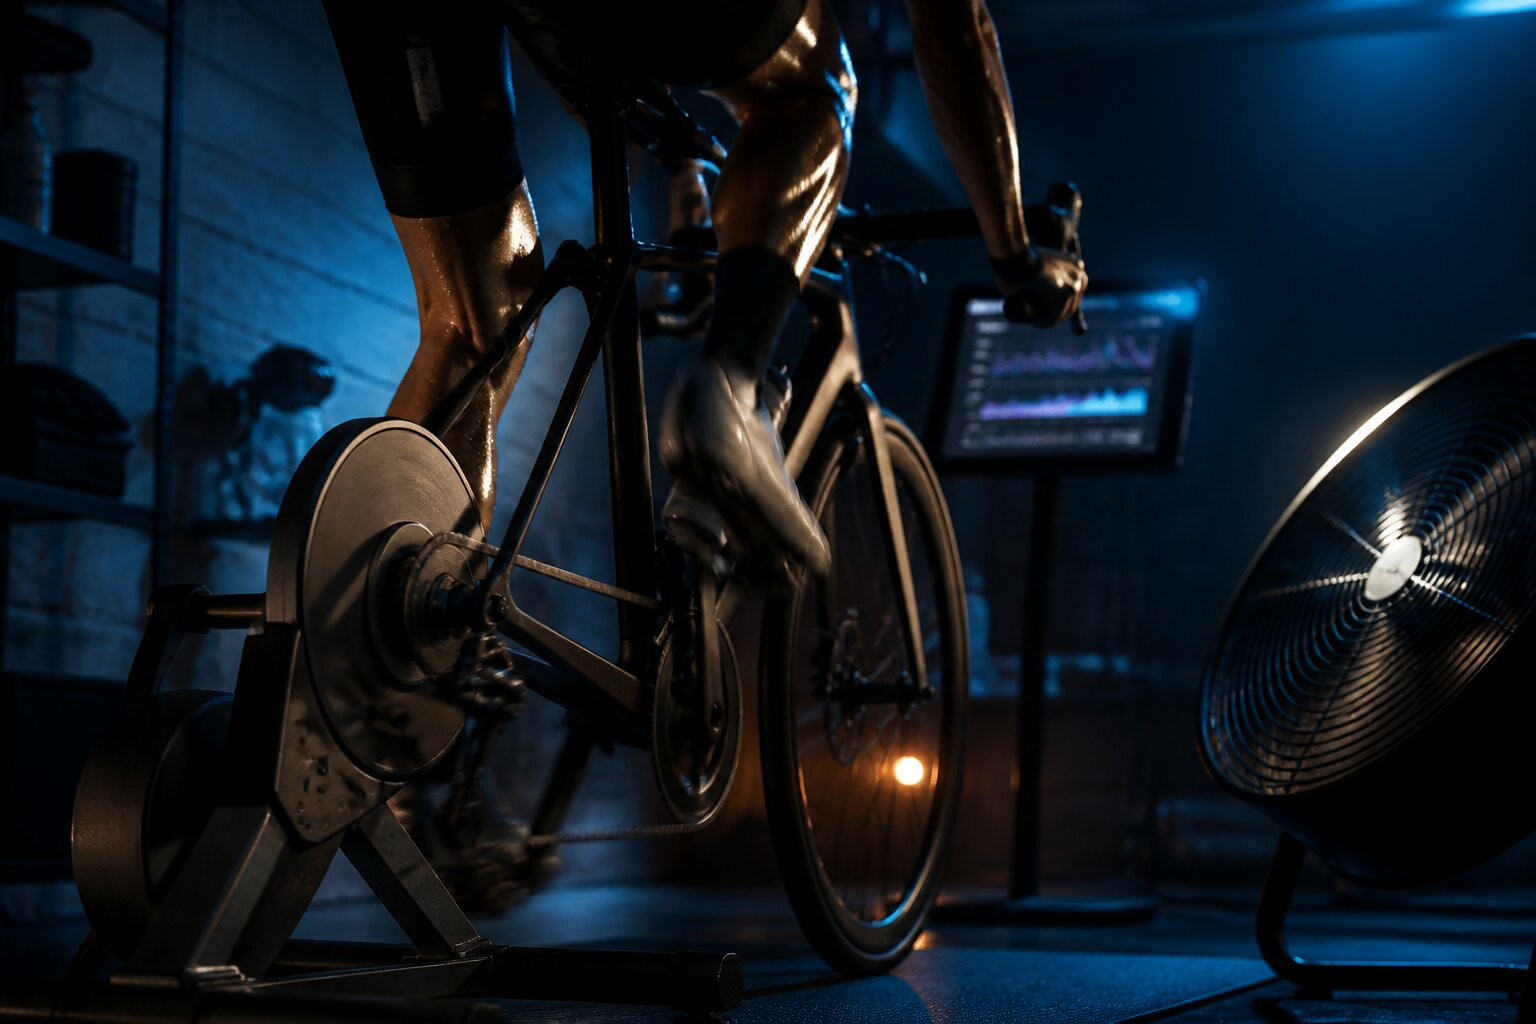
    Summer, sunshine, and the trainer comes out in the basement? Sounds like heresy. Yet many triathletes do their best VO2max and threshold intervals in the pain cave, not on the road. The reason is simple: on a trainer, a session comes out exactly as planned, to the watt and to the second.

    What ERG mode actually does

    ERG is the mode where the trainer manages power itself. Set a target, say 280 watts, and the resistance unit holds that value regardless of how the rider pedals. Cadence changes, power stays fixed: the trainer adds or removes resistance to match. In practice a good trainer holds the target to within a few watts (manufacturers typically claim about plus or minus 2 percent accuracy, though the real figure depends on calibration and how warmed up the unit is).

    The consequence is that there is no way to cheat. When fatigue hits and a rider would normally back off a few watts, ERG does not allow it, holding the set power until the interval ends. It is a coach that does not negotiate.

    Why short intervals come out cleaner indoors

    Picture a 10-minute threshold interval at 250 watts on the road. A junction, a red light, a climb, a car, a gust of wind: power jumps around and the file looks like a seismograph. The average might hold up, but the effort itself is ragged.

    The same interval indoors looks like a ruler. Short, precise efforts, VO2max sets, threshold work under 20 minutes per interval, come out cleaner indoors because the noise disappears: traffic lights, traffic, changing terrain. The training file is technically clean, 10 minutes is exactly 10 minutes, and 250 watts is 250 watts. A high signal-to-noise ratio means the data is readable and the rider knows exactly what was done.

    Summer adds one more argument: in a basement with a fan, hard intervals happen without a fight against 32°C (90°F) heat, which would cut power anyway. Above about 32°C (90°F), power drops can exceed a few percent even in athletes who are heat-adapted.

    What ERG will not give

    Precision has a flip side. ERG removes all the variability of real riding: terrain, wind, managing pace while fatigued. Those are exactly the skills that matter on race day, when a rider has to manage power alone on a changing course without blowing up on the first climb.

    In other words, a trainer in ERG mode builds the engine but does not teach how to drive the car. Riding the entire winter and spring in ERG only can leave a rider with a great FTP and zero feel for pacing.

    The balance: combine both worlds

    The strongest athletes do not pick one or the other. They combine both modes. ERG and the trainer handle the precise interval work, building power and VO2max in controlled conditions. Riding outdoors in free-ride mode covers what a trainer cannot teach: pacing, bike handling, feel for the bike, and long, easy volume on real terrain.

    A practical split for the racing season: hard, short intervals stay on the trainer in ERG, for a clean file. Long endurance rides and race-simulation bike legs happen on the road, in an aero position, on real terrain. That builds both the engine and the driver.

  • Carbs Per Hour on the Bike: 90, 120 or More

    Carbs Per Hour on the Bike: 90, 120 or More

    A triathlon run does not fail in the legs, it fails in the stomach. Most amateurs who fade in the final kilometres are not undertrained. They are running low on fuel, because they ate too little through the whole bike leg. The bike is the dining table. The only question is how much actually fits in an hour.

    The numbers to start from

    The longer the race, the more carbohydrate per hour it takes. Short efforts need roughly 30 to 60 g/h. Very long races need more. Specifically for triathlon:

    • 70.3 (half distance): about 60 to 90 g/h
    • Full IRONMAN: about 90 to 120 g/h

    Most of that dose gets taken on the bike. It is the calmest discipline, the one where the stomach tolerates food best. Everything bounces around on the run and absorption drops, so the bike is the moment to fill the tank completely.

    Why glucose alone is not enough

    This is where the physiology explains the rest. The gut absorbs glucose through a specific transport channel that has a ceiling, around 60 g/h. Anything above that sits in the stomach, ferments, and ends in cramps or a stop in the bushes. That is why 60 g/h was treated as the physical limit for years.

    The breakthrough was a second channel: fructose absorbs through a separate route. Combining glucose with fructose bypasses the bottleneck and lets the body oxidise significantly more carbohydrate per hour. A 2:1 ratio of glucose to fructose was the historical standard; newer products lean toward 1:0.8. That is why modern gels and drinks list both sugars on the label. It is not marketing, it is gut throughput.

    Individual tolerance: do not copy the pros

    Before aiming for 120 g/h because that is what a champion does, remember the gut is not the same from person to person. The differences are large: some athletes do not absorb much more than 55 g/h, others handle 120 g/h or more over many hours of racing.

    Which is why dosing should never be guessed on race day. It is set in training, gram by gram. The goal is the highest dose the stomach tolerates without revolt, not the highest number from a table online.

    How to train the gut

    The good news: gut throughput is a trainable trait, just like FTP. The bad news: it has to be trained deliberately, not left to chance on race day.

    The method is simple. Pick long bike rides and treat them as a dress rehearsal for nutrition. Start from a dose already familiar, say 60 g/h, and add 10 to 15 g/h every few weeks. Train on the same gels and drinks planned for race day, since the stomach prefers what it already knows. After every ride, note what and how much was eaten and how the stomach reacted. After a few weeks, there is a proven personal strategy instead of a guess.

    More fuel during the ride means less glycogen burned, which means more left for the final run, right when the competition is already slowing down.

    The most common amateur mistake

    It is not the wrong product or the wrong sugar ratio. It is simply eating too little, too late. The first gel should not wait for hunger or a drop in power, by then it is already too late and the energy deficit is building. Fuel from the first minutes of the bike leg, in a steady, regular rhythm, before the tank runs dry.

  • Chain Waxing: The Watts You Save and How to Do It at Home

    Chain Waxing: The Watts You Save and How to Do It at Home

    Everyone is hunting for free watts. Thousands go on aero wheels, an aero helmet and a wind-tunnel trisuit, while the chain gets a drop of lube once a month. Yet the drivetrain is the one place on a bike where power genuinely leaks away, and it happens to be cheap to get back. Waxing is not magic. But on a dirty course after 180 km, it can make a difference.

    How many watts is this really?

    No spin: on a clean chain, the difference between a good wax and the best oil-based lube is minimal. Independent tests at 250 W power showed paraffin was faster by only 0.24 W than the best PTFE-additive oil. That is within the margin of measurement error. If the story ended there, it would not be worth the bother.

    The catch is that a chain does not stay clean. After exposing both drivetrains to dust, sand and water, wax’s advantage grew to around 2.5 W. Against cheaper drip lubes, waxing can add another 6 to 8 W. That is real currency, about the same as paying for a more expensive set of wheels.

    The conclusion: wax does not win because it is magically slick at the start. It wins because it does not collect dirt. Oil acts like tape for sand; wax dries into a hard shell and abrasive grit simply falls off.

    Why wax wears less and protects the drivetrain

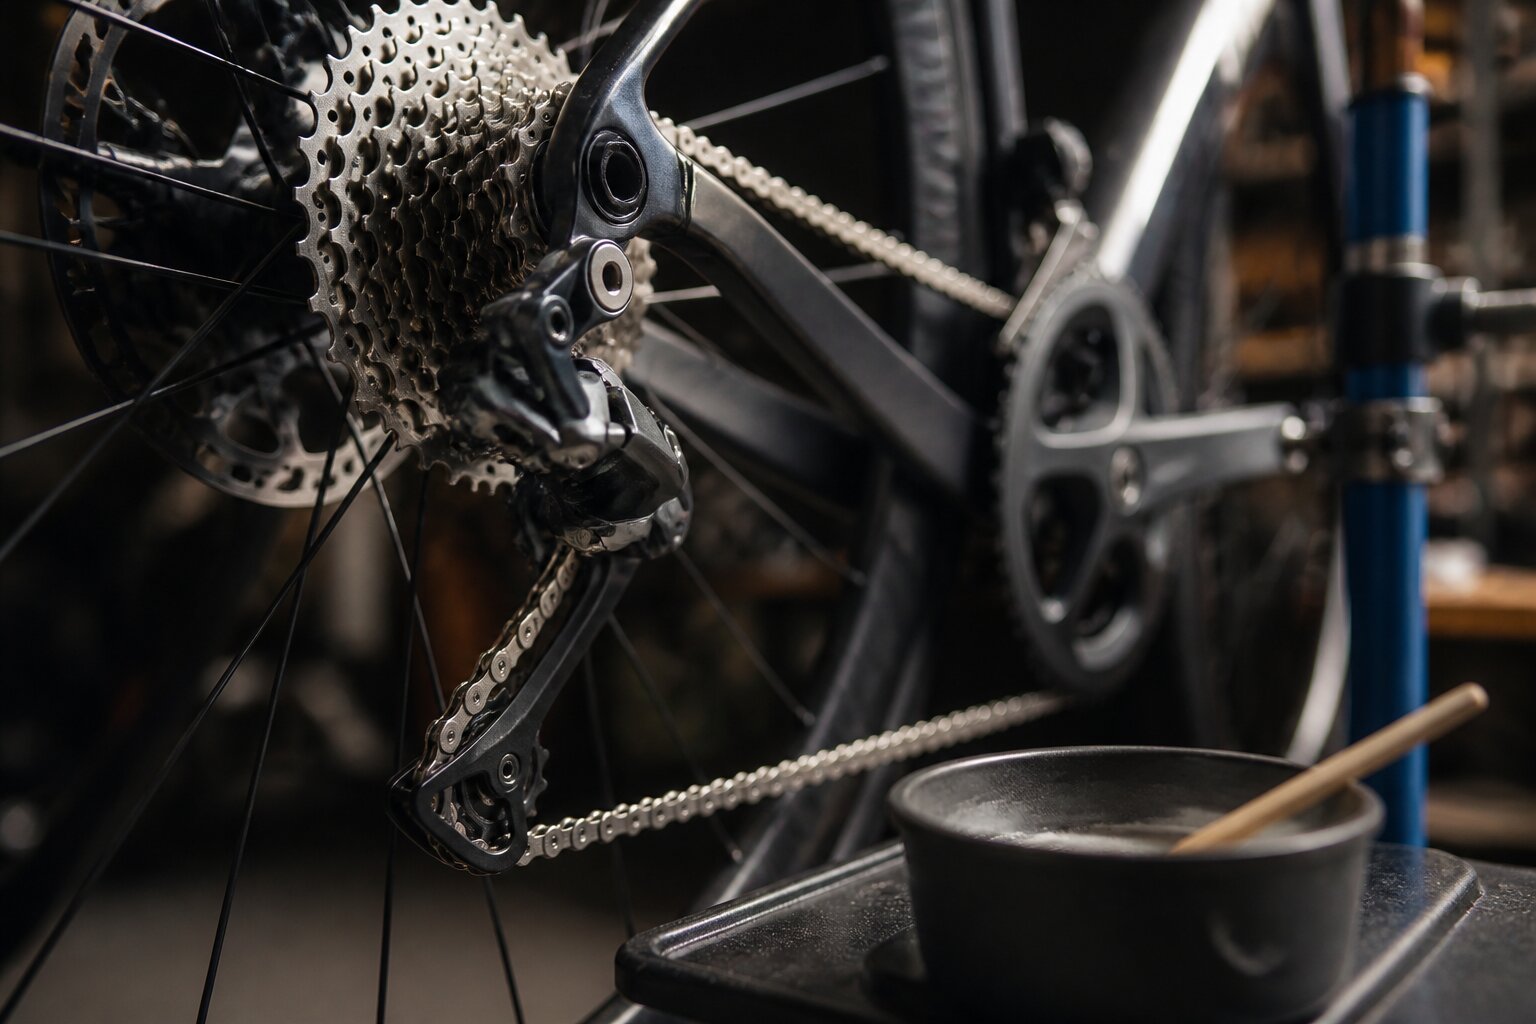
    Wax has a lower coefficient of friction and, more importantly, it stays inside the rollers and pins, exactly where the chain does its work. A wax bath, dipping the whole chain in melted paraffin, is the current gold standard. Hot wax works into every gap, and once it sets it forms a dry layer that does not attract dirt.

    The second benefit matters just as much for the wallet. A waxed chain extends the life of the cassette, chainrings and the chain itself, because grit mixed with oil grinds down cassette teeth like polishing paste. Less abrasive friction means the whole drivetrain wears more slowly.

    A bonus worth appreciating in transition: the drivetrain stays clean. No more black tattoos on the calf or grease on the hands before the start.

    Wax bath versus drip wax

    There are two routes. A wax bath (immersion) gives the best result but means removing the chain, melting paraffin and a bit of patience. Liquid wax (drip wax) goes on like an ordinary lube, straight from the bottle: more convenient, but the layer is thinner and needs topping up more often.

    For a triathlete the logic is simple. Anyone targeting a 70.3 or a full IRONMAN and wanting to save every watt over 180 km should do a proper wax bath once a season and top up with drip wax between sessions. Anyone still testing the idea should start with the drip version and judge for themselves whether a cleaner drivetrain is worth it.

    How to wax a chain at home, step by step

    The first waxing is labour-intensive, because a factory chain has to be completely degreased. This is the most important step: wax will not bond to leftover factory grease. Skip it and the whole job is wasted.

    StepWhat to do
    1. DegreaseShake the new chain in a degreaser (such as mineral spirits or denatured alcohol), several baths until it runs clear. This step cannot be skipped.
    2. DryThe chain has to be completely dry. Moisture trapped in wax causes corrosion from the inside.
    3. Wax bathMelt paraffin in a container (an old pot or a slow cooker works), submerge the chain for a few minutes, stir so the wax works into the rollers.
    4. Cool and flexTake the chain out, hang it to set, then flex the stiff chain by hand until it runs smoothly again.
    5. FitInstall it, ride a few metres, done.

    Topping up is simple: once the chain starts to rattle, or after wetter, dirtier rides, repeat the bath or add drip wax. For a wax bath, look for ready-made paraffins such as Silca Hot Melt, Molten Speed Wax or CeramicSpeed UFO. For drip wax, typical products are Squirt or Silca Super Secret, sold at bike shops and larger retailers. Prices shift with the season, so it is worth comparing before buying.

    Is it worth it? The verdict

    Racing against the clock and counting every watt: yes. Not because wax makes a huge difference on a clean chain, it does not, but because on a real, dusty course it holds its form longer than oil, while also saving the cassette from an early replacement. It is an investment that pays back in watts and in money.

    Riding mostly for fun, with no interest in a pot of melted paraffin: a good oil-based lube and regular cleaning will still do the job. Just do not call a drop once a month on a dirty chain drivetrain care.

  • The Long Run in IRONMAN Training: Why 3 Hours Is the Limit

    The Long Run in IRONMAN Training: Why 3 Hours Is the Limit

    The marathon at the end of an IRONMAN does not forgive. You can have a great FTP and swim like a fish, but if your legs do not know a long run, the final 20 kilometres turn into a march. The long run is the foundation of run preparation for the full distance, and most amateurs get it wrong in one of two ways: too rarely, or too long. Both mistakes cost you.

    Why run long at all

    The long run builds what no shorter session can fake: leg resilience for a marathon after 180 km on the bike. It does more than build fitness: a long run develops the aerobic base, forces mitochondrial development in the muscles, and teaches the body to manage energy over many hours.

    There is no shortcut. No series of fast intervals replaces what one solid long session delivers, because the adaptation only comes after many kilometres on tired legs.

    What “long” actually means

    In concrete terms: in full-distance IRONMAN preparation, long runs usually fall in the 2.5 to 3.5 hour range, and the longest single session is about 3 hours. Many coaches plan two to three runs of 2 hours 15 minutes to 2.5 hours at the peak of the season.

    Note the measure: this is about time, not distance. For a slower age-grouper, 3 hours covers different ground than it does for someone near the front of the field, which is exactly why the clock matters and the kilometre marker does not. Your legs do not know how far you ran. They know how long they worked.

    Why 3 hours is the ceiling

    Here is the most common mistake ambitious amateurs make: if the marathon will take 4 hours, they think they need to run 4 hours in training. You do not. And you should not.

    If you are planning to run the marathon in 4 hours or more, a training run beyond 3 hours usually ends in muscle damage that costs more in recovery than it delivers in adaptation. Put plainly: for the following days you are so beaten up that you lose more good sessions than you gained from one mega-run. Some coaching schools go further and cap long runs at 2.5 hours.

    The ceiling is not laziness. It comes down to balance: past a certain point, injury risk and recovery cost grow faster than the adaptation.

    How often to do it

    The long run is not a once-in-a-while session. In the final months before race day, do it on three weeks out of four, with the fourth week lighter, for recovery and supercompensation. That rhythm gives a regular stimulus while still letting the body strengthen instead of just sliding under fatigue.

    Do not “jog” for three hours

    The single most important fix, if you want long runs to actually work: this is not meant to be mindless shuffling. A long, slow jog on its own has limited value. You gain the most by weaving in stretches at IRONMAN race pace or slightly above, especially in the second half of the run, when the legs are already tired, exactly as they will be on race day.

    This trains the body for two things at once: holding target pace and doing it while fatigued. That is precisely the scenario waiting on the run course once you get off the bike. A long run with race-pace segments is the dress rehearsal for that moment.

    The verdict: balance, not heroics

    The long run is not a contest for who can last longest. It is a tool. Keep sessions around 2.5 to 3 hours, run them on three weeks out of four, weave in race-pace segments, and resist the urge to grind out the full marathon distance in training. The balance sheet here is unforgiving, and patience wins it, not heroics.

  • Kona 2026: IRONMAN Rebuilds Its Qualification System

    Kona 2026: IRONMAN Rebuilds Its Qualification System

    IRONMAN introduced a new, results-based qualification system for the Kona world championship, then walked back part of it after less than three months. The reason: after the first races, it turned out that almost all the slots from the performance pool were going to men. If Hawaii is the goal, here is how it works now.

    What actually happened

    In mid-August 2025, IRONMAN launched the “Kona Standard” system: qualification based on results rather than the number of starters in each age group. The winner of every age-group category got an automatic slot. The remaining places were split by a shared performance pool, where men and women competed against each other on a converted, age-graded scale.

    It sounded fair. In practice, it did not work. It quickly became clear that nearly all the pool slots were going to men. At IRONMAN California, beyond the automatic podium slots, only one woman qualified, against 32 men. The petition “Stand Up for Ironwomen” gathered more than 5,000 signatures.

    The numbers that forced the change

    The data IRONMAN revealed through CEO Scott DeRue is unforgiving. When a slot dropped from the podium into the shared performance pool, it went to a man in 96% of cases. Up to that point in the season, women had been offered 24% of all slots and accepted 20.3%. Modelling of the system against previous seasons had projected 30 to 35%.

    DeRue pointed to two causes. First, women decline slots more often: about 15% of podium finishers decline, against 3% of men, and with an on-the-spot roll-down decision, many need more time to work out family logistics. Second, in this part of the season most of the fastest women (around 60% by IRONMAN’s own rankings) were preparing for Kona, racing there, or recovering, which drained the pool of the strongest female contenders.

    What exactly changed

    IRONMAN backed away from two elements of the new system.

    First, roll-down slots now stay within gender. If a woman declines a slot, it goes to the next woman, not to the fastest athlete in a mixed pool.

    Second, separate performance pools now exist for women and men, with the slot count in each depending on the gender split of entries for that specific race. The women’s “Kona Standard” is now calculated against the women’s 30 to 34 age group, not the men’s, as it was under the shared pool.

    There is a catch. This is a partial return to the old mechanism: since more men enter, they get more slots. With an 85 to 15 entry split, only about one in six performance-pool slots will go to a woman.

    What it means for you as an age-grouper

    The changes apply retroactively. Slots that previously fell into the shared pool will be reallocated: 24 women’s slots and 8 men’s slots go back to the athletes who would have earned them, and the pool split adds another 44 slots for women, without taking any from men. Combined, the Kona 2026 start field grows by 76 spots, and IRONMAN has said it will not cut pools already announced for upcoming races.

    Practical takeaway: if you are chasing qualification, check how many slots for your gender a given race offers, since that now depends on the entry structure. Timing matters too: a roll-down requires an on-the-spot declaration. Arrive with a travel plan ready.

    And the pro race continues

    This is the age-group system. Professionals have a separate pool. For 2026 that is 56 men’s slots and 55 women’s. Come spring, plenty of spots remained open, and the key opportunities fall now: IRONMAN Frankfurt on 28 June offers six men’s slots. The qualifying window closes in mid-August, so names like Patrick Lange or Magnus Ditlev, both hit by health setbacks (Ditlev with shingles, among others), still have time, but less of it.

  • Suunto Race 2 Gets Auto Transitions, With a Catch

    Suunto Race 2 Gets Auto Transitions, With a Catch

    Suunto has spent years chasing Garmin on multisport features. A software update from January 2026 (version 2.50.26) closes a good chunk of that gap: the Race 2 now gets automatic transitions in triathlon mode, heart rate broadcast to a bike computer, and swim drills. The catch is that the auto-transitions have a bug that corrupts your data at the finish.

    What the update adds

    The Race 2 software update, a staged rollout from 7 January 2026, adds a package of features triathletes have been waiting for since launch:

    • Automatic transitions in the preset Triathlon and Swimrun modes: the watch detects the change of discipline on its own, no need to tap anything in the transition zone.
    • Default modes for duathlon, aquathlon and swimrun: ready made profiles that were missing before.
    • Heart rate broadcast: the Race 2 sends wrist heart rate to a bike computer or trainer.
    • Swim drills: support for technique sets in the pool.
    • Looped multisport: you can cycle back through the same set of disciplines without ending the session, useful for swim-bike-swim sessions.

    The features are catching up, not a revolution. Garmin and COROS have had auto-transitions and heart rate broadcast for a while. For a Race 2 owner it is still a real step up, and one less reason to look enviously at the Forerunner.

    The catch: auto-transitions corrupt the data file

    That is where the problem starts. According to tests by the5krunner, in the current software version an automatic transition saves the whole activity as one continuous file, with no split into swim, T1, bike, T2 and run segments.

    In other words, the watch totals your overall time but does not break it down by discipline or transition zone. For anyone who wants to work out after a race how much time they actually lost in T1, or what their run split looked like, that is useless.

    The fix for now is simple: manual transitions save every segment correctly. Until Suunto fixes the recording, tap the button in the transition zone yourself. It costs one second and gets you clean data per discipline.

    Who this is worth it for

    If you already own a Race 2, update and use it. Heart rate broadcast and swim drills work without issue, and the default duathlon and aquathlon modes genuinely make life easier.

    If you are choosing a triathlon watch from scratch, the Race 2 with this update is back in the running as a sensible alternative to the Garmin Forerunner 970, especially on price: the Race 2 starts at $499 in the US, while the Forerunner 970 launched at $749.99. Treat auto-transitions as a feature still in progress, not a reason to buy. Until race day, rely on the manual button.

  • Cornering and Descending: Where Triathletes Lose Time

    Cornering and Descending: Where Triathletes Lose Time

    You have trained your FTP, you own an aero helmet and expensive wheels. Yet at every corner you brake down to walking pace. You lose distance that you then claw back with brutal effort. Triathletes often ride solo, so cornering technique rarely gets any real practice. On a twisty course it is technique, not raw power, that decides the result. The good news is that cornering and descending can be learned.

    The corner starts on the straight

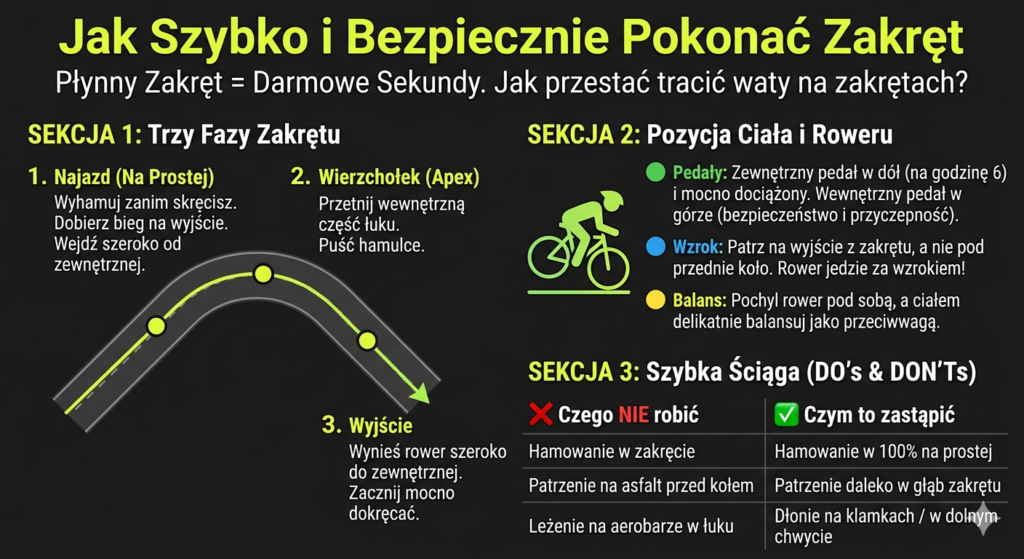
    The most important part of a corner is the approach. That is where the key decisions get made. The rule is simple: do all your braking on the straight, before you lean the bike over.

    Once the bike is leaned, the tyres need to hold grip through the arc. Braking mid lean is the fastest way to slide a wheel and crash.

    The ideal line fits in three words: enter wide, clip the apex, exit wide. A wide arc lets you carry higher speed. Pick the right gear before you enter the corner too, so you can accelerate hard the moment you are through it.

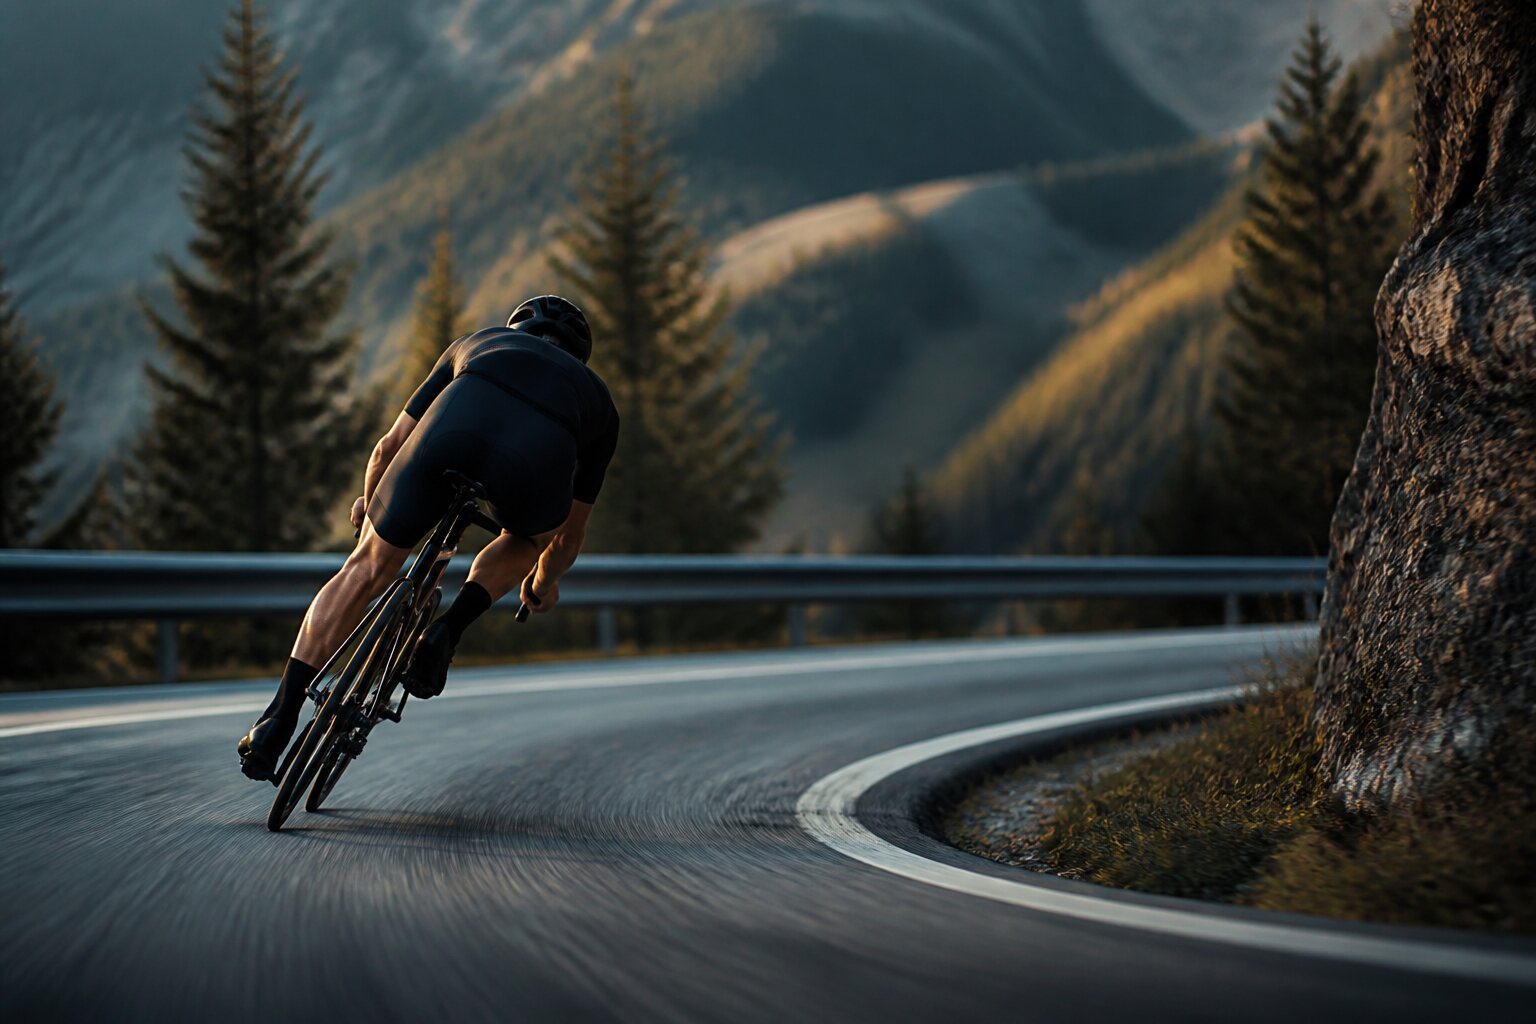
    A cyclist leaning into a corner on a road descent

    Outside pedal down

    This is the detail that changes everything. In a corner, set your inside pedal up. Shift your full body weight onto the outside pedal, down.

    That lowers your centre of gravity and presses the tyre harder into the tarmac, so you get maximum grip.

    You steer a bike mainly by leaning it, not by turning the bars. Lay the bike underneath you and use your body as a counterweight. Straighten the inside arm slightly. Most important: look where you want to exit, not at the front wheel. The bike always follows your eyes.

    A descent is no place to panic

    Confidence on descents and in corners comes from the same fundamentals. Riders who fear speed brake too hard and lose valuable momentum. Instead of grabbing the levers, apply these rules:

    • Smooth modulation: feather both brakes lightly at once. Avoid sudden inputs that lock the wheels.
    • Safe hand position: on a straight descent you can stay on the extensions. Once corners appear, move your hands to the drops or the hoods immediately. That gives you full control with the brakes under your fingers. The aero position does nothing for you if fear makes you brake to a standstill.

    How to practise it

    Most mistakes come from panic and poor position, not from weak tyre grip. Practise somewhere safe, away from traffic:

    1. Figure eights in a car park: find an empty lot. Ride tight figure eights, going lower each time. You will find out exactly how much grip your tyres have.
    2. Deliberate line: on a familiar, safe loop, practise entering wide and aiming for the apex. Repeat until it becomes automatic.
    3. Gentle descents: start on shallow hills. Drill your brake modulation and a stable position before you take on real climbs.

    Twisty courses are ahead this season, and the seconds technique buys you come free. They cost not one extra watt.